ZS-PS30CP_ CED/AU6 [
Using the displa
Y
display
Checking the information of an audio CD
T
time of the CD
After reading the CD
total playing time will appear
twice to
cancel Resume play
T
number
T
time
Checking the information of an MP3 disc
T
file number on the CD
After reading the file/folder inf
folder number and the total file number will appear
or press
twice to cancel Resume play
T T
Checking the information of a USB de
T
device
Press
twice during playback, or press
once
while selecting the file.
When there are multiple f
is not displayed.
USB device
(Example:
T T
Tips
If the CD is blank, “ noDISC” appears in the display.
If there are no MP3 files on the USB device, “ NO FILE” appears in
the display
T
Press DISPLA
while playing an MP3 disc or
USB device.
The song title ( )*
1
The artist name ( )*
1
The album name ( )*
1
The current file number and playing time*
2
*
1
If the file does not have corresponding ID3 information, “ NO
TITLE” , “ NO ARTIST” , and “ NO ALBUM” scroll instead of the
song title, artist name, and album name, respectively
*
2
Song title, artist name or album name will change to this in a
few seconds.
Selec
playback
Y
order
Press MODE
.
Each press changes the play mode as f
Normal play (None)
Single repeat ( 1)
All repeat ( )
Selected folder play ( )*
Selected folder repeat play ( , )*
Shuffle play (SHUF)
Prog
Prog , PGM)
* These functions do not apply when using a CD-DA.
O
Playing tracks/MP3 files repea
(Repeat Pla
Y
repeatedly in normal and prog
1 Press OPERA
.
2 Press CD
or USB
.
3 Proc
device is not playing.
T Do this
A single
track/MP3
file
1 Press MODE
(press , then
press MODE during playback) until
“ 1 ” appears.
2 Press
or
to select the
track/MP3 file that you want t
3 Press
.
All tracks/
MP3 files
1 Press MODE
(press , then
press MODE during playback) until
“ ” appears.
2 Press
.
A selected
folder (MP3
disc or USB
device)
1 Press MODE
(press , then
press MODE during playback) until
“ ” and “ ” appear
2 S
/TUNE
+ or –
.
3 Press
.
Prog
tracks/MP3
files
1 Program tracks/MP3 files (see
“Creating your o” ).
2 Press MODE
(press , then
press MODE during playback) until
“PGM ” and “ ” appear
3 Press
.
Note
Y
playing or paused.
When you press MODE
during playback, “ PUSH STOP”
appears in the display
T
Press MODE (pr , then press MODE
during playback) until “ ” disappears from the
display
Playing tracks/MP3 files in random
order (Shuffle Play)
Y
random order
1 Press OPERA
.
2 Press CD
or USB
.
3 Press MODE
(press
, then press MODE
during playback) until “ SHUF” appears in the
display
4 Press
to start Shuffle Play
T
Stop playing first.
(press
,
then press MODE
during playback) until “ SHUF”
disappears from the display
Note
Y
playing or paused.
When you press MODE
during playback, “ PUSH STOP”
appears in the display
During Shuffle Play
file by pressing
.
The resume function does not work during Shuffle Play
Creating your o(Program
Play)
Y
MP3 files on a CD/USB device.
1 Press OPERA
.
2 Press CD
or USB
.
3 Press MODE
(press
, then press MODE
during playback) until “ PGM” appears in the
display
4 Press
or
to select the track.
F /TUNE + or –
first and
then press
or
.
T
Audio CD
MP3 disc
USB device
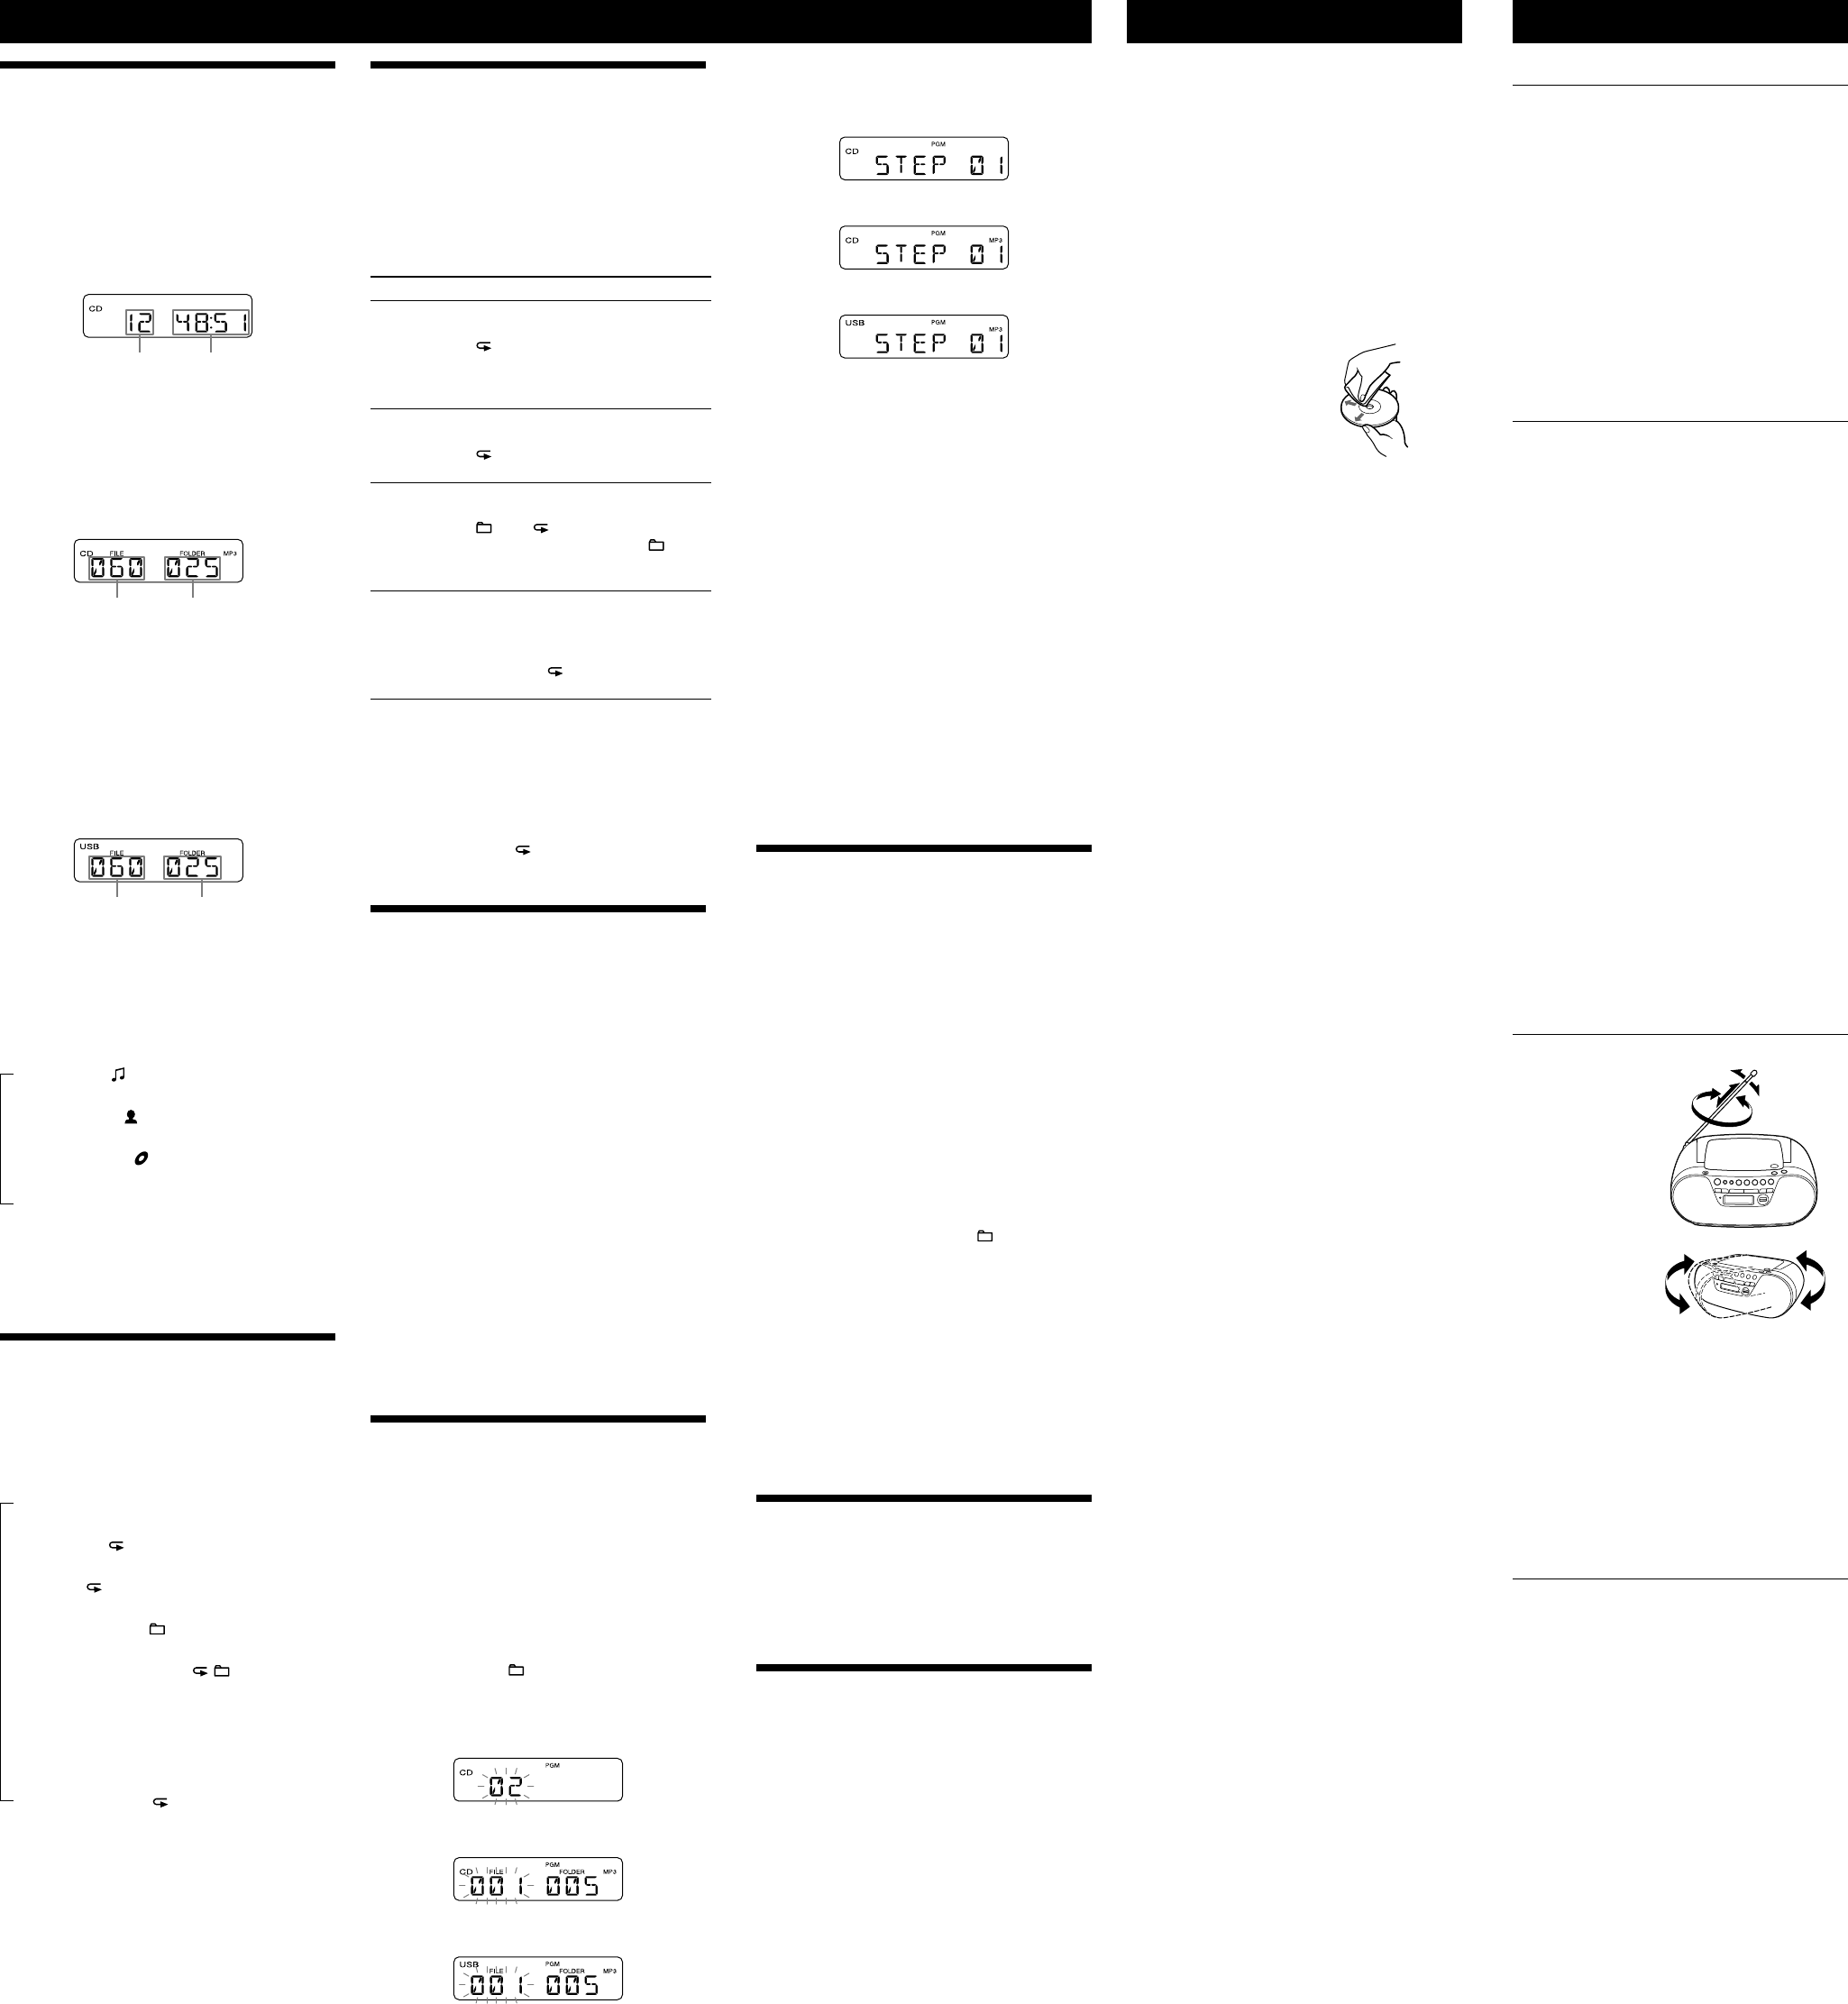
5 Press DISPLA
.
“STEP xx ” appears in the display
Audio CD
MP3 disc
USB device
6 T4 and 5 .
7 Press
to start Program Pla
T
Stop playback first.
until “ PGM”
disappears from the display
T
Press DISPLA
(press
, then press
DISPLA
during playback).
The last programmed st
display
track/folder number appears in the display
T
Press
once if the CD is stopped and twice
if the CD is playing.
erased.
programming pr
Tips
If you try to program 21 tracks/MP3 files or more, “ FULL” will
appear in the display
Y
saved until you open the CD c
The resume function does not work during Prog
Presetting radio stations
Y
Y
10 for AM in any or
1 Press OPERA
.
2 Press RADIO BAND
to select the band.
3 Hold down A
for 2 seconds until
“AUT” flashes in the display
4 Press DISPLA
.
The stations are stor
frequencies to the higher ones.
If a station cannot be preset automatically
Y
manually
1 Press OPERA
.
2 Press RADIO BAND
to select the band.
3 T /TUNE + or
–
.
4 Press M
.
The band selected (“ FM-xx” or “ AM-xx” ) appears in
the display
5 Press PRESET + or –
until the preset number you
want for the station flashes in the displa
6 Press DISPLA
.
The new station replaces the old one
Tip
The preset radio stations remain in memory even if you unplug
the AC power c
Playing preset radio sta
1 Press OPERA
.
2 Press RADIO BAND
to select the band.
3 Press PRESET + or –
to tune in the stored
station.
Connec
Y
such as a portable digital music player through the
speakers of this unit. Be sure to turn off the power
of each component befor
F
component to be connected.
1 Connect the AUDIO IN jack
to the line output
jack of the portable digital music player or other
components using an audio connecting cable (not
supplied).
2 Press OPERA
to turn the unit on.
3 T
4 Press A
, and start playback on the
connected component.
The sound from the connected component is
output from the speakers of this unit.
T
extension cable (not supplied) with a stereo-mini
jack on one end and two phono plugs on the other
end.
Prec
Discs that this unit CAN play
• Audio CD
• CD
*/MP3 files)
* CD-DA is the abbreviation for Compact Disc Digital Audio
recording standard used f
Discs that this unit CANNOT pla
• CD
format or MP3 format c
1/Level 2 or Joliet
•
CD-R/CD-R
that has scratches or is dirty, or CD-R/CD-RW recorded
with an incompatible recor
•
CD-R/CD-R
Notes on discs
• Before playing, clean the CD
with a cleaning cloth.
CD from the center out. If there
is a scratch, dirt or fingerprints
on the CD
error
• Do not use solvents such as benzine, thinner
commercially available cleaners or an
intended for vin
• Do not expose the CD to direct sunlight or heat
sources such as hot air ducts, or leav
car parked in direct sunlight as there can be a
considerable rise in temperatur
• Do not stick paper or a sticker on the CD, or scratch
the surface of the CD.
• After playing, store the CD in its case
On safety
• As the laser beam used in the CD player section is
harmful to the eyes, do not att
the casing. Refer servicing to qualified personnel
only
• Should any solid object or liquid fall into the unit,
unplug the unit, and have it checked by qualified
personnel before opera
• Discs with non-standard shapes (e.g., heart, square,
star) cannot be played on this unit. A
do so may damage the unit. Do not use such discs.
On power sourc
• For AC opera
voltage is identical with your local po
(see “ Specifications” ) and use the supplied AC
power cor
• Unplug the unit from the wall outlet when it is not
be used for an extended period of time.
• I
to avoid damage that can be caused b
leakage or corrosion.
On placement
• Do not leave the unit in a location near heat sources,
in a place subject to direct sunlight, excessiv
or mechanical shock, or in a car subject to the direct
rays of the sun.
• Do not place the unit on an inclined or unstable
place.
• Do not place anything within 10 mm of the side
of the cabinet.
unobstructed for the unit to operate pr
prolong the life of its componen
• Since a strong magnet is used for the speakers,
keep personal credit cards using magnetic c
or spring-wound watches a
prevent possible damage fr
On operation
• I
location, or is placed in a very damp room, moisture
may condense on the lens inside the CD play
section. Should this occur
properly
an hour for the moisture to ev
Cleaning the cabinet
• Clean the cabinet, panel and controls with a soft
cloth slightly moistened with a mild detergent
solution. Do not use any type of abrasive pad,
scouring powder
benzine.
If you have an
your unit, please consult your near
General
The pow
securely
weak.
There is no audio
Unplug the headphones when listening through
speakers.
Noise is heard.
equipment that emits radio wav
Move the portable telephone, etc., aw
the unit.
CD/MP3 play
The CD does not play or “ noDISC” is displa
even when a CD is in plac
open for about an hour to dry moisture
condensation.
CD-RW, r
weak.
The sound drops out
damaged.
when using a poor quality CD-R/CD
a problem with the recor
software.
Starting playback takes more time than usual.
playback.
– a disc r
– a disc that has not been finaliz
data can be added).
– a disc that has man
Radio
Reception is poor
antenna to
improve F
reception.
itself to improv
AM reception.
The audio is weak or is poor quality
weak.
radio, noise ma
The
with an indoor antenna, move the unit a
the
USB device
The USB devic
different USB devic
– T
– F
– Pla
– T
– T
– T
“OVER CURRENT ” appears.
electrical current from the
(USB) port
.
off the unit and remove the USB devic
(USB) port
. Make sure there is no problem with
the USB device. If this message persists, contact your
nearest Sony dealer
There is no sound
the unit and reconnect the USB device.
the unit.
T
There is noise
turn on the unit again.
is distorted. Noise may have ent
recording pr
it again.
The USB devic
(USB) port
.
not correctly oriented when the connection was
attempted. Orient the c
or USB cable correctly
“READING ” is displayed f
or it takes a long time befor
following cases:
– T
– T
– T
– T
T
you adhere to the f
– Keep the t
to 100 or less.
– Keep the t
less.
Erroneous display
corrupted. Send the music data to the USB device
again.
the alphabet. Other characters will not be displayed
correctly
The USB devic
turn on the unit.
the USB device operation manual for details on ho
to deal with this problem. If the problem persists,
contact your nearest Sony dealer
Play does not start.
Play does not start from the first file.
MP3 files cannot be played back.
“ .mp3” extension.
F*
folder
* This unit supports F
media may not support both file systems.
For details
device in question or contact the manufacturer
After trying the remedies, if you still have pr
unplug the AC pow
After all the indications in the display disappear
the AC pow
again. If the problem persists, please consult your
nearest Sony dealer