37780
36
Verklein
Vergroot
Pagina terug
1/41
Pagina verder
35
DTV Channel Setup
ENGLISH
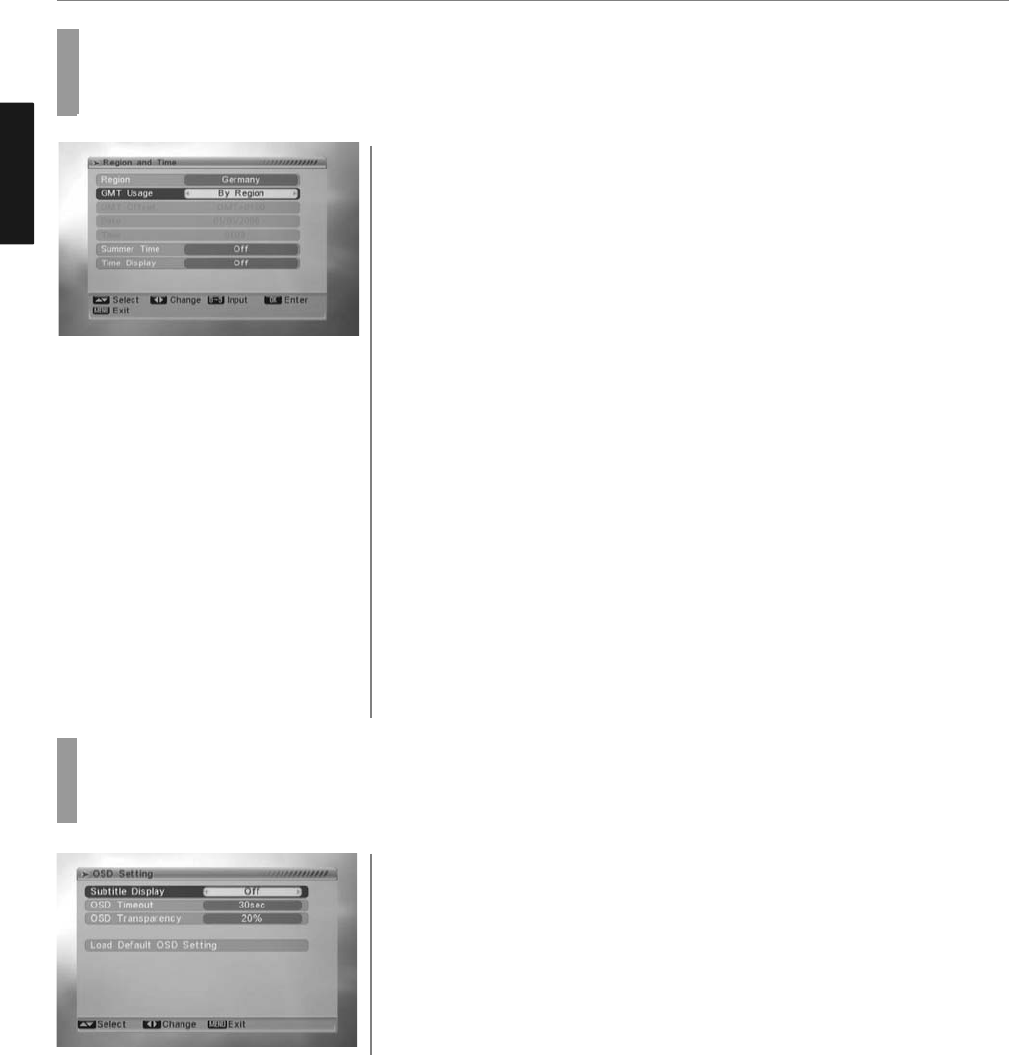
Setting Region and Time
When you enter to “Region & Time” menu, you will see “Region” and “Time Setting” items like below:
Region:
Region is used for selecting the country which you are in.
You can press [Left/Right] key to select each mode circularly.
Press [Menu] key to exit menu.
Time Setting:
-.When you select “Time Setting” and press [OK] key to enter the menu,
you will see the screen like below:
-. GMT Usage: This item is use for open the usage of GMT.
You can press [Left/Right] keys to switch “Off / User Define / By Region”
The “GMT Offset” item is valid only when the setting of “GMT Usage” is “User
Define”.
You can press [Left/Right] keys to switch “GMT
- Offset” value and the range is “-12:00 ~ +12:00”, increase each half hour
progressively.
- “Date” and “Time” items are valid only when the setting of “GMT Usage” is “Off”.
You can press [Left/Right] keys to moving highlight and use number keys to input
directly.
- “Summer Time” items are valid only when the setting of “GMT Usage” is “By
Region.”
You can press [Left/Right] keys to switch.
- Time display function can control whether the time will be displayed on screen
or not.
- Press [Exit] key to draw back from “Time” menu.
1
2
OSD Setting
When you input to “OSD Setting” menu, you will see a screen like below:
Menu Style: offers five kinds different color style; you can press [Left/Right]
key to select your favorite.
Subtitle Display: You can press [Left/Right] key to select “On” or “Off”. If the
current channel has subtitle information,
it will be showed up while this function is “On”. If this function is “Off”,
there won’t show up subtitle information even if the current channel has
subtitle information.
OSD Timeout: When you switch channels in full screen, there will show up some information about current channel on
the lower of the screen.
And regarding to the duration of these information show up on the screen,
you can press [Left/Right] key to set the time. The range of the duration is “5 second ~ 30 seconds.”
OSD Transparency: Besides the setting of “OSD Menu Style”, you also can set the transparency of OSD. You can press
[Left/Right] key to select the values.
There are 5 levels of transparency, 10%, 20%, 30%, and 40% and “NO” (means no transparency function).
Load OSD Setting Default: If you are not satisfy with your setting,
you can move highlight to this item and press [OK] key to reset parameters as default value.
Press [Exit] key to draw back from the “OSD Setting” menu.
1
3
4
5
6
2
36

Hulp nodig? Stel uw vraag in het forum

Spelregels

Misbruik melden

Gebruikershandleiding.com neemt misbruik van zijn services uitermate serieus. U kunt hieronder aangeven waarom deze vraag ongepast is. Wij controleren de vraag en zonodig wordt deze verwijderd.

Product:

Bijvoorbeeld antisemitische inhoud, racistische inhoud, of materiaal dat gewelddadige fysieke handelingen tot gevolg kan hebben.

Bijvoorbeeld een creditcardnummer, een persoonlijk identificatienummer, of een geheim adres. E-mailadressen en volledige namen worden niet als privégegevens beschouwd.

Spelregels forum

Om tot zinvolle vragen te komen hanteren wij de volgende spelregels:

Belangrijk! Als er een antwoord wordt gegeven op uw vraag, dan is het voor de gever van het antwoord nuttig om te weten als u er wel (of niet) mee geholpen bent! Wij vragen u dus ook te reageren op een antwoord.

Belangrijk! Antwoorden worden ook per e-mail naar abonnees gestuurd. Laat uw emailadres achter op deze site, zodat u op de hoogte blijft. U krijgt dan ook andere vragen en antwoorden te zien.

Abonneren

Abonneer u voor het ontvangen van emails voor uw Marantz LC4602E bij:


U ontvangt een email met instructies om u voor één of beide opties in te schrijven.


Ontvang uw handleiding per email

Vul uw emailadres in en ontvang de handleiding van Marantz LC4602E in de taal/talen: Engels als bijlage per email.

De handleiding is 2,76 mb groot.


U ontvangt de handleiding per email binnen enkele minuten. Als u geen email heeft ontvangen, dan heeft u waarschijnlijk een verkeerd emailadres ingevuld of is uw mailbox te vol. Daarnaast kan het zijn dat uw internetprovider een maximum heeft aan de grootte per email. Omdat hier een handleiding wordt meegestuurd, kan het voorkomen dat de email groter is dan toegestaan bij uw provider.

Uw handleiding is per email verstuurd. Controleer uw email

Als u niet binnen een kwartier uw email met handleiding ontvangen heeft, kan het zijn dat u een verkeerd emailadres heeft ingevuld of dat uw emailprovider een maximum grootte per email heeft ingesteld die kleiner is dan de grootte van de handleiding.

Er is een email naar u verstuurd om uw inschrijving definitief te maken.

Controleer uw email en volg de aanwijzingen op om uw inschrijving definitief te maken

U heeft geen emailadres opgegeven

Als u de handleiding per email wilt ontvangen, vul dan een geldig emailadres in.

Uw vraag is op deze pagina toegevoegd

Wilt u een email ontvangen bij een antwoord en/of nieuwe vragen? Vul dan hier uw emailadres in.


Info