-J00839
3 of 3
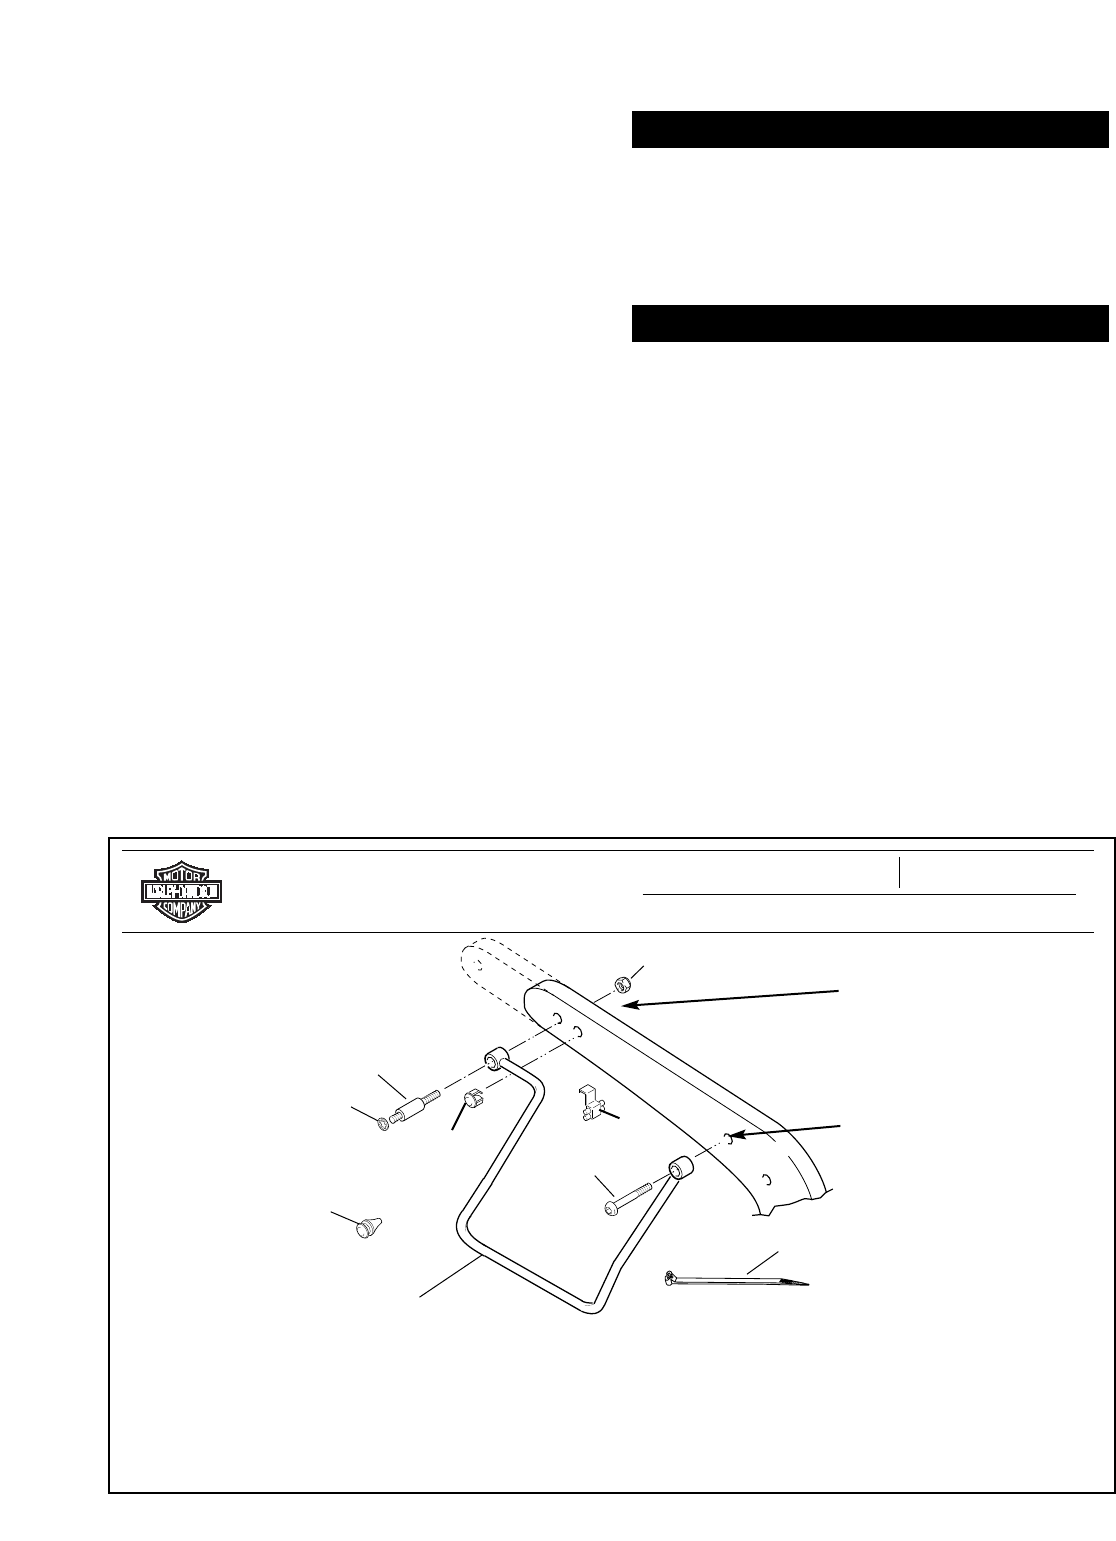
Item Description Part Number
1 Screw, button head (2) 4118
2 Locknut (2) 7776W
3Plug (chrome) (2) 56239-93
4Plug (rubber) (2) 58758-93
5 Lockwasher (2) 94081-90T
Item Description Part Number
6 Directional bar stud (2) 68496-91
7Wire connector (4) 70576-68
8 Support, saddlebag - left 90590-91B
9 Support, saddlebag - right 90591-91B
10 Cable strap 10006
1
8, 9
7
6
5
4
3
2
Service Parts
Saddlebag Support Kit
Date 9/98Part No. 90589-91D
sp90589c
10
On FXD and FXDL models,
the rear mounting point is
the rear hole on the fender-
support bracket. FXDWG
mounts in the second to
the last hole.
Remove stock
screw from here.
4. Route the directional wires through the hole in the fender
as shown in Figure 1. Measure the wires for length into
the tail-lamp housing. Allow enough wire for termination.
Remove the measured wires from the fender and cut the
wires to length.
5. Install the chrome snap cap in the fender-strut hole
previously used for directional wires.
6. Position right saddlebag support bar from kit to right rear
fender support. Insert long threaded end of rear
directional housing support (now part of the directional
housing/support assembly) through rear mounting hole in
saddlebag support bar, rear fender support, sissy bar side
plate and rear fender. See service parts page for exact
hole locations.
7. Install original flat washer and locknut onto directional
housing on underside of rear fender. Tighten finger tight.
8. Insert one chrome button head bolt (from kit) with one
original flat washer through front mounting hole in
saddlebag support bar, rear fender support, sissy bar side
plate and rear fender and into rear fender strut bracket.
Tighten bolt to 15 ft-lbs (20 Nm).
9. Align rear directional housing so that its lens, when
installed, will be aimed rearward for proper visibility. While
holding directional housing in position, tighten locknut to
22 ft-lbs (29 Nm).
10. Reconnect right directional wires within directional
housing using wire connector from kit. Wrap the
connector with electrical tape. Tuck wire connector
assembly within available space alongside lamp socket.
Plug the connector back into the tail-lamp housing. Route
the wires the same as the original equipment routing.
11. Repeat steps 1 – 10 for the left saddlebag support bar.
Always connect the positive battery cable first. If the posi-
tive cable should contact ground with the negative cable
installed, the resulting sparks may cause a battery explo-
sion which could result in death or serious injury.
12. Reconnect the battery cables to battery, positive cable
first.
Test directionals after finishing the installation. Weak,
intermittent, or non-operational lights may indicate a
poor connection or a short circuit in wires. The motorcy-
cle must never be operated in this condition. Operating
a motorcycle in this condition could result in death or
serious injury.
Inspect bulb and socket. Examine wires for bare spots
or loose connectors. After securing components, test
directionals again for satisfactory operation.
13. Test both directionals for proper operation.
1WARNING
1WARNING