13. Insert loose right directional wire (beneath fender)
through hollow directional housing support and into
directional housing.
14. Reconnect right directional wires within directional
housing using wire connector from kit. Wrap the
connector with electrical tape. Tuck wire connector
assembly within available space alongside lamp socket.
15. Install the bulb into the right directional-housing socket.
Fasten the lens to the directional housing.
16. Repeat steps 1 – 15 for the left saddlebag support bar.
17. Gently pull wire forward along underside of fender
through the grommet and into the area under the seat.
Install cable strap from kit to replace strap removed in
step 2.
Always connect the positive battery cable first. If the
positive cable should contact ground with the negative
cable installed, the resulting sparks may cause a bat-
tery explosion which could result in death or serious
injury.
18. Reconnect the battery cables to battery, positive cable
first.
Test directionals after finishing the installation. Weak,
intermittent, or non-operational lights may indicate a
poor connection or a short circuit in wires. The motor-
cycle must never be operated in this condition.
Operating a motorcycle in this condition could result in
death or serious injury.
Inspect bulb and socket. Examine wires for bare spots
or loose connectors. After securing components, test
directionals again for satisfactory operation.
19. Test both directionals for proper operation.
20. 1993 and later models only: Install rubber plug in wire
hole in directional housing.
Installation – 2002 and Later Models
To protect against shock and accidental start-up of
vehicle, disconnect the battery cables, negative cable
first, before proceeding. Inadequate safety precautions
could result in death or serious injury.
Always disconnect the negative battery cable first. If the
positive battery cable should contact ground with the
negative cable installed, the resulting sparks may cause
a battery explosion which could result in death or seri-
ous injury.
NOTE
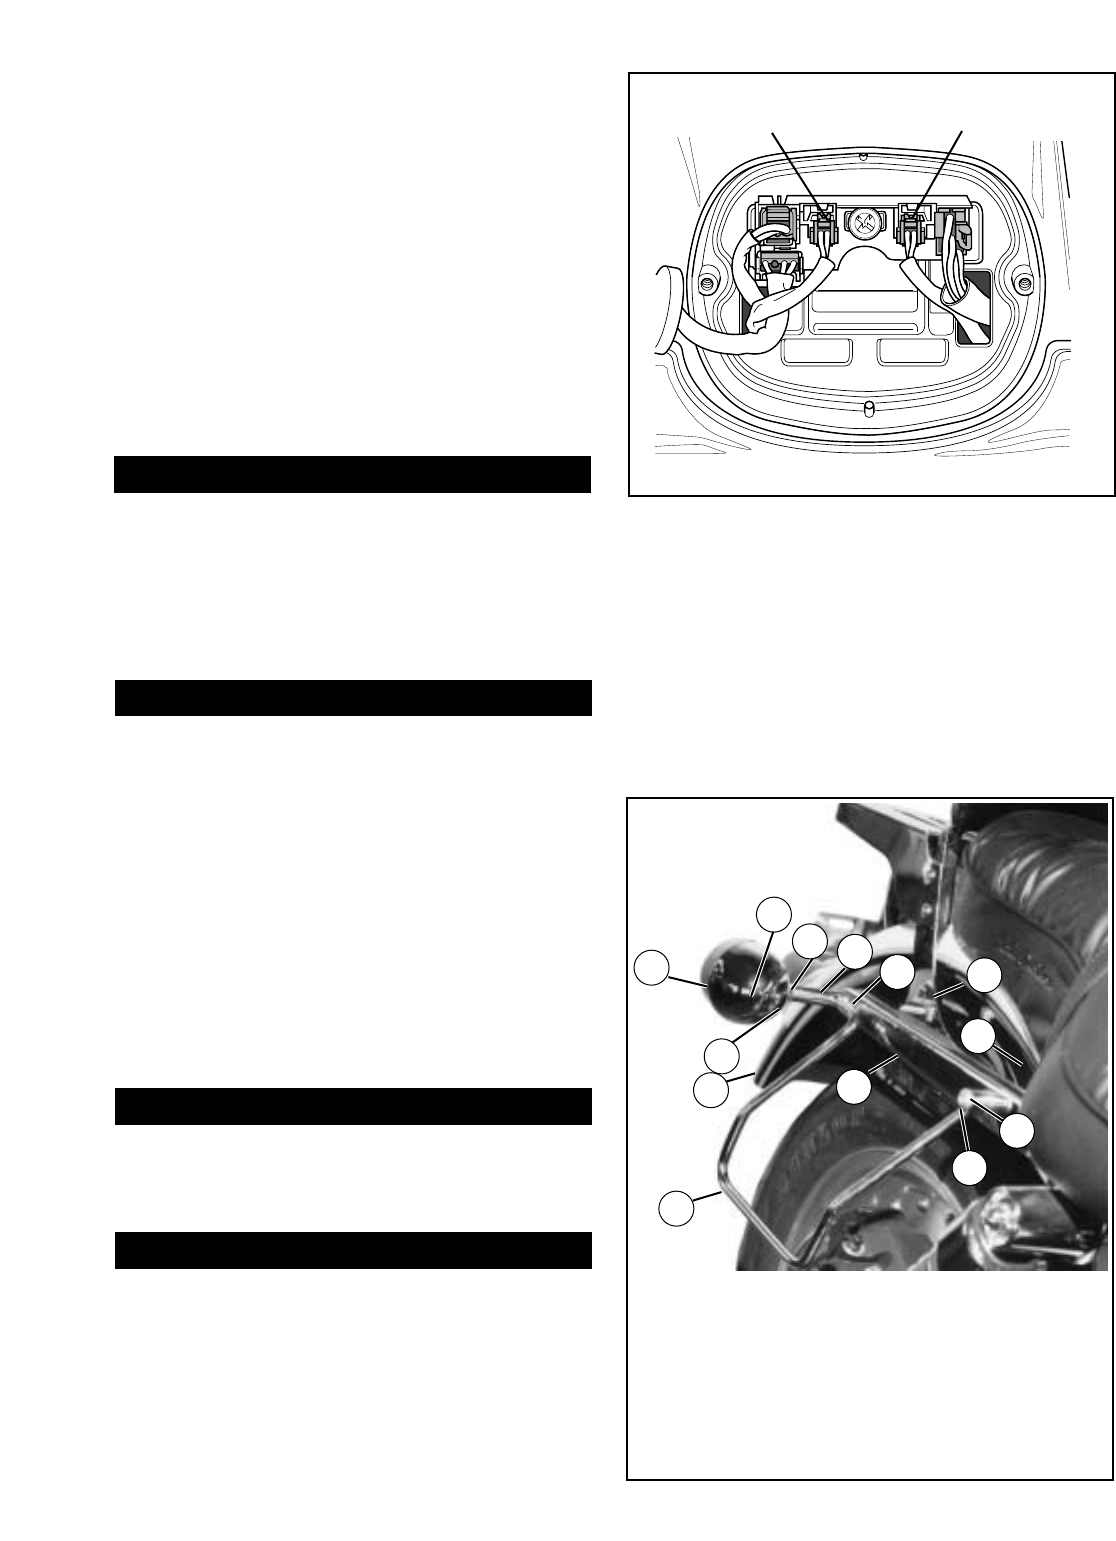
The connection for directionals is inside the tail-lamp hous-
ing.
1. Remove the rear directionals from the vehicle according
to applicable Service Manual instructions. Save the
connector on the end of each set of wires, with a length of
wire and conduit. Discard all other hardware. For
installation, note how the wires are routed inside the
fender.
2. See the Service Parts illustration. Remove the stock
screw from the fender cover as indicated.
3. Feed the directional wires through the directional stalk
and thread the directional lamp (separate purchase) onto
the end of the directional stalk.
1WARNING
1WARNING
1WARNING
1WARNING
Left Turn signal lamp
(save connector)
Right Turn signal lamp
(save connector)
Figure 2. Turn-Signal Connectors
i03917
Figure 1. Right Saddlebag Support Bar Installed on FXD
i03994
Original Equipment (bold)
Kit component
1. Saddlebag support
2. Rear fender support
3. Screw, button head
4. Flat washer
5. Sissy bar side plate
6. Rear fender
7. Rear fender strut
bracket (hidden)
8. Lockwasher, chrome
9. Rear directional
housing
10. Directional bar stud
11. Flat washer and locknut
(hidden)
12. Wire connector (hidden)
13. Plug (rubber or chrome)
-J00839
2 of 3
3
1
7
5
11
9
4
2
8
6
12
13
10