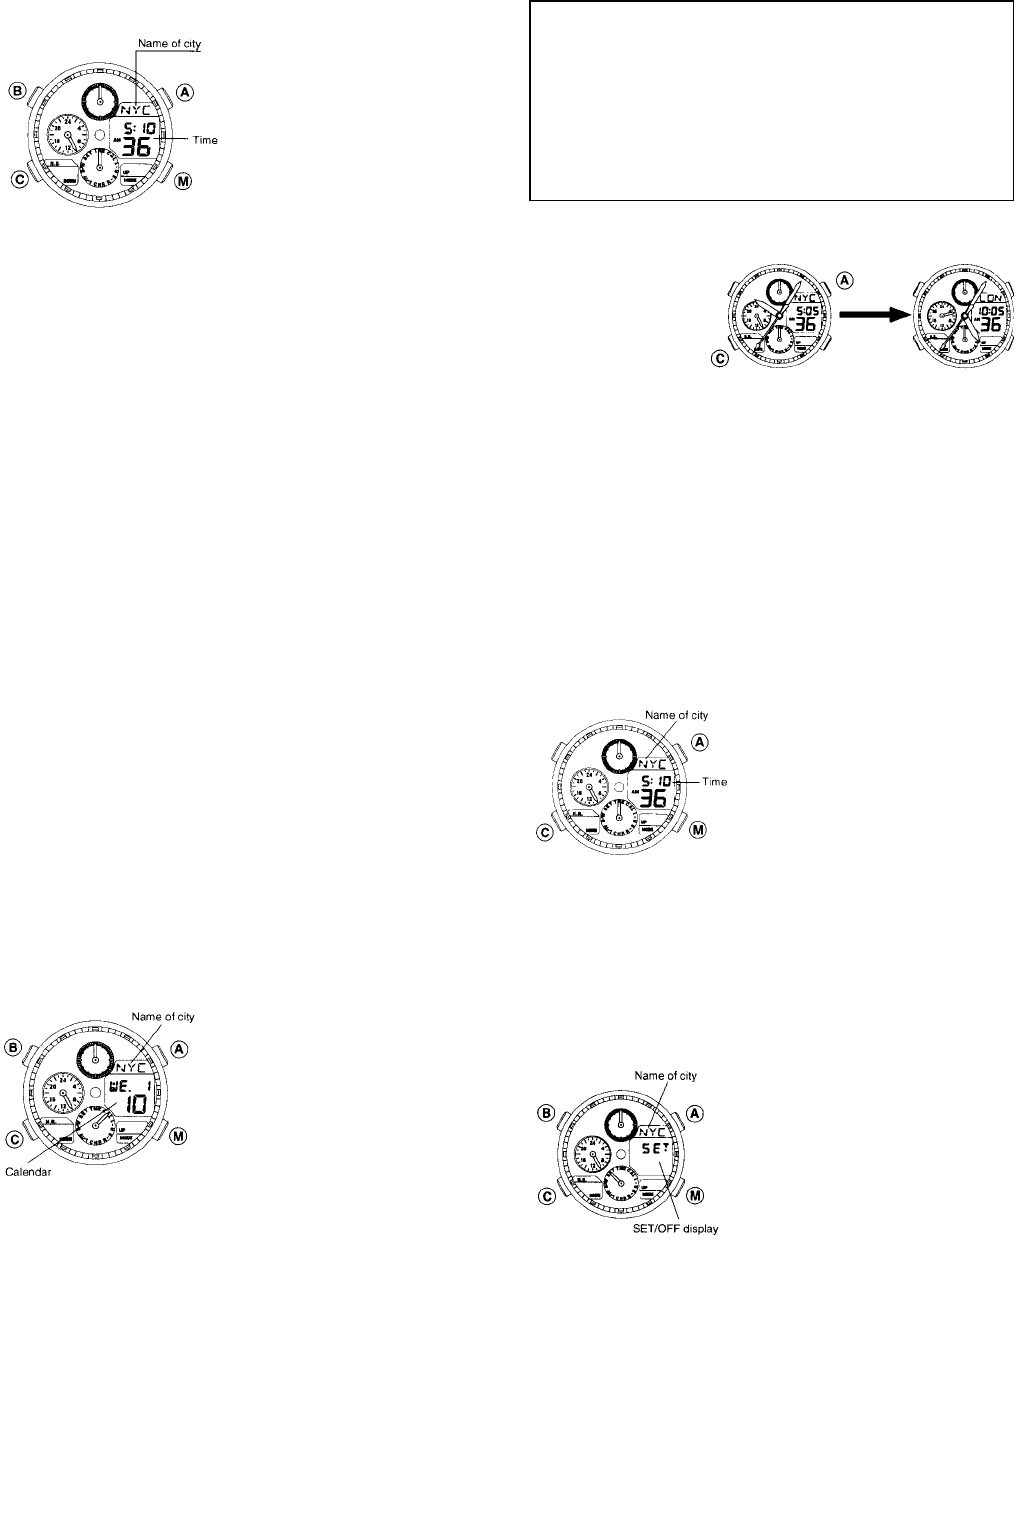
[Normal Time Display]
1. Press button 嘷
M and set
the watch to TME mode.
2. Press button 嘷
A or 嘷C ,
and display the name of
the city for which the
time is to be set.
3. Pull out button 嘷
M . The
hours, minutes and
seconds of the digital
display will start to flash.
* The time can be switched to Daylight Saving
Time as this time.
Press button 嘷
C to switch to Daylight Saving Time
for that city. When the Daylight Saving Time is
displayed the word “SUMMER” will be displayed.
4. Each time button 嘷
A is pressed, the display will
change in the order of SUMMER, seconds,
minutes, hours and 12H/24H (12 hour or 24 hour)
display. Since the flashing digit of the display
changes each time button 嘷
A is pressed, press
button 嘷
A until the digit of the display you want to
correct flashes
5. Press button 嘷
C to set the flashing digit of the
display (continuously pressing button 嘷
C will
cause the number displayed to advance rapidly).
• When setting to a 12 hour display, make sure
the display for AM/PM is correct.
6. Push button 嘷
A back into the normal position,
completing the digital time setting.
• Daylight Savings Time can be set independently
for each city.
<Analog Time Setting>
Analog cannot be set alone. However, analog time
can be set by switching the digital and analog
display. Refer to section 7 entitled, “Switching
Between Analog Time and Digital Time”. (Page 14)
6. SETTING THE CALENDAR
■ When the calendar is set for any city, the
calendar for the other cities are set automatically.
[Normal Calendar Display]
1. Press button 嘷
M and set
the watch to the CAL
mode.
2. Press button 嘷
A or button
嘷
C to display the city for
which you want to set the
calendar.
3. Pull out the 嘷
M button. The
“month” of the digital
display will start to flash.
4. Since the flashing digit of the display will change
each time button 嘷
A is pressed in the order of
month, date, day and year, press button 嘷
A until
the digit of the display you want to correct flashes.
5. Press button 嘷
C to correct the flashing digit of the
display (continuously pressing button 嘷
C
will
cause the number displayed to advance rapidly).
6. Push button 嘷
M
back into the normal position,
completing the calendar setting.
7. SWITCHING BETWEEN ANALOG TIME AND
DIGITAL TIME
This watch is
designed for
simple switching
between digital
and analog displays for cities and calendars.
1. Press button 嘷
M and set the watch to the TME or
CAL mode.
2. Press button 嘷
A (to advance the name of the
cities forward) or button 嘷
C (to advance the name
of the cities backward) to display the desired city.
3. Simultaneously press buttons 嘷
A and 嘷C . A
confirming beep will be produced indicating that
the times (calendar) of the cities designated for
digital have been interchanged.
8. DISPLAYING TIME AND CALENDAR OF
MAJOR CITIES OF THE WORLD
1. Press button 嘷
M and set
the watch to the TME or
CAL mode.
2. Press button 嘷
A (to advance
the name of the cities
forward) or button 嘷
C (to
advance the name of the
cities backward) to display
the desired city.
9. USE OF ZONE SETTING (SET)
■ In the zone setting function, only the cities selected
“SET” can be retrieved and displayed in each
mode easily.
[Zone Setting Mode]
<Zone Setting>
1. Press button 嘷
M and set the
watch to the SET mode.
2. Press button 嘷
A or button
嘷
C to display the city that
you want to set.
3. Pull out button 嘷
M. The
name of the city and the
word “SET” of the digital
3. display will begin to flash. At this time, select
“SET” or “OFF” for display of the city by pressing
button 嘷
B.
• When setting other cities, first press button 嘷
A
or
嘷
C to display the city desired to be corrected, and
then set for each city using button 嘷
B
.
4. After completing settings for each city, push button
嘷
M to the normal position to complete the setting
procedure.
• The year can be set from the years 1995 to 2099.
• Since this watch is equipped with an auto-
calendar function, there is no need to correct
the date at the end of the month.
• When the date has been set to a date that does
not exist (such as February 30), the watch will
automatically correct the date to the 1st of the
following month when return to the normal display.