14 15X32 DIGITAL MIXER Quick Start Guide
X32 DIGITAL MIXER Getting Started
Windows-based application and Linux/
OS X application for X32
Also o ered is a separate remote editor running
onhost computers that will allow for complete
editing control of the X32 via Ethernet. Details of
the remote editor’s download, setup and operation
are included in a separate user manual available for
download from the X32 product page. Check out
behringer.com for more information.
Tip: The X32 remote communication is OSC-based
(open sound control) and we will share the protocol
on our website, allowing developers to design their
own control software. Stay tuned to behringer.com
for details on the OSC protocol.
X-USB card
The X-USB card allows transmission of up to
32channels to and from a connected computer.
Pleasedownload the X-USB drivers and Quick Start
Guide from behringer.com before connecting the
mixer to your computer.
(EN) Getting Started (ES) Puesta en marcha
Startup and Shutdown, and Update:
We recommend switching the X32 mixer on rst,
andshutting it o last when any sound system is
connected. This will prevent the possibility of any
unexpected noises being transmitted during the
startup/shutdown process.
The Setup screen’s general preference page contains
a Safe Main Levels function. When activated,
theconsole automatically mutes the main LRC
levels when booting the console. It also prevents
any scene loading from a ecting (i.e. turning up)
themainslevels.
Synchronization and Sample Rate settings for the
console can be adjusted on the Setup/Con g page,
but please note that sample rate changes will
require a reboot of the console. When you see a red
square indication at the top section of the main
display, please verify if the synchronization settings
on Setup/Con g make sense (see section 3).
If the console has been used by someone else,
andyou feel unsure about its speci c routing status,
you can reset the X32 to default settings in two
convenient ways:
• • While the console is booting and the “X32”
logoappears on the screen, press and hold
the Scenes/Undo button until the console
is fully operational and the Home screen is
displayed. Theconsole will now be in the same
state as it was when shipped from the factory.
However, youcan immediately revert to the
status the console was in when being switched o
the last time by pressing the Scenes/Undo button
• • You can also reset the console any time after
booting by pressing Setup/Con g, then Initialize
NOTE: Initializing the console does not
automatically erase the current show data or
any stored scenes. Ifyou wish to clear all scenes,
please use the ’Initialize All Show Data’ option on
Setup/Con gpage.
In order to prevent any errors by losing power
during a store operation, we recommend
using the “SafeShutdown” function from the
Setup/Globalpage.
NOTE: The X32 can be locked against unintended use
by activating ’Lock Console’ from the Setup/Global
page. In this state the UI will not allow any changes
to be made and the display shows “X”. Keep HOME
depressed for about 5s to unlock the X32 again.
The X32 rmware can easily be updated by
performing the following steps:
• • Download the new console rmware from the
X32product page onto the root level of a USB
thumb drive
• • Plug the USB thumb drive into the top panel USB
connector while the console is turned o
• • Hold the USB View button depressed while
switching the console on. While booting, the X32
will run a fully automatic rmware update,
which will take 2-3 minutes longer than the
regular boot sequence
When no update le is available on the USB drive,
or when it is corrupted, the update mode will
remain active, preventing the X32 from booting
regularly. Switch the console o and back on
without holding the USB View button to boot the
console with the existing rmware.
CAUTION: Please do not block the fan opening on
the bottom of the X32 cabinet! The large slow-
turning fan is barely audible, but it is still working.
Speci cally when mounting the X32 in a road case,
please ensure there is su cient space underneath to
allow for some air ow.
Resumen operativo de la mesa de mezclas
¡Bienvenido al Manual de puesta en marcha de la
mesa de mezclas digital X32! En este documento le
ofrecemos un resumen de las operaciones básicas
de esta mesa de mezclas para que pueda ponerse
en marcha con ella rápidamente. Mientras va
leyendo este documento, le recomendamos que
experimente con las distintas pantallas y controles
de la consola. El interface de usuario de esta consola
ha sido diseñado para ser extremadamente fácil en
cuanto a navegación y aprendizaje. Además de este
manual de puesta en marcha, dispone también de
un manual de instrucciones en inglés disponible
como chero PDF descargable a través de nuestra
página web behringer.com.
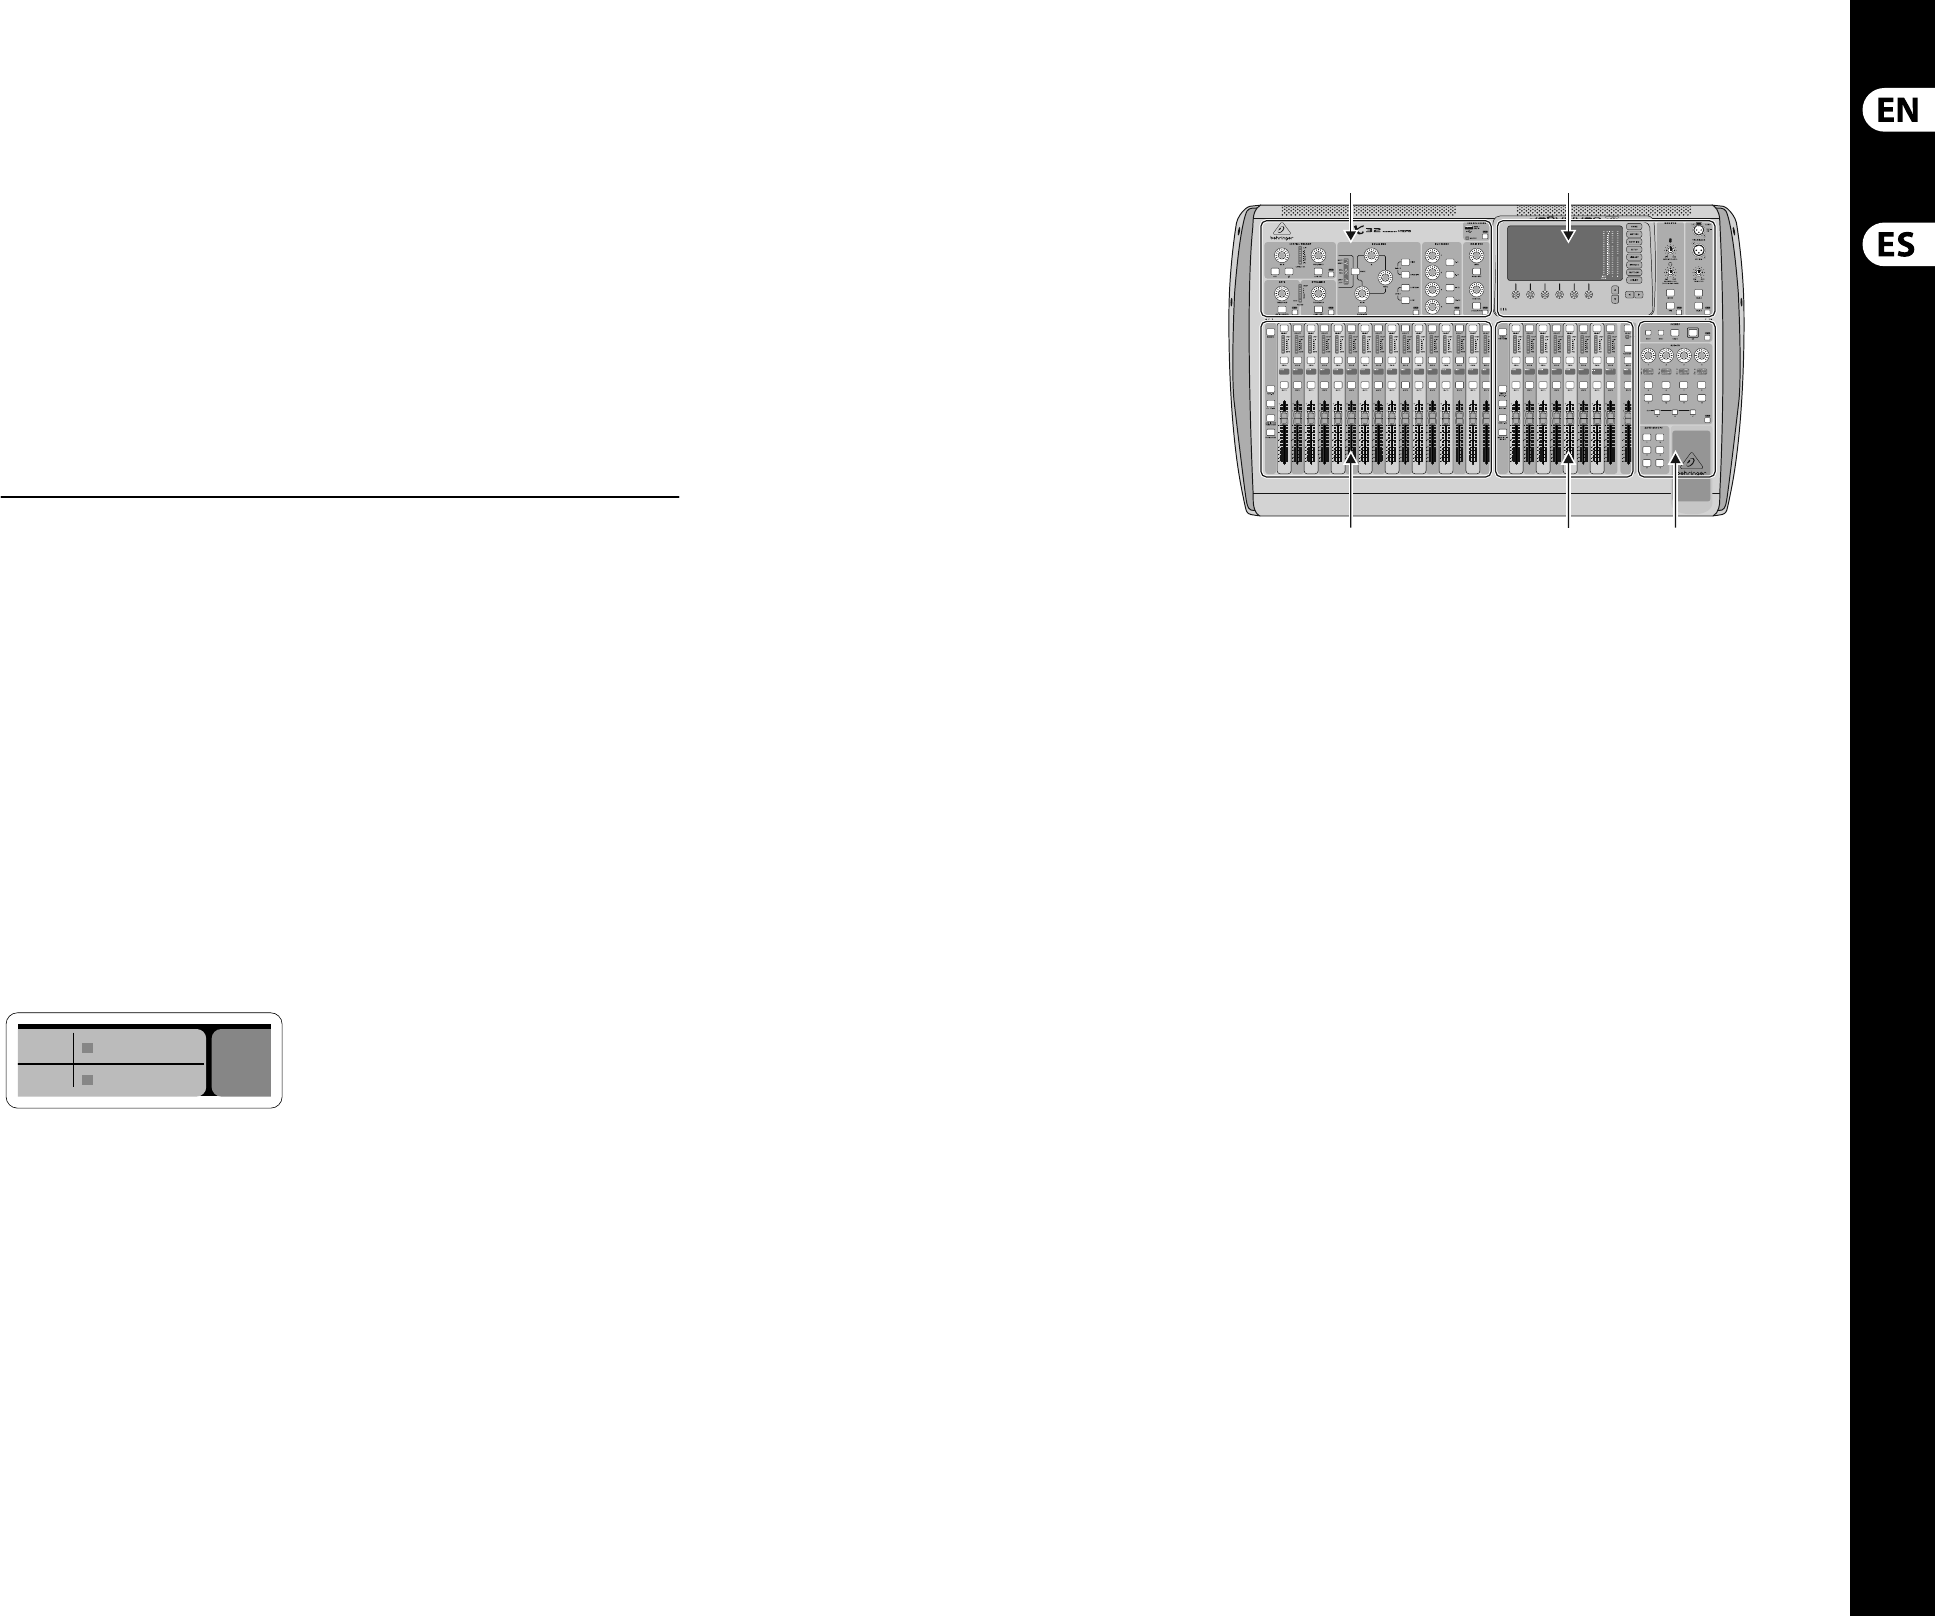
Funcionamiento general del interface
deusuario
El interface de usuario de la X32 está dividido en
cinco secciones principales:
(1) Banda de canal
(2) Canales de entrada
(3) Pantalla y monitorización
(4) Grupo/Bus/Canales principales
(5) Escenas/Asignación/Grupos de anulación oMute
Funcionamiento de los botones View
En distintos puntos del panel superior de la consola
encontrará unos pequeños botones marcados
como View. Pulse estos botones para hacer que la
gran pantalla a color de la consola (conocida como
Pantalla principal) pase a mostrarle información
relacionada con la sección cuyo botón View acabe
de pulsar.
Por ejemplo, si está editando el ecualizador y
le interesa visualizar en gran formato la curva
de respuesta de frecuencia del EQ o el valor de
parámetro de EQ correspondiente, simplemente
pulse el botón View adyacente a la sección EQ.
Sinecesita comprobar el ruteo de la señal de línea
interior o talkback, simplemente pulse el botón
View que está al lado del botón Talk y en la pantalla
principal aparecerán todos los detalles.
Con las opciones que le ofrece este botón
View, prácticamente se elimina la necesidad
de ir pasando por distintas páginas de menú,
dadoque los botones View siempre le llevarán a la
pantallanecesaria.
Consejo: La pestaña Setup/Global de la pantalla
principal le permite ajustar las preferencias de
comportamiento de los botones View y Select.
Personalización de la X32 por medio de la
página de utilidades
Pulse el botón Utility, situado a la derecha de
la pantalla principal, para activar una serie
de funciones de gran utilidad de una forma
“sensible al contexto”. Por ejemplo:
• • Cuando esté ajustando el ecualizador de un
canal de la consola, el pulsar el botón Utility le
ofrecerá opciones de copia, pegados, carga o
almacenamiento de ajustes del ecualizador.
• • El pulsar el botón Utility mientras mantiene
pulsado el botón de selección de un canal hará
que aparezca una pantalla de asignación de
nombres en la que podrá personalizar el aspecto
con el que aparece el canal tanto en la pantalla
principal como en la pequeña pantalla de canal.
• • En las páginas Routing, el pulsar el botón Utility
le ofrecerá la opción de cargar o almacenar
distintos ajustes pre jados de escenarios
deruteo.