Helpline No. UK/Northern Ireland 00800 52323000 Rep. Ireland 00800
Web Support: service@produktservice.info
Model Number: AE1-FW-10SN
4.1 Function buttons
4.2 Time and date
4.2.1 Radio controlled time
The time is encoded (DCF77 - 1 hour preset) and
transmitter in Mainflingen near Frankfurt/Main
some 1,500 km. If your clock is located within this transmission range it
will receive and convert this signal, thereb
date is always displayed im
is not possible to receive a signal at your curren
the time manually (seeon 4.2.2 "Manual setting").
4.2.2 Manual setting
Note: To rapidly alter the digits p " or "–/C/F" button.
1. To set the time press and hold the "SET/ZONE" button for approx.
3 seconds until the language for the weekday display starts to flash. You
can choose to display the weekday in English (EN), Dutch (DU), French
(FR), Spanish (SP) Italian (IT) or German (GE) by pressing the
"+/ " or "-/C/F" button. Then press the "SET/ZONE" button to confirm
your selection; 24 Hr or 12
2. Press the "+/ " or "-/C/F" button to alternate between the 12 and 24 hour
display and confirm your selection by pressing the "SET/ZONE" button.
The year now st
3. Press the "+/
" or "-/C/F" button to set the year and confirm your
selection by pressing the "SET/ZONE" button. The month now starts
flash.
4. Set the month, date, hour and minute in the same way. When the minute
entry has been confirmed the time zone flashes.
5. Press the "SET/ZONE" button to set time zone 0 for Central European
Time. To set other time zones (see section 4.2.6 "Time zone") press the
"+/
" or "-/C/F" button and confirm your selection by pressing the
"SET/ZONE" button.
6. ON
then flashes in the displaRC is displayed instead of the
weekday. You have the option of disabling r
want to operate your clock manually. Use the "+/ " or "-/C/F" button to
select ON or OFF and confirm your selection by pressing the
"SET/ZONE" button. The setting
Note: If no button is pressed f
setting procedure, the tim
have entered will be saved.
4.2.3 12/24-hour format
To set the 12/24-hour format please proceed as described under section
4.2.2 "Manual setting". The 12-hour format is indicated by the "PM" symbol
to the left abov
4.2.4 Weekday display
The weekday
inserted. The weekday display w
your radio controlled wall clock. To set the language for the weekday
display please refer to section 4.2.2 "Manual setting".
4.2.5 Calendar week
The calendar week depends on the curr
automa
4.2.6 Time zone
You can use this function to set and displ
basic setting the
The Earth is divided in
Earth's surface where a common time applies. This usually runs along the
longitudinal lines from the poles. When passing into another zone time
changes by one hour. In an easterly direction time moves forward by one
hour and in a westerly direction it moves backward by one hour. If, for
example, you want to set the time for a countr
of your country, you will need to enter
Setting the time
zone
1. To set the time
zone press and
hold the
"SET/ZONE"
button for
approx.
3 seconds until
the language
for the
weekday
display starts to flash.
2. Now press the "SET/ZONE" button 7 times until a flashing digit (from
-12 to +12) appears on the display.
3. Press the "+ " - or "–/C/F" button to set your desired time zone. Confirm
your selection by briefly pressing the "SET/ZONE" button twice. The
local time is now displa
You can now switch between
zone by briefly pre When the time is
being displayed for the respective zone the ZONE s
above the time.
Note: You can only adjust the hour in this mode; the minutes run
synchronously with the normal time.
4.3 Alarm time
The radio controlled wall clock has three configurabl
weekday alarm (AL M-F), a weekend alarm (AL S-S) and an appointment
alarm (AL AP).
4.3.1 Setting the alarm
To set one of the three alarm
approx. 3 seconds.
The alarm AL M-F (Monday – Friday
appears and the hour starts to flash;
use the "+/
" or "-/C/F" button to set the desired hour and confirm your
selection by pressing the "ALARM" button. The minutes now start to flash;
use the "+/
" or "-/C/F" button to selecte relevant minute and press the
"ALARM" button to confirm your setting.
The alarm AL S-S (Saturday – Sunday)
use the "+/
" or "-/C/F" button to set the desired hour and confirm your
selection by pressing the "ALARM" button. The minutes now start to flash;
use the "+/ " or "-/C/F" button to set the relevant
"ALARM" button again to confirm
The Alarm AL AP (appointment alarm) appears and the year flashes. Use
the "+/
" or "-/C/F" button to set the desired year and confirm
selection by pressing the "ALARM" button. The month now starts to flash;
set the month, date, hour and minute in the same way. Press the "ALARM"
button again to confirm the setting for the date and time of the alarm
alarm setting fun
4.3.2 Activating/deactivating the alarm and alarm
repeat function
To activate or deac
button; Alarm AL M-F
(Monday - Friday) appears. Press the " " button to
activate or deactivat
) and optionally the alarm repeat function
(Zz) for this alarm time (s
button to confirm your selection.
Alarm AL S-S
(Saturday - Sunday) appears; press the " " button again to
activate or deactivat
) and optionally the rep
(Zz) for this alarm time (s
button to confirm your selection.
Alarm AL AP
(appointment alarm) appears; press the " " button to activate
or deactivate the alarm ) for the appointment alarm function (symbol
appears/disappears). The appo
cannot be repeated with th
4.3.3 Displaying the alarm time
Alarm time AL M-F (Monday - Friday), alarm time AL S-S (Saturday
- Sunday) and the appointment alarm can be displayed by pressing the
"ALARM" button: Press once to display alarm time AL M-F (Monday
- Friday); press twice to display alarm time AL S-S (Saturday - Sunday);
press three times to display the appointment alarm; and press four times to
return to the normal display it several seconds until the clock
automatically re
4.3.4 Switching off the alarm
Alarm ( ): When the alarm sounds it either switches off automatically after
2 minutes or it can be switched off by
weekend alarm, however, remain activ i.e. the alarm will sound again the
following weekday (Monday - Friday) or Saturday
time.
Repeating the alarm (Zz):
To enable this feature th
(section 4.3.2) must be activated and the
display. Pressing the "SNOOZE" button while the alarm is sounding causes
the Zz symbol to flash and the alarm to sound again after 8 minutes. You
can switch off the alarm by pressing any other button. The weekday and
weekend alarm, however, remain activ i.e. the alarm will sound again the
following weekday (Monday - Friday) or Saturday
time.
Note: The alarm responds to the time indicated in the display (radio
controlled time, manuall
4.4 Temperature display
The temperature displa
immediately afte
does not indicate the current ambient tem
temperature sensor needs s
Please note that the tem
the clock is mou this can radiate heat or
Selecting °Celsiu
To switch between °C and °F press and hold the "-/C/F" button f
3
"-/C/F" button again for approx. 3
to °C.
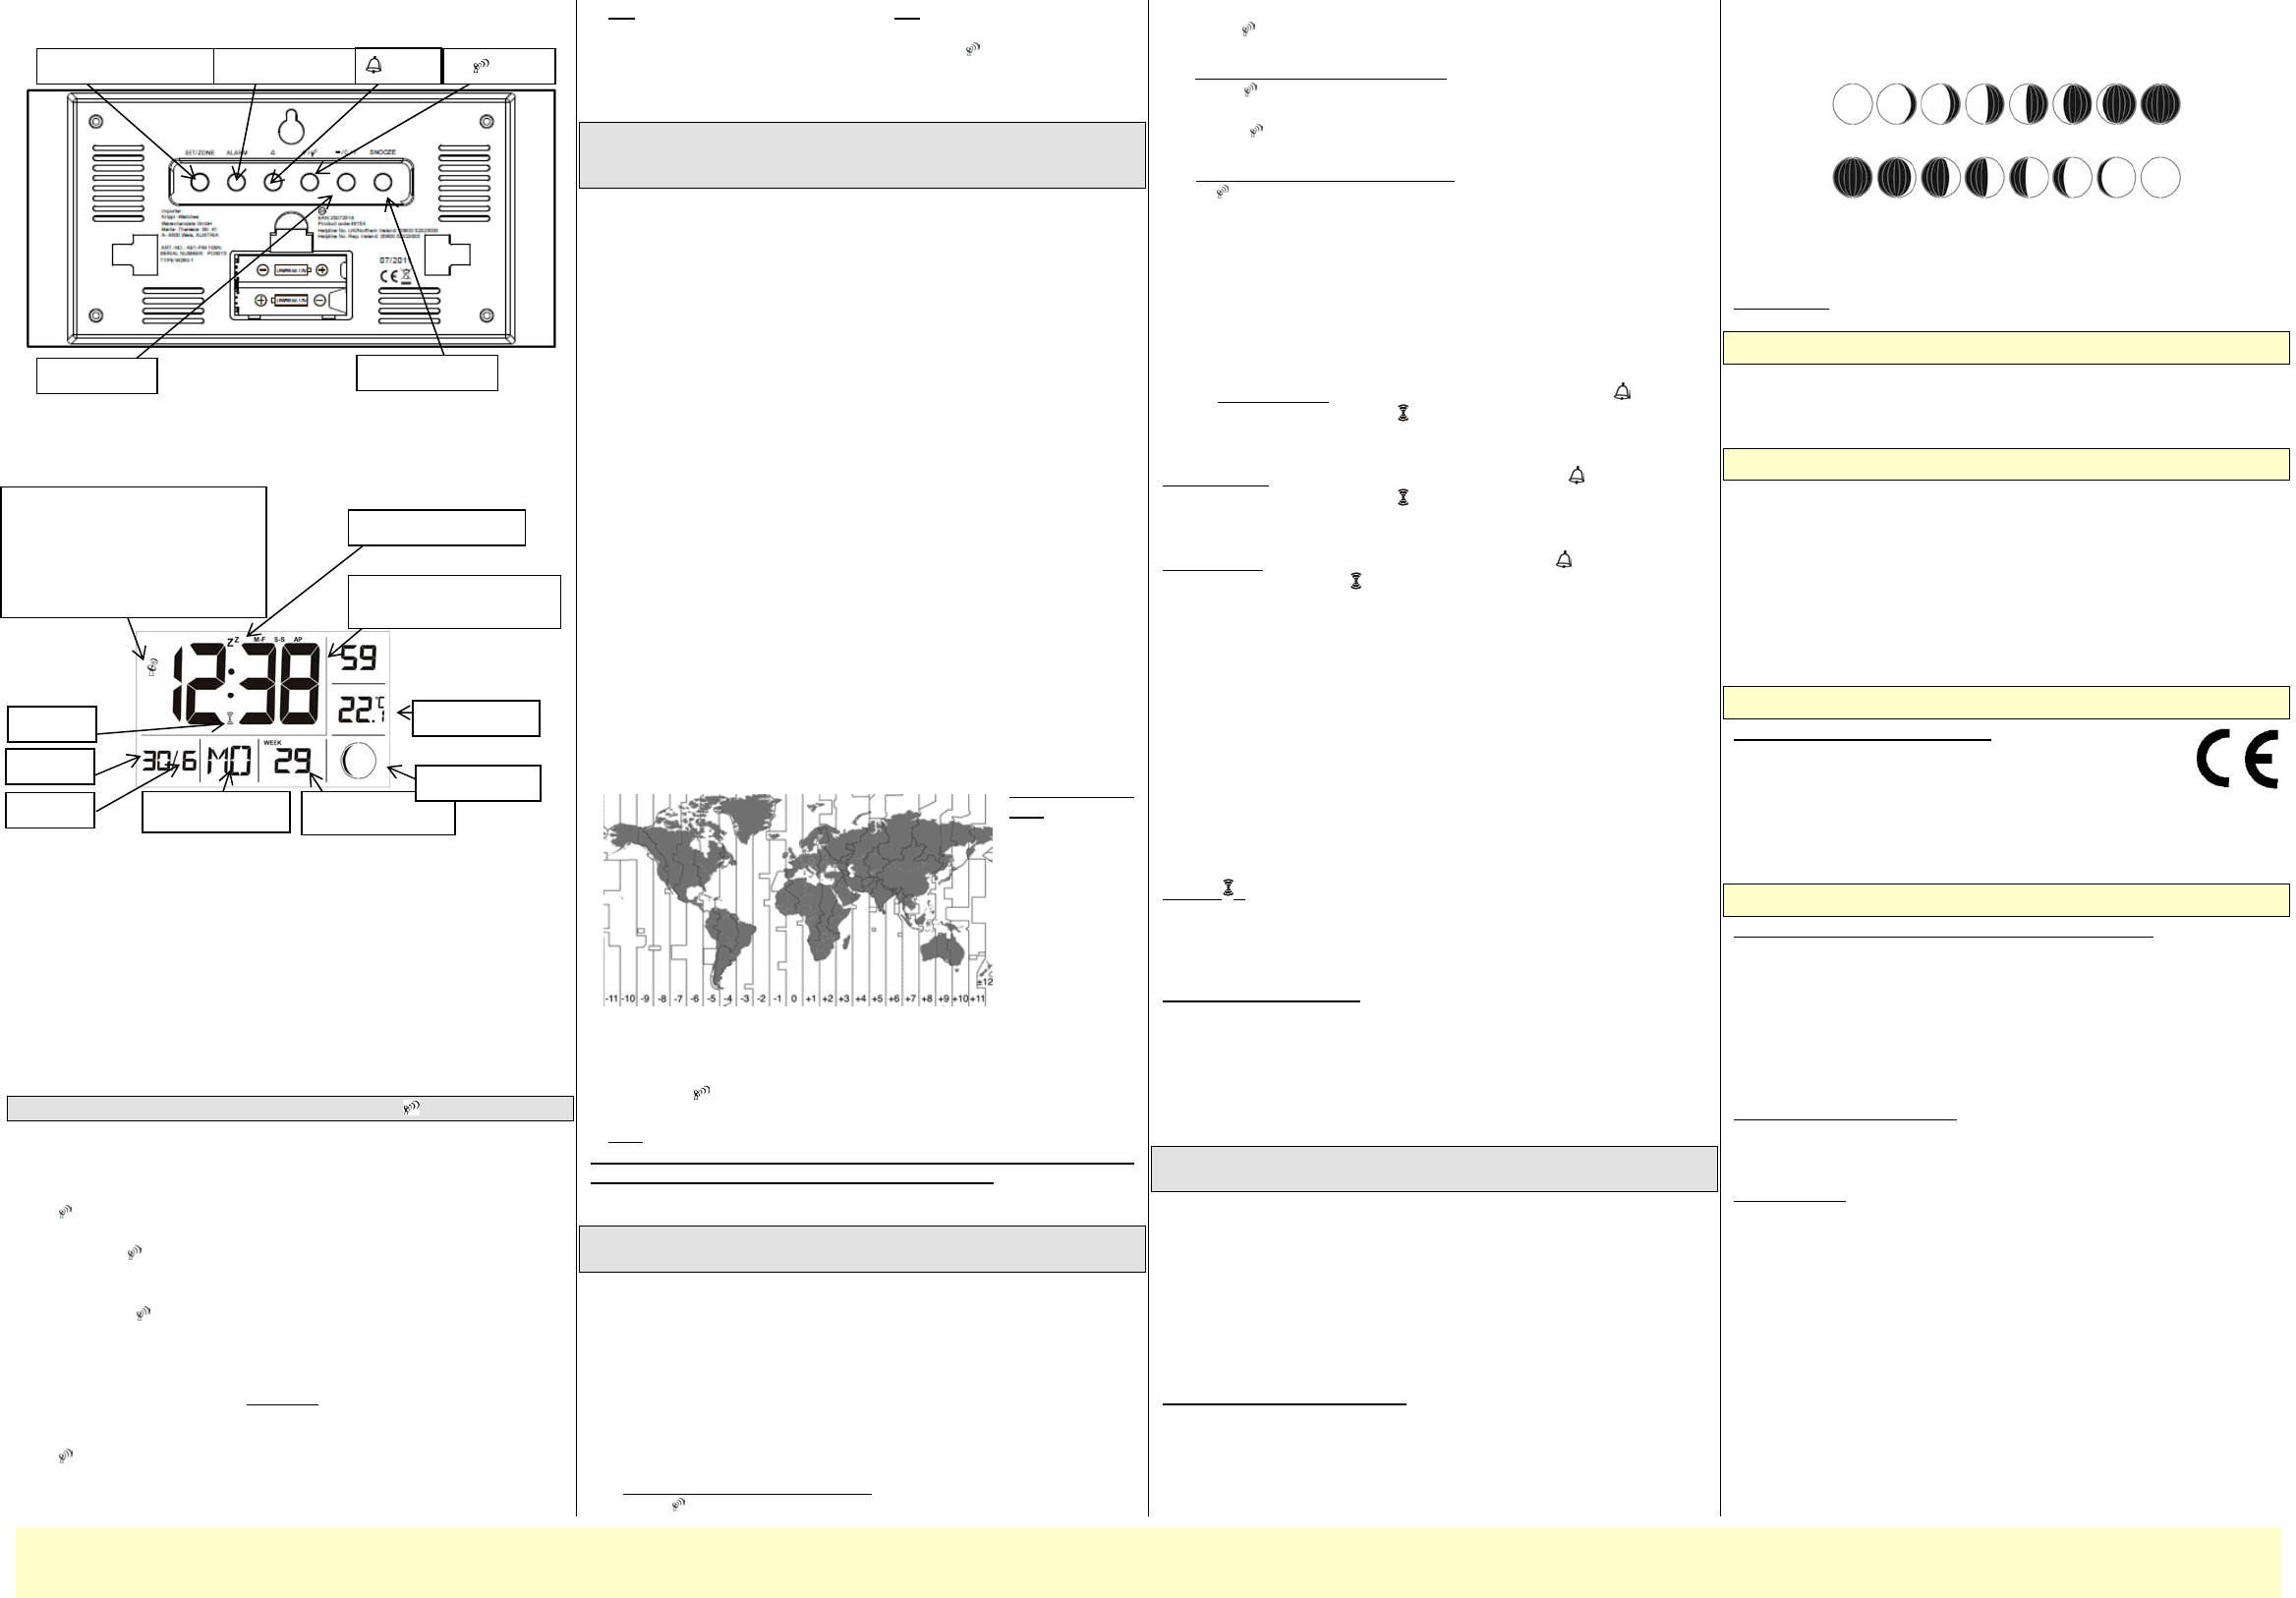
4.5 Moon phase
The moon phase depends on the current date and is displayed with the
following symbols:
Full moon
New moon Waxing
4.6 Technical specifications
Temperature:
5 Assembly
The clock can either be set up on its feet or mounted on a wall using the rear
hanging mount. When using the feet please mak
place.
6 Changing the batteries
Replace the batteries
Open the battery comp
controlled wall clock. B
contacts and the contacts in the clock. Insert the b
1.5V batteries) and close the battery com
correct polarity). Onles with equivalent battery types and
do not use a mixture of old and new batteries, as old batteries
recommend you operate the clock with ordinary batteries as opposed to
rechargeable bat
7 Declaration of conformity
R&TTE Directive 1999/5/EC: Summary of the
declaration of conform
that the radio controlled wall clock
AE1-FW-10SN conforms to the basic requirements and
other relevant provisions of Directive 1999/5/EC. You can access the
declaration of conformity in its entirety via our website at:
http://www.produktservice.info EAN: 25072518
8 Troubleshooting
The radio controlled clo
not receive a sign
the signal can prevented by structural or natural
obstructions (e.g. mountains). The radio controlled wall clo
with a quartz clock which
4.2.2 "Manual setting"). Electromagnetic or atm
also disrupt the radio signal. This type of interference can no
eliminated by si
Incorrect temperature di
The temperatu
direct sunlight. Please position your clock in such a way that it is not
exposed to direct sunlight.
Weak batteries: Replace the batteries as soon as the display becomes weak
or faded. When inserting the nees always
correct (see section 6 "Changing the batteries"). After changing t
proceed as described und
Time in hours, minutes
and seconds
Alar
Day of the week Calendar week
Radio tower symbol:
- Radio waves displayed continuously:
radio controlled time received
- Radio waves flashing: searching for
radio controlled time
- Not visible: radio signal lost and/or
manual time se
Snooze function
Date
Month
Tem
erature
Moon
hase
" " button
"SET/ZONE" button "ALARM" button "+
" button
"- /C/F" button
"SNOOZE" button