Helpline No. UK/Northern Ireland 00800 52323000 Rep. Ireland 00800
Web Support: service@produktservice.info
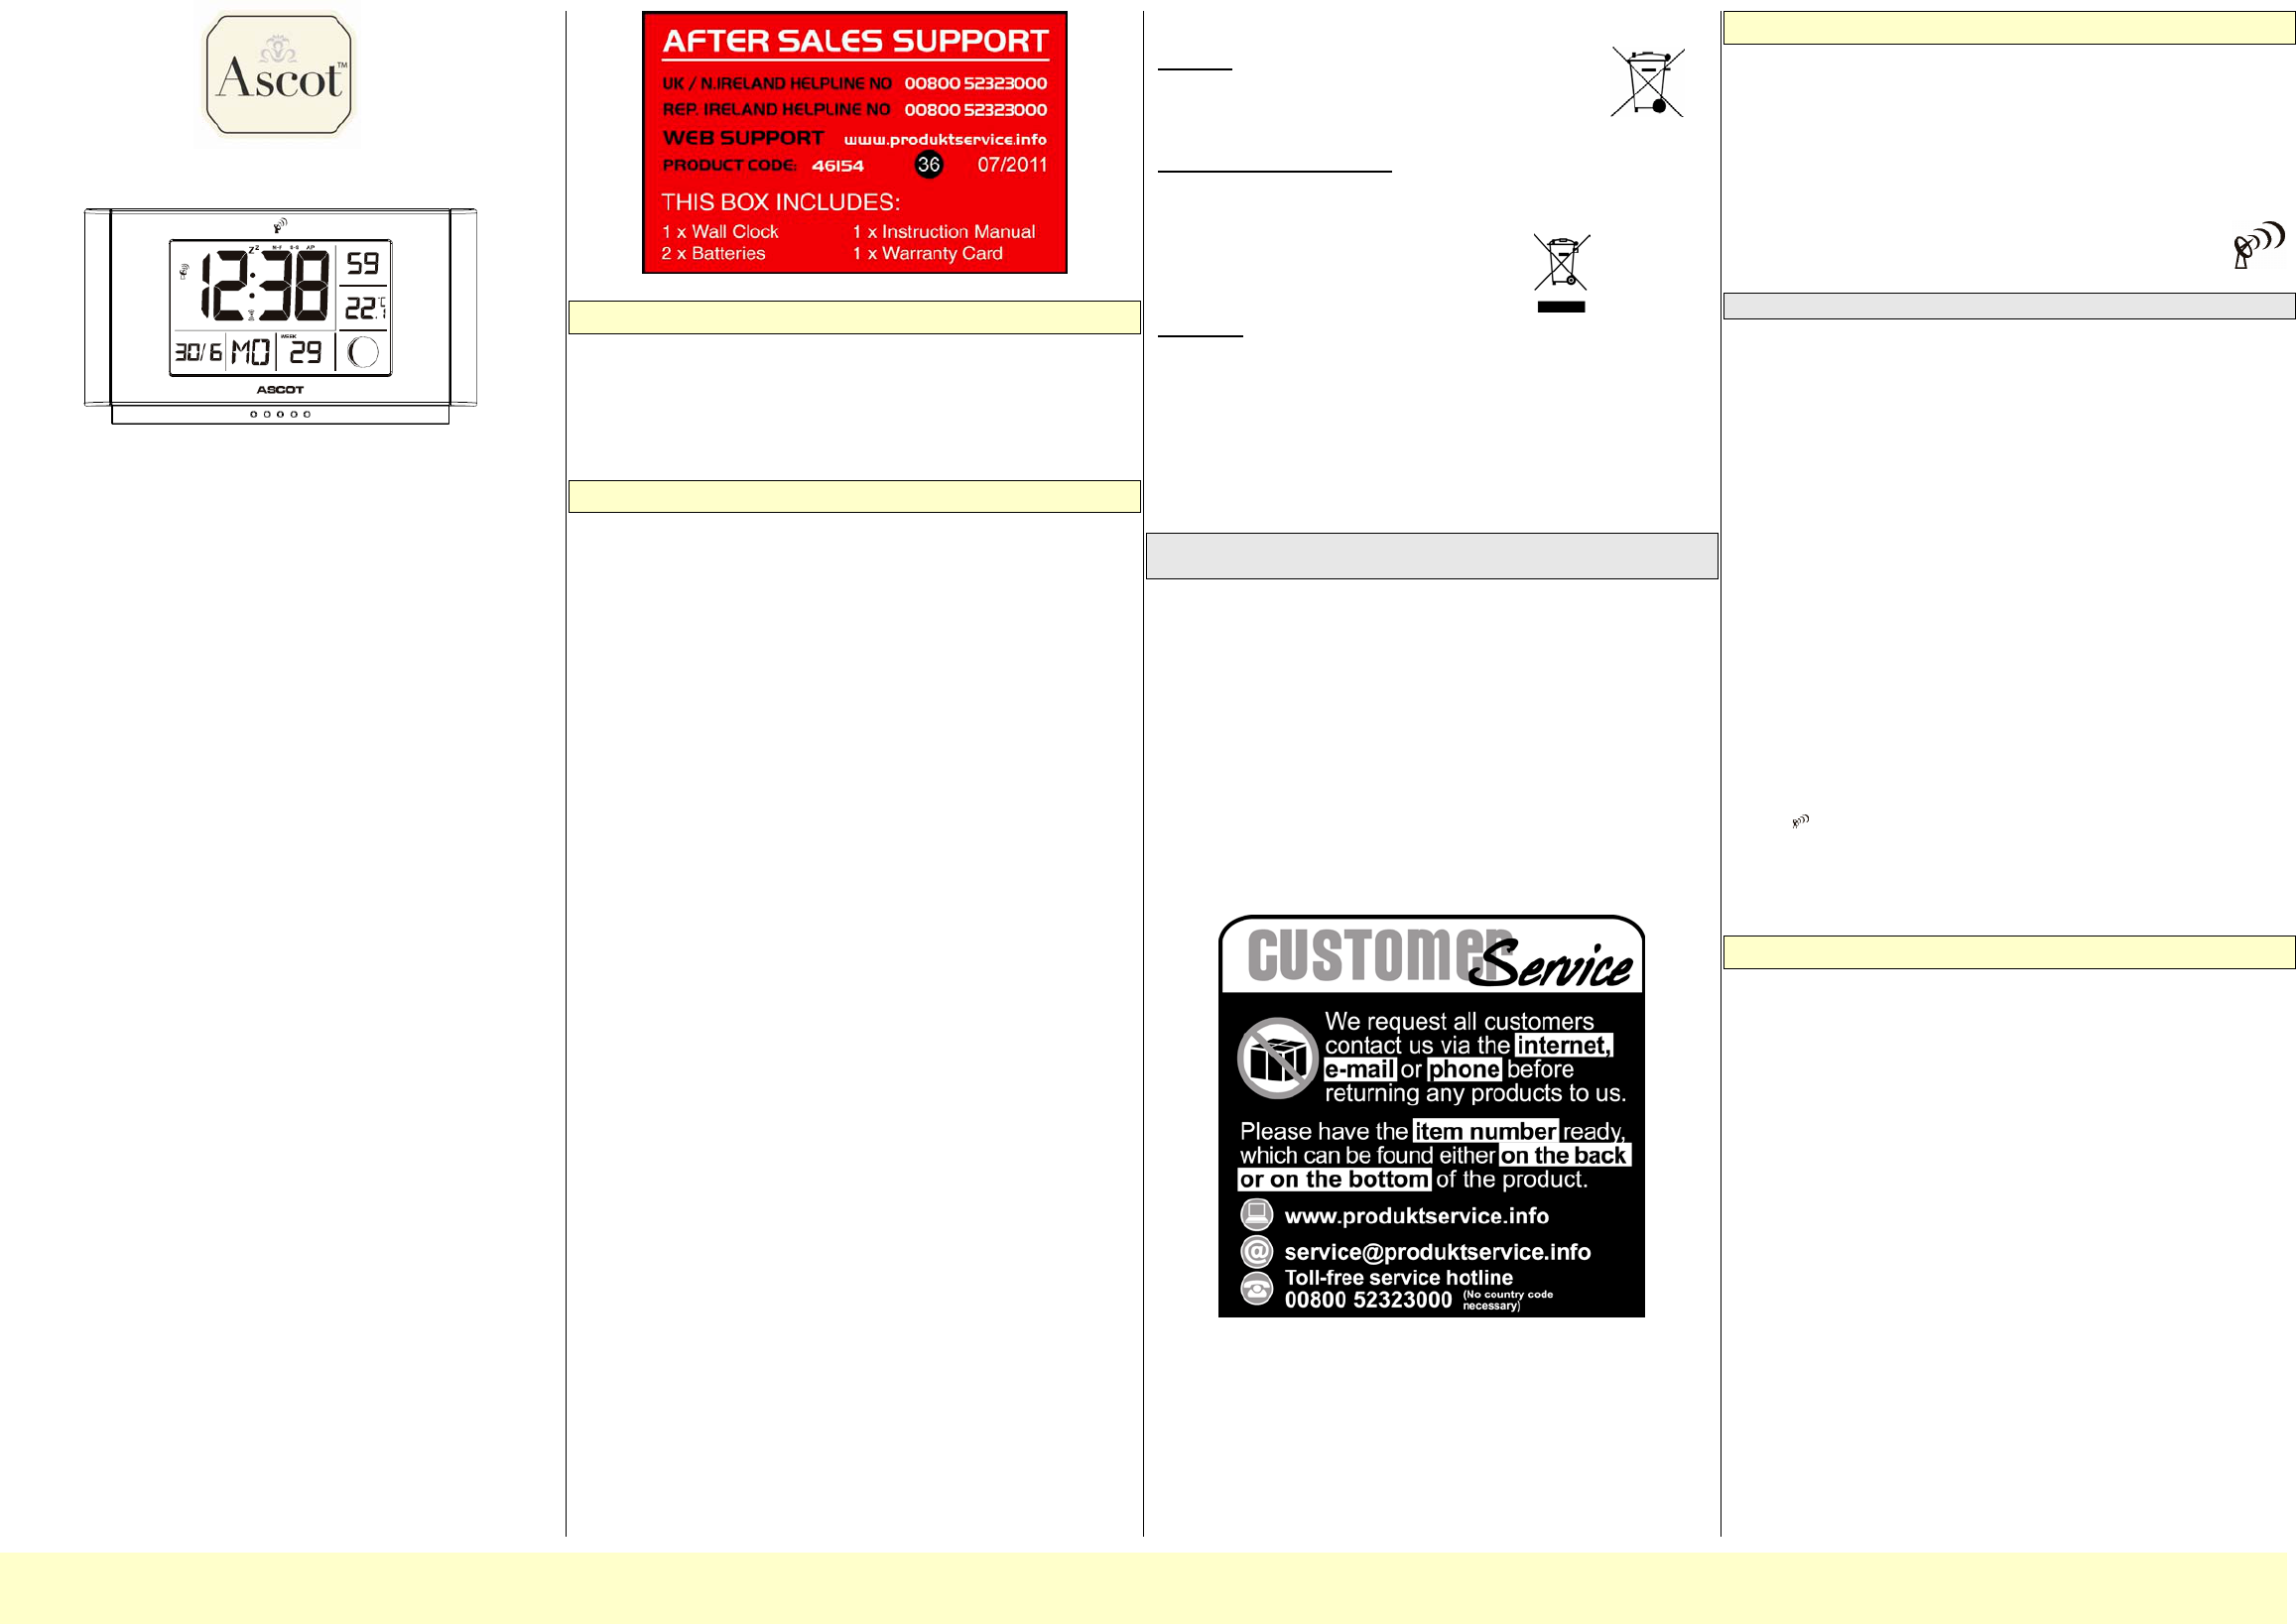
Model Number: AE1-FW-10SN
Radio Controlled LCD Wall Clock
AE1-FW-10SN
Operating instruction
Issue: July 2011
Table of Contents
1 Area of applica
2 Safety and mai
2.1 Safety structions .................................................................1
2.2 Operating nment condition
2.3 Ambient mperature .............................................................1
2.4 Battery operatio ...................................................................
2.5 Disposal
2.6 Cleaning and car ..................................................................
2.7 Storage
2.8 Information concerning thes
2.9 Scope delivery
3 Commissionin ...............................................................................
4 Modes/function
4.1 Function buttons ....................................................................2
4.2 Time d date ........................................................................2
4.2.1 Radio controlled time..................................................2
4.2.2 Manual setting ............................................................2
4.2.3 12/24-hour format .......................................................
4.2.4 Weekday display ..........................................................
4.2.5 Calendar week ............................................................2
4.2.6 Time zone ....................................................................2
4.3 Alarm
4.3.1 Setting the alarm .........................................................
4.3.2 Activating/deactivating the alarm and alarm rep
function .......................................................................
4.3.3 Displaying the alarm time ...........................................
4.3.4 Switching off the alarm ...............................................
4.4 Temperatur ..............................................................
4.5 Moon phase ...........................................................................2
4.6 Technical ecifica
5 Assembly .........................................................................................
6 Changing the batteri
7 Declaration of c
8 Troubleshooting .............................................................................2
AFTER SALES SUPPORT
Now you have purchased an Ascot product rest assured in the knowledge
that as well as your 3 year parts and labour warranty you have the added
peace of mind of dedicated helplines and web sup
What your 3 Year Warranty means:
Great care has gone into
therefore provide you with years of good service when used properly. In the
event of product failure within its intended use over the course of the first
3 years after date of purchase, we will remedy the problem as quickly as
possible once it has been brought to our atten
such an occurrence, or if you require any information about th
please contact us via our helpline support services, details of which
found both in this manual and on
1 Area of application
This radio controlled wall clock is designed exclusively for use as a clock. It
is intended for private use and is not suitable for commercial pur
use other than that described in these operating instructions is not permitted
and can result in damage
arising from improper use. Additional information and explanations can be
found in these operating instructions.
2 Safety and maintenance
2.1 Safety instructions
Please pay particular a
instructions provided. Doing so will ensure reli
packaging and operating instructions in a saf
transferred to the new owner
clock. Never open the housing oll clock as there are no serviceable
parts inside (the exception
change the batteries, see section
any items on top of the clock and do not exert an
To prevent damage do not touch the display with an
2.2 Operating environment conditions
Make sure your clock is not
heat and prolonged exposure torly in a car)
clock is protected against impact which can occur during normal, everyday
use. It is imperative that very strong
welding machines
deviations in time measurem
interference can
2.3 Ambient temperature
Your clock can be operated continuously within an ambient temperature
range of 0°
from -10° C to 0° C for brief periods. If the batteries have been removed
(see section 6 "Changing the batteries"), yo
temperatures ranging between -10° C and 50°
safely. Avoid high temperatures and permanently damp environments.
2.4 Battery operation
Your radio controlled wall clock is operated by 2 x LR6/R6 / AA 1.5V
batteries.
The following section provides
Never expose the batteries to excessive heat from direct sunlight, fire or
other such source as this increases
batteries. Do not disassemble
explosion! Keep batteries and
Batteries can be swallowed b
immediately. Prevent leak
skin, eyes and m
rinse the affected areas
advice. Always replace all of the batteries at the same time. Ignoring this
information may result in damage and possibly even to the batteries
exploding. You can find information on replacing the batteries under section
6 "Changing the batteries".
2.5 Disposal
Batteries: Batteries
disposed of correctly by shops s
authority waste departments where there are appropriate
containers.
Radio controlled wall clock:
If you wish to dispose of your radio
controlled wall clock, please adhere to
authority waste department can provide you with the releva
07/2011
KRIPPL-WATCHES Warenhandels GmbH
Maria-Theresia-Straße 41, 4600
Packaging: Dispose of the clo
regulations. Your local authority waste departmen
relevant information.
2.6 Cleaning and care
Only clean the clock using a soft, damp, lint-f
solvents or abrasive or gaseous cleaning agents. Make sure drops of water
are not left to accumu
discolouration. Do not expose the display to glaring sunlight or ultra-violet
radiation.
Note! There are no components inside the clo
maintenance or cleaning.
2.7 Storage
Remove the batteries if you do not intend using the radio
clock for a prolonged period. When storing the clock please observe the
information included under section 2.2 "Operatin
and section 2.3 "Ambient temperature"
2.8 Information concerning these operating
instructions
We have arranged th
locate the relevant information b
assistance for your clock canned by browsing our FAQs (frequen
asked questions), which can be accessed online via our product service page
(http://www.produktservice.info) EAN Code: 25072518
2.9 Scope of delivery
1 x radio controlled wall clo1-FW-10SN, 1 x set of operating
instructions, 1 x warranty card, 1 x warranty sticker, 2 x LR6/R6 / AA 1.5V
batteries, 2 x feet
3 Commissioning
We recommend that you read t
starting to use your radio controlled wall clock. Please pay particular
attention to section 4.1 "Function buttons" in order to become acquainted
with the clock.
1. The batteries have alread
however the contacts are
protrudes visibly between the battery compartment and the cover. You
can remove this strip without opening the batt
2. When you have removed the strip the LCD display will
illuminate, a brief audible
search procedure will start auto
by flashing radio waves
Note! No other s
This process can take approx. 2 to 5 minutes. When the radio signal is
received the date, time and moon phase displays are set automatically. The
radio waves above the ruminated continuously.
As is the case with wireless signals for mobile telephon
reception, it is p
receive a signal at ev
operates properly. The following
•
•
Concrete buildings, metal components and
•
•
Electronic devices such as TVs, computers, various household
appliances, transform
railway lines.
•
•
Atmospheric effects
•
•
The distance of the radio signal
(mountains, etc.). So-called "dead spots", which make reception
impossible, can occur anywhere.
•
•
Reception is better in rural ar
are fewer sources of interference at night compared to during the day.
Therefore reception is better
•
•
Weak batteries
3. The radio signal is generally synchronised with the radio controlled
time within 2 to 5 minutes, after which the radio tower s
constantly in the display. If this
"+/ " button for approx. 3 seconds. The radio waves above the radio
tower symbol start to flash and another
radio signal.
4. If it is not possible to receive a signal at your current location,
also set the tisection 4.2.2 "Manual setting").
4 Modes/functions
•
•
Clock (hours, minutes, seconds), 12/24-hour display
•
•
Date (month, day), calendar week display
•
•
Weekday in 6 different languages (German, English, Dutch
Spanish and Italian)
•
•
Temperature dis
•
•
Alarm (weekday alarm, weekend
•
•
Alarm repeat function
•
•
Automatic time adjustment and conversion from summe r/winter time
•
•
Time zone setting
•
•
Moon phase
•
•
Suitable for table assembly and wall mounting