5
ENGLISH
4
GETTING STARTED
In order for this product to function correctly please install the drivers on the
CD supplied with this product.
INSTALLATION FOR USERS OF WINDOWS¨ XP
A) Drivers Only For Typical Users
1 With your computer switched on, close down any programs that are currently running and insert the Saitek Smart
Technology CD into your CD-ROM drive.
2 When the Introduction Screen appears, click Install Software to continue. If the CD does not run automatically,
select Start from the Windows¨ Taskbar, then Run and type D:\Setup.exe and click OK - where D:\ is the letter of
your CD-ROM drive.
3 When the Welcome screen appears, click Next to continue.
4 After reading the Disclaimer, select the I accept the terms of the Disclaimer option and click Next to continue.
5 At the Driver Setup screen, if you havenÕt already done so, plug in your controller and click on Next.
6 At the Driver Setup screen, click Next to test your controller.
7 When the Saitek Controller screen appears, try out all your controllerÕs buttons and controls to show that it is
working properly. When you have finished, click OK. For more information on the use of the control panel, please
see the Maintaining your Controller Settings section of this manual.
8 At the Software Setup screen, select Do not install the SST Programming Software and click Next. The
Programming Software can be installed at a later date by following instruction (B). below
9 At the Registration screen, select Check this box to register now and follow the on-screen instructions, or you
can choose to select this option later.
10 Click on Finish to complete the installation.
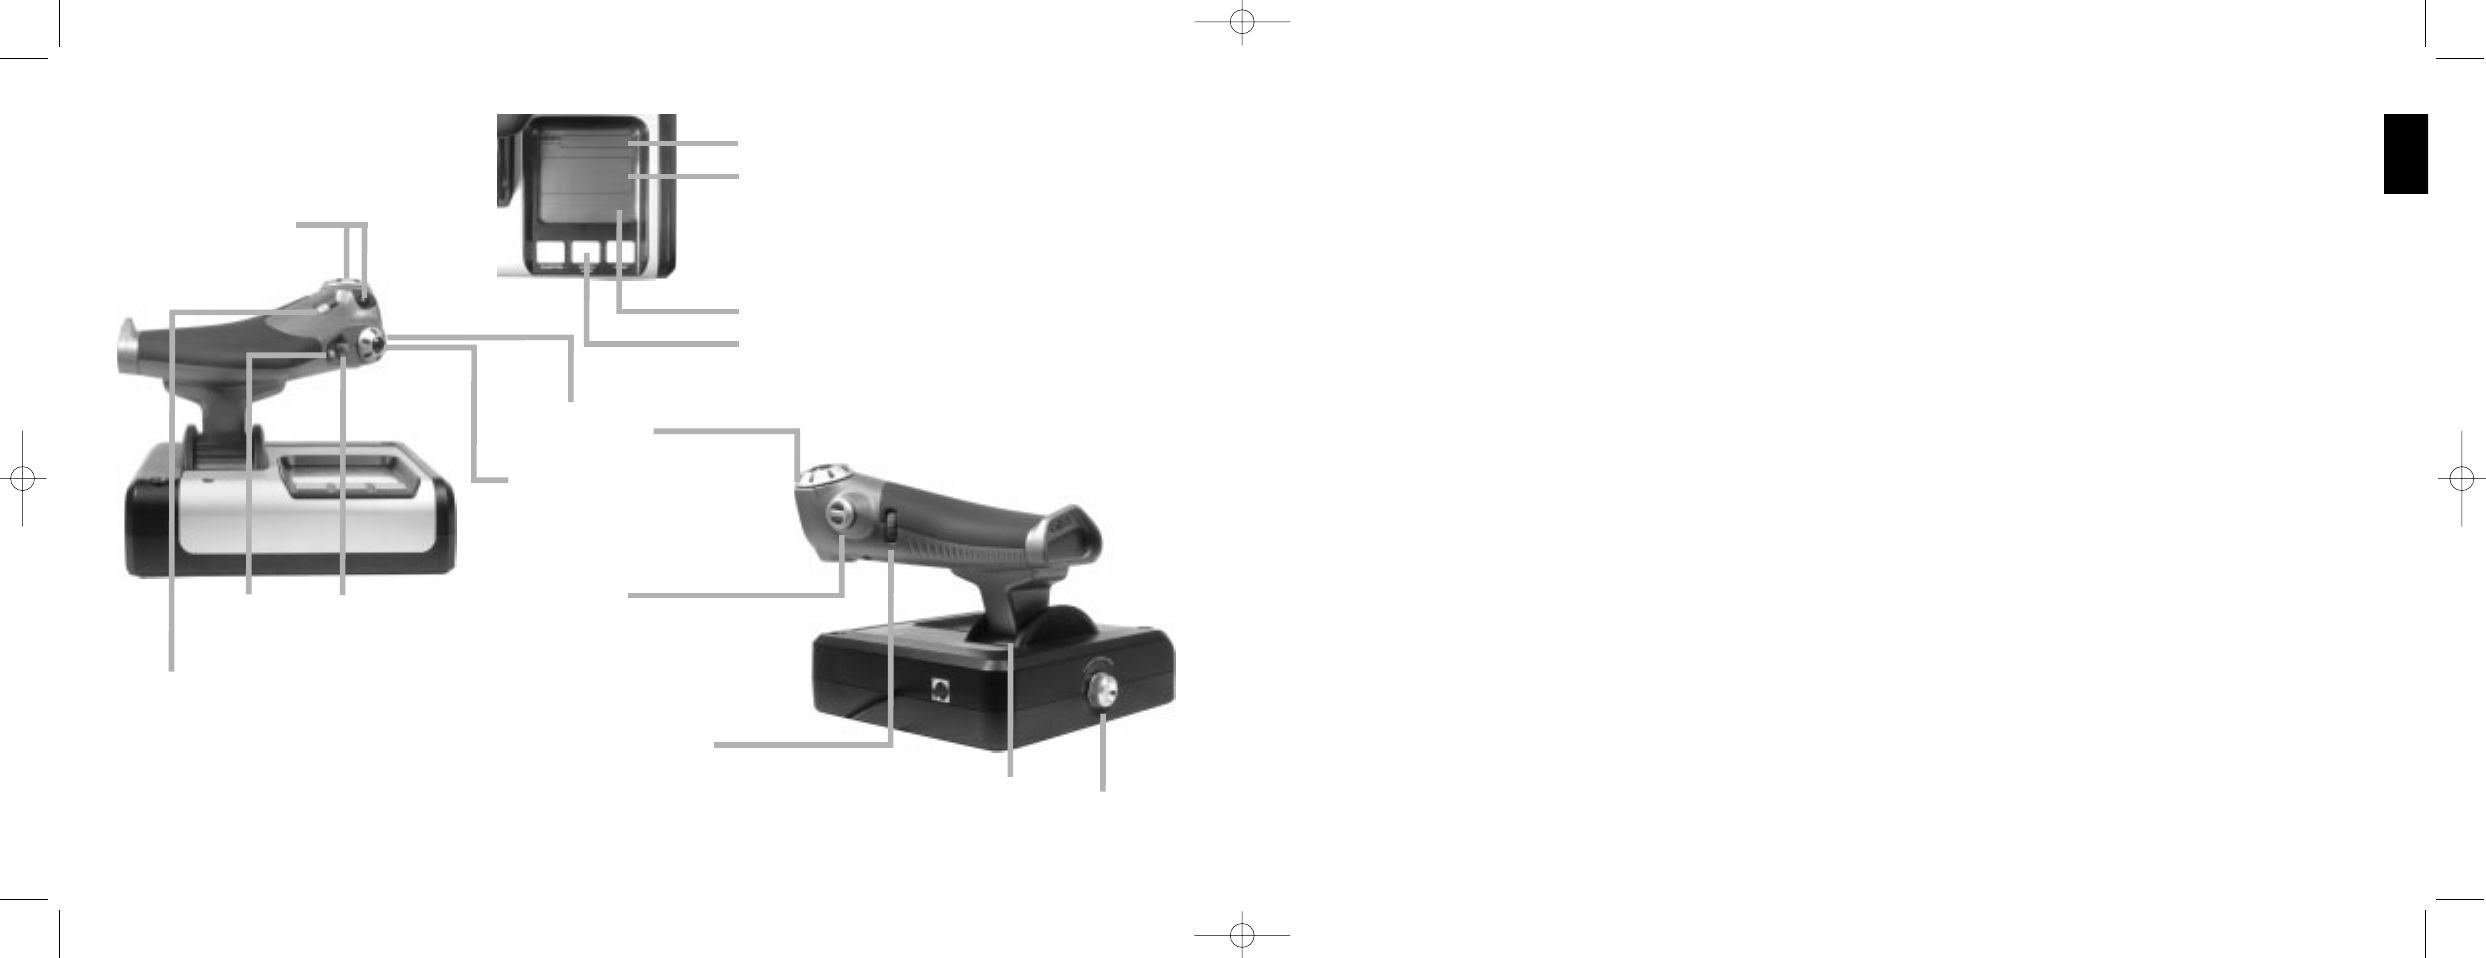
Multi-Function Display (MFD) screen indicates:
Mode and shift state
Mode state is determined by mode selector on the head of the stick.
User defined Text area
- indicates name of command assigned to button when activated.
- supplies name of profile in use and enables on-the-fly profile
selection. Profile can also be changed during gameplay by pressing
clutch button and scrolling though available profiles moving the point-
of-view hat switch up and down. Move the same button left to clear
current profile or right to activate profile.
Multi Time Displays
Time zone (set origin and destination local times in control panel)
Formattable date/month/time
Stopwatch for flight time
Throttle
2 Fire Buttons
Conveniently positioned on
throttle head for instant
access in the heat of the battle.
Progressive throttle control
Super smooth action with metal tension
adjustment and detents for programming idle
(0-20%) and afterburner (80-100%) settings.
Mouse controller,
which can also
function as a hat
switch.
8-way hat switch:
Select from multiple view
perspectives and assign
frequently used commands.
Two rotaries provide axes
for pitch, trim and yaw
settings.
Clutch (I) Button
Initiates 'safe mode' to allow
on-the-fly profile selection,
or to display button
functionality on MFD without
activating commands.
Smooth-action
thumb slider
provides axes for
pitch, trim and
yaw settings or
zoom in/out view.
Scroll wheel positioned on rear
of throttle for index finger
activation; includes built-in
button.
Left mouse button.