Part Names
English
Status Display
The status display shows the operating status of this product.
System Indicator Display
The operating status of this product is displayed with the system indicator
Function Buttons
The functions of the function buttons are indicated by the icons displayed at the bottom of the screen.
The functions of the buttons will depend on the displayed screen. (Icons are not displayed on some screens.)
In the playback screen or MENU screen, holding down the function button returns you to the previous screen.
Recording
1
2
3
4
During playback
5678
During MENU screen display
Inserting and Ejecting the microSDTM Card
Turn o the power to this product when inserting and removing the microSD card.
Inserting the microSD Card
Hold the top edge of the microSD card, position the
microSD card so that the terminals are facing the
backside of this product, and slowly insert it into the
microSD card slot until it clicks.
CAUTION
Do not insert the microSD card at an angle. Doing so may
cause damage.
Ejecting the microSD Card
Slowly push in the top edge of the microSD card until it
clicks (1 ). The lock will be released. Pull out the microSD
card (2 ).
5 Return to the previous menu
6 Previous file
7 Next file
8 Confirm
9 Back
0 Up
! Down
" Conrm
90!"
Exclusive App Installation
SpeciedInstallationPositiononFrontWindscreen
When installing this product to the inside of the front windscreen, install in a vehicle and in a position that satises all of
the following conditions.
• A
20% of the actual length, excluding parts overlapping weatherstrips, mouldings, etc. and masked parts) or is in the
shadow of the rear view mirror as viewed from the driver’s seat.
Note that “20%” as described above is a rough estimate. Please install the product in accordance with your
country’s laws and regulations.
• A
• A
pattern.
• A
• A
IMPORT
Always install this product in the specied installation position to ensure a safe eld of view while driving and to achieve
full performance from the product.
Pioneer is not liable for any damage, due to installation or use of the product.
This product
* Install this product in a location
where it will not interfere with the
driver’s eld of view,such as behind
the rear view mirror
Installation Angle
Forward Direction
of V
Front
Windscreend
Installation Direction
This
product
Front
Windscreend
Horizontal Direction
Ground
This product
Horizontal Direction
Within 20% of Height
A
Rear View Mirror This product
Range of Windscreen Wipers
A
Air Bag
1 Clean the installation area
2 Install this product
1: Fix the Suction Mount Cradle to the Main Unit
2: Install at the specied position of the front
windscreen, adjusting the direction to make the
image horizontal.
CAUTION
• Make sure that the surface of the front windscreen is
clean and dry
• Firmly press the suction cradle installed on the
windscreen.
• Do not install the cradle by itself. Always use it
connected with the Dash Camera.
• Never touch the surface of the LCD.
• Install rmly so that it does not come o. Incorrect
installation may cause this to drop while driving and
cause an accident. Inspect the installation state from
time to time.
• T
detaching, you may attach the safety strap (included in
the box).
3 Route the cable
Route the power cable to the passenger seat side.
Connect the power supply depending on its type. →
“Connecting the Power Cable”
4 Turn the vehicle engine on to display the
recording screen
Note
A
purchased. Peel o this lm.
Connecting the Power Cable
Cigarette Lighter Power Cable Connection
Fully insert this into the vehicle accessory socket to make a good connection. (The location of the accessory socket will
dier depending on the vehicle.)
CAUTION
The accessory socket will be extremely hot immediately after using the cigarette lighter
power cable may melt or short circuit if it is plugged in while the socket is hot. Wait for the socket to cool before plugging
in the cigarette lighter power cable.
Accessory
socket
Cigarette lighter
power cable
00:00
2021/01/05 20:00:13
21 33 44 55 66 77 88
9
1 Recording in progress
2 Elapsed recording time
3 Event recording status
4 Parking Mode
5 Sound recording
6 Wireless connection status
7 GPS reception status
8 Power status
9 Date / Time / vehicle speed
Blinking Green Menu Displayed Normal Recor Recor
Error Has Occur
(Including microSD
Card not Inserted)
Illuminated green — — —
Illuminated red — — —
Blinking red ———
Not illuminated ———
12 3
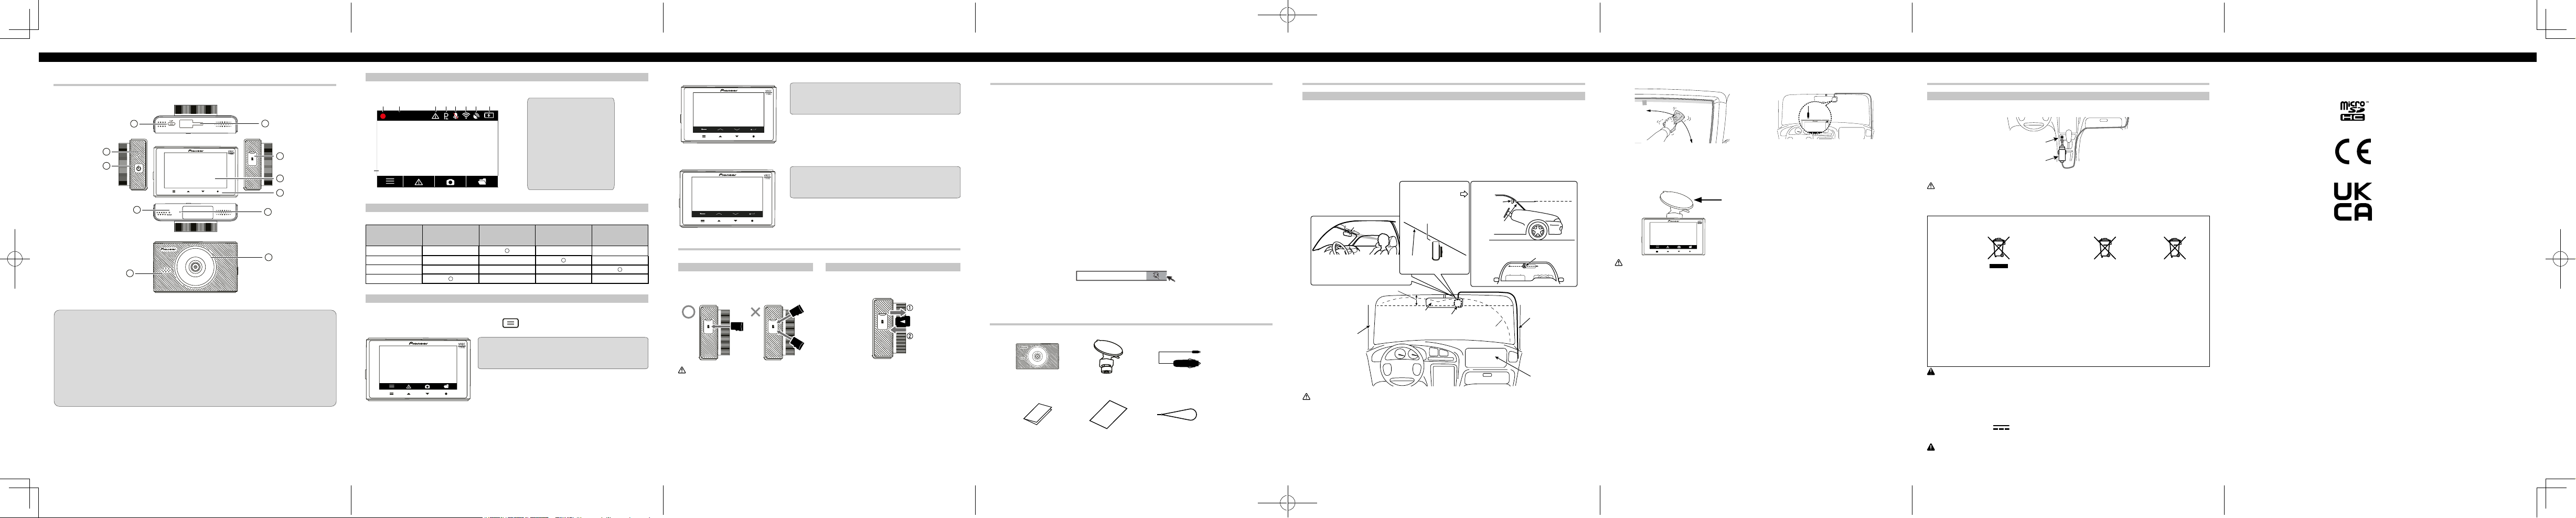
Check
The exclusive app “Dash Camera Connect” can be used on iPhone or Android™ smartphone to check
the video recorded on this product or make settings on the screen of iPhone To
use this app, a wireless connection must be made between this product and iPhone/Android™ smartphone
beforehand.
Set the wireless connection function of this product to on. →“This Product Settings”
Operate the iPhone or Android™ smartphone to select this product as the wireless
connection device. The SSID name (access point name) and password of this product can
be checked in the wireless connection settings screen.
• Only one iPhone/Android™ smartphone device can be connected to this product at any one time.
When a second device is connected, the first connected device is disconnected.
• While a wireless connection is made, no operations can be performed on this product. If a
function button is pressed while a wireless connection is made, a message will be displayed
prompting to wireless wireless
be disconnected, and operations on this product will be enabled.
• You can change the SSID name of this product by operating the exclusive app “Dash Camera
Connect”. Note, however, when the SD card is formatted, the SSID name returns to its default
setting.
• It is recommended to enter the search term “Dash Camera Connect” in the search field to search for
the application.
1
2
• SD, microSD and microSDHC Logo are trademarks of SD-3C LLC.
• EU Conformity marking.
• The Wi-Fi CERTIFIED™ Logo is a registered trademark of Wi-Fi Alliance®.
• iPhone is a trademark of Apple Inc., registered in the U.S. and other countries.
1
4
10
5
9
6
2
3
7
8
11
Top
Bottom
Front
Back
Right sideLeft side
1 Power Port
Connect the cigarette lighter power cable.
2 microSD card Slot
Up to 32GB microSD Card capacity
3 Reset Button
Press this button with the tip of a ballpoint
pen to reset this product.
4 LCD
5 Function Buttons
6 Lens
7 Speaker
8 System Indicator
9 Microphone
a Suction Mount Cradle connection point
b ON/OFF Power Button Main Unit×1 Suction Mount Cradle
×1 Cigarette Lighter Power
Cable 3.5 m×1
Quick Start Guide×1 Warranty×1 Safety Strap×1
Part Names
English
Status Display
The status display shows the operating status of this product.
System Indicator Display
The operating status of this product is displayed with the system indicator .
Function Buttons
The functions of the function buttons are indicated by the icons displayed at the bottom of the screen.
The functions of the buttons will depend on the displayed screen. (Icons are not displayed on some screens.)
In the playback screen or MENU screen, holding down the function button returns you to the previous screen.
Recording
1 Main menu display
2 Manual recording of eve nts (Event Recording)
3 T ake photo
4 Playback recorded media
During playback
56 78
During MENU screen display
Inserting and Ejecting the microSD TM Card
T urn o the power to this product when inserting and removing the microSD card.
Inserting the microSD Card
Hold the top edge of the microSD card, position the
microSD card so that the terminals are facing the
backside of this product, and slowly insert it into the
microSD card slot until it clicks.
CAUTION
Do not insert the microSD card at an angle. Doing so may
cause damage.
Ejecting the microSD Card
Slowly push in the top edge of the microSD card until it
clicks ( 1 ). The lock will be released. Pull out the microSD
card ( 2 ).
5 Return to the previous menu
6 Previous file
7 Next file
8 Confirm
9 Back
0 Up
! Down
" Conrm
90 ! "
Exclusive App Installation
Specied Installation Position on Front W indscreen
When installing this product to the inside of the front windscreen, install in a vehicle and in a position that satises all of
the following conditions.
• A position where this entire product is within 20% of the top edge of the height of the front windscreen (range withi n
20% of the actual length, excluding parts overlapping weatherstrips, mouldings, etc. and masked parts) or is in the
shadow of the rear view mirror as viewed from the driver ’ s seat.
Note that “20%” as described above is a rough estimate. Please install the product in accordance with your
country’ s laws and regulations.
• A position where the lens p art of this product is within the wiping range of the wiper .
• A position where the lens p art of this product does not hang over the sunshade and black ceramic lines/black cera mic
pattern.
• A position where this produ ct faces in the horizontal dire ction to the front and side to side.
• A position where the powe r cable can be routed without unnecessary force.
IMPORT ANT
Always install this product in the specied installation position to ensure a safe eld of view while driving and to achieve
full performance from the product.
Pioneer is not liable for any damage, due to installation or use of the product.
This product
* Install this product in a location
where it will not interfere with the
driver ’ s eld of view ,such as behind
the rear view mirror .
Installation Angle
Forward Direction
of V ehicle
Front
Windscreend
Installation Direction
This
product
Front
Windscreend
Horizontal Direction
Ground
This product
Horizontal Direction
Within 20% of Height
A Pillar
Rear V iew Mirror This product
Range of Windscreen Wipers
A Pillar
Air Bag
1 Clean the installation area
2 Install this product
1 : Fix the Suction Mount Cradle to the Main Unit
2 : Install at the specied po sition of the front
windscreen, adjusting the direction to make the
image horizontal.
CAUTION
• Make sure that the surface of the front windscreen is
clean and dry , before attaching the cradle.
• Firmly press the suction cradle installed on the
windscreen.
• Do not install the cradle by itself. Always use it
connected with the Dash Camera.
• Never touch the surface of the LCD.
• Install rmly so that it does not come o. Incorrect
installation may cause this to drop while driving and
cause an accident. Inspect the installation state from
time to time.
• T o avoid the windscreen m ounted cradle from
detaching, you may attach the safety strap (included in
the box).
3 Route the cable
Route the power cable to the passenger seat side.
Connect the power supply depending on its type. →
“Connecting the Power Cable”
4 T urn the vehicle engine on to display the
recording screen
Note
A protective lm is applied to the lens when the product is
purchased. Peel o this lm.
Connecting the Power Cable
Cigarette Lighter Power Cable Connection
Fully insert this into the vehicle accessory socket to make a good connection. (The location of the accessory socket will
dier depending on the vehicle.)
CAUTION
The accessory socket will be extremely hot immediately after using the cigarette lighter . The tip of the cigarette lighter
power cable may melt or short circuit if it is plugged in while the socket is hot. W ait for the socket to cool before plugging
in the cigarette lighter power cable.
Accessory
socket
Cigarette lighter
power cable
00:00
2021/01/05 20:0 0:13
21 33 44 55 66 77 88
9
1 Recording in progress
2 Elapsed recording time
3 Event recording status
4 Parking Mode
5 Sound recording
6 Wi-Fi connection status
7 GPS reception status
8 Power status
9 Date / Time / vehicle speed
Blinking Gr een Menu Displayed Nor mal R ecor ding R ecor ding Event
Er r or Has Occur r ed
(Including micr oSD
Car d not Inserted)
Illuminated green — — —
Illuminated red — — —
Blinking red ———
Not illuminated ———
12 3
Check the Accessories
The exclusive app “Dash Camera Connect” can be used on iPhone or Android™ smartphone to check
the video recorded on this product or make settings on the screen of iPhone or Android™ smartphone.
To use this app, a Wi-Fi connection must be made between this product and iPhone/Android™ smartphone
beforehand.
Set the Wi-Fi function of this product to on. →“This Product Settings”
Operate the iPhone or Android™ smartphone to select this product as the Wi-Fi connection
device. The SSID name (access point name) and password of this product can be checked
in the Wi-Fi settings screen.
• Only one iPhone/Android™ smartphone device can be connected to this product at any one time.
When a second device is connected, the first connected device is disconnected.
• While a Wi-Fi connection is made, no operations can be performed on this product. If a function
button is pressed while a Wi-Fi connection is made, a message will be displayed prompting you
to break the Wi-Fi connection. If you select [Yes], the Wi-Fi connection will be disconnected, and
operations on this product will be enabled.
• You can change the SSID name of this product by operating the exclusive app “Dash Camera
Connect”. Note, however, when the SD card is formatted, the SSID name returns to its default
setting.
• It is recommended to enter the search term “Dash Camera Connect” in the search field to search for
the application.
1
2
•SD, microSD and microSDHC Logo are trademarks of SD-3C LLC.
•EU Conformity marking.
•UK Conformity marking.
• iPhone is a trademark of Apple Inc., registered in the U.S. and other countries.
1
4
10
5
9
6
2
3
7
8
11
To p
Bottom
Fr o nt
Fr o nt
Right side Le ft side
1 Power Port
Connect the cigarette lighter power cable.
2 microSD card Slot
Up to 32GB microSD Card capacity
3 Reset Button
Press this button with the tip of a ballpoint
pen to reset this product.
4 LCD
5 Function Buttons
6 Lens
7 Speaker
8 System Indicator
9 Microphone
a Suction M ount Crad le connection point
b 11 ON/OF F Power Button Main Unit×1 Suction Mount Cradle
×1 Cigarette Lighter Power
Cable 3.5 m ×1
Quick Start Guide×1 Warranty×1 Safety Strap×1
− 3 −
English
P recaution
Certain co u n tr y an d state laws may p ro h ib it o r rest rict th e p lacem en t an d u se o f th is
product in your vehicle. Please comply with all applicable laws and regulations
re ga rding the use , insta lla tion a nd ope ration of this product. It is the use r ’ s
responsibility in compliance with all applicable laws and ordinance.
Information for users on collection and disposal of old equipment and used batteries
(Symbol for equipment) (Symbol examples for batteries)
Pb
These symbols on the products, packaging, and/or
accompanying documents mean that used electrical and electronic products and batteries should not be mix
with general household waste.
For proper tr
collection points in accordance with your national legislation.
By disposing of these products and batteries correctly, you will help to save valuable resources and prevent any potential
negative effects on human health and the environment which could otherwise arise from inappropriate waste handling.
For more information about collection and recycling of old products and batteries, please contact your local municipality
your waste disposal service or the point of sale where you purchased the items
These symbols are only valid in the European Union.
For countries outside the European Union:
If you wish to discard these items, please contact your local authorities or dealer and ask for the correct method of
disposal.
CAUTION
•There is a danger of explosion if the battery is incorrectly replaced. Replace only with the same or
equivalent type.
• Do not expose a battery to high or low extreme temperatures during use, storage or transportation.
•Do not dispose of a battery into fire or a hot oven, or crush mechanically or cut a batter
result in an explosion.
• The graphical symbol placed on the product means direct current.
WARNING
•Batteries (battery pack or batteries installed) must not be exposed to excessive heat such as sunshine,
fire or the like.
Wireless Connection
• On-board (for connection of iOS/Android exclusive
apps) 802.1
• Output power: + 17 dBm Max.
• Frequency band(s): 2400 - 2483 MHz
• iOS is a trademark or registered trademark of Cisco in the U.S. and other countries.
• Android is a trademark of Google LLC.
Dash Camera Connect