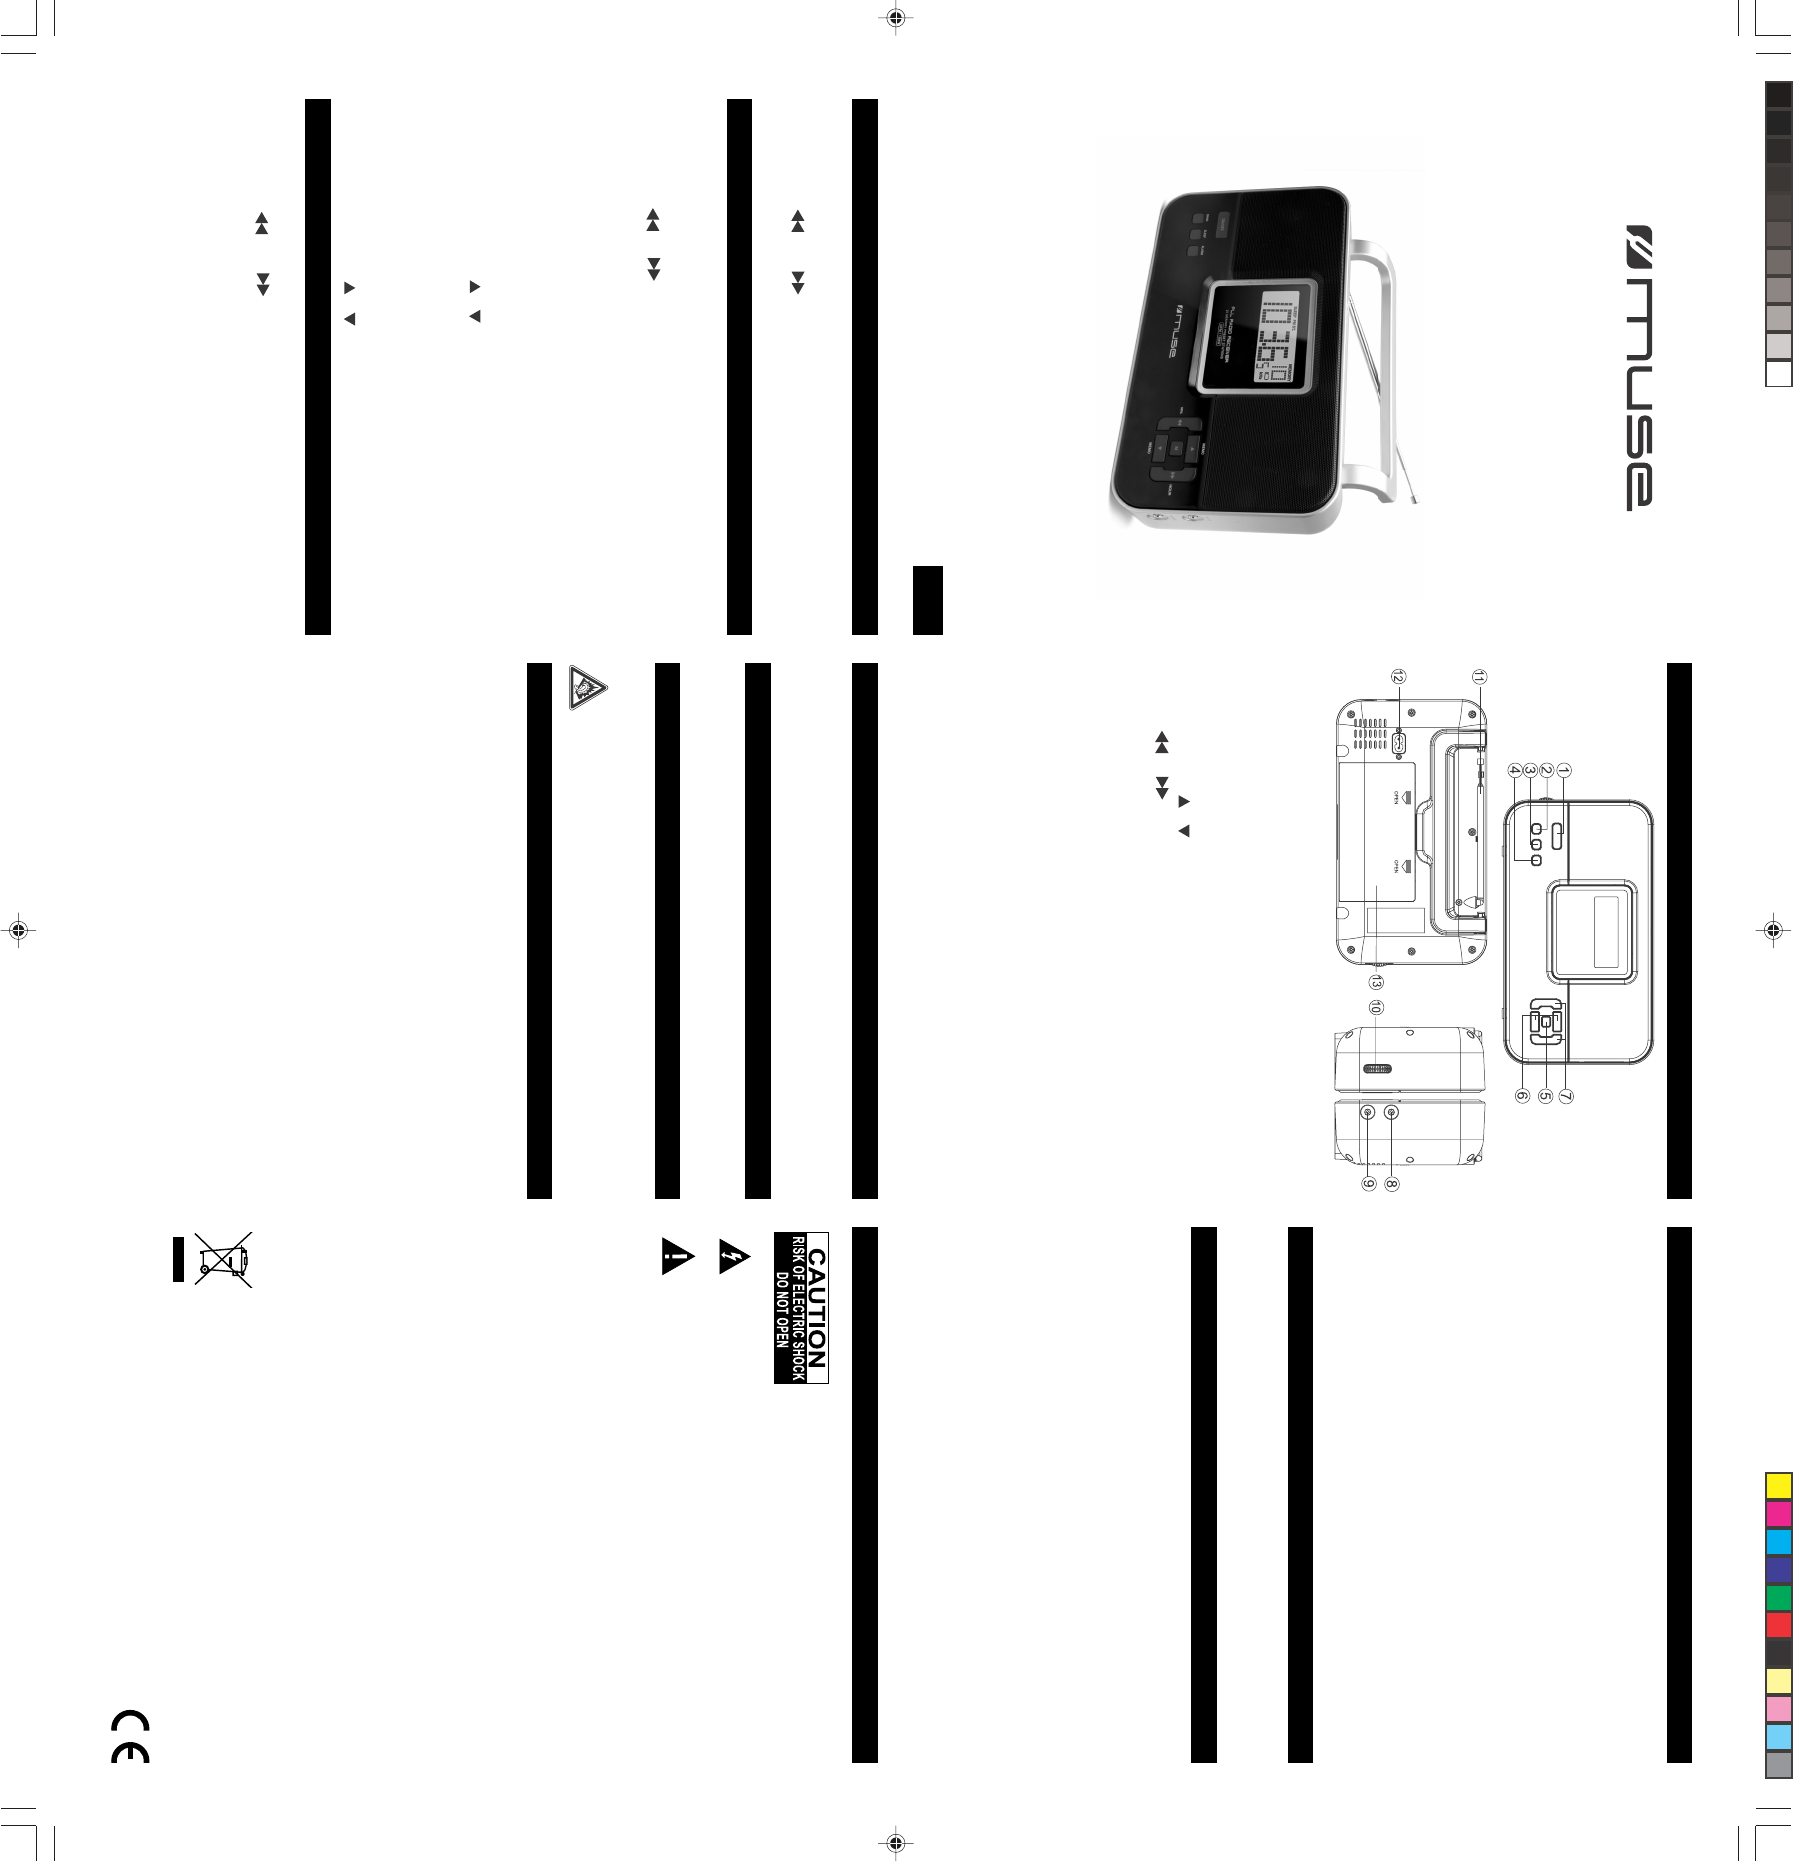
1. Remove the battery compartment door by applying thumb pressure to
area indicated on battery door and then lift the door out and off the cabinet.
2. Insert 4 x 1.5 V “D” / R20 / UM1 batteries with the + and - marks correctly
aligned (not included) into the compartment.
3. Replace the compartment door.
Notes on batteries
• Do not mix different types of batteries or old batteries with new ones.
• Never recharge the batteries, apply heat to them or take them apart.
• Battery shall not be exposed to excessive heat such as sunshine,fire or
the like.
• Attention should be drawn to the environmental aspects of battery disposal.
• The batteries need to be replaced when:
The volume decreases, or sound is distorted during operation.
NOTE:In order to avoid leakage, always remove the batteries when unit will
not be used for a long period of time.
POWER ON / OFF THE UNIT
1. Press the ON/OFF to turn on the radio. The display will change to show
radio frequency.
2. Press the ON/OFF to turn off the radio. The display will revert to current
time.
SET CLOCK
After the batteries are installed, the display will show “00:00”
1. Press MEMO/SET once and you will see the flashing display.
2. Press MIN. or HOUR to set the time.
3. Press MEMO/SET again when finished.
RADIO
Using the radio
1. Press the ON / OFF to turn on the radio.
2. Press BAND to select AM or FM bands.
3. Press MIN. / HOUR or to tune to your desired radio station.
4. Adjust the volume by (10).
To enhance radio reception ability:
FM: Extend and rotate the antenna
AM: Rotate and move the unit horizontally for optimum reception.
SETTING THE ALARM
1. Press ALARM that you will see a flash ‘ ALARM’ on the display.
2. Press MIN. / HOUR to adjust your desired alarm time. The
display will revert to current time after 5 seconds from your adjustment.
TO CANCEL THE ALARM SETTING
1. Press MEMO / SET that the display will flash.
2. Press ALARM twice and the ‘ALARM’ indicator disappear, the alarm
stop.
SLEEP TO MUSIC
1. Press SLEEP to select among off 90.80.70……10 minutes. Then change
to the radio automatically and you will see the ‘SLEEP’ on the display.
Connect the earphones ( not included) to the earphone jack on unit.
LISTENING WITH EARPHONES
In full power, the continuous listening of the player may damage
the user’s hearing.
CONNECTING THE AUX
Connect your auxiliary source ( e.g.mp3 player) to the AUX input jack on
the right side of the unit, the unit will change to AUX function automatically.
CONNECTING POWER CORD
1. Connect the detachable AC cord (included) to the AC socket on the rear
of the unit.
2. Plug the power cord into 230V-50Hz AC outlet.
MORE INFORMATION
CAUTION: To reduce the risk of electric shock, do
not remove the cover (or back). There are no user
serviceable parts inside the unit. Refer all servic-
ing to qualify personnel.
The exclamation point within the triangle is a warning sign alerting
the user of important instructions accompanying the product.
The lightening flash with arrowhead symbol within the triangle is a
warning sign alerting the user of “ dangerous voltage” inside the
unit.
IMPORTANT!
The ventilation should not be impeded by covering the ventilation open-
ings with items such as newspapers, table-cloths, curtains, etc.
No naked flame sources, such as lighted candles, should be placed on
the apparatus.
The use of apparatus in moderate climates.
The apparatus should not be exposed to dripping or splashing.
Ensure a minimum distance of 5cm around the apparatus for sufficient
ventilation.
Do not place objects filled with liquids, such as vases, on the apparatus.
Excessive sound pressure from earphones and headphones can cause
hearing loss.
The marking plate is located on the botton of unit.
Mains plug is used as the disconnect device and it shall remain readily
operable. To be completely disconnected the power input, the mains plug
of the apparatus shall be disconnected from the mains completely. The
mains plug should not be obstructed or should be easily accessed during
intended use.
Under the influence of electrical fast transient or/and electrostatic
phenomenon, the product may malfunction and require user to power
reset.
-
-
-
-
-
-
-
-
-
-
If at any time in the future you should need to dispose of this
product please note that Waste electrical products should not be
disposed of with household waste. Please recycle where facili-
ties exist. Check with your Local Authority or retailer for recycling
advice.(Waste Electrical and Electronic Equipment Directive)
1 - GB
3 - GB4 - GB
Saving Preset Stations
1. Tune to a station to be saved as a preset station ( see “Using the Radio”).
2. Press MEMO / SET once and you will see a flashing ‘MEMORY’ on the
display.
3. Press MEMO button / to select a preset number.
4. Press MEMO / SET to save station as selected preset number.
5. Repeat above steps to preset a maximum of 10 stations for AM and FM
respectively.
Selecting Preset Stations
1. Make sure you are in preset mode.
2. Press MEMO button / to select a preset number.
Stopping the alarm
When the alarm is triggered, press ALARM button to stop it.
Note:
- The AC cord must be unplugged from both the jack on the unit and the
power outlet for the unit to run on the batteries.
- When the AC cord is connected from the main unit to the power outlet, the
power source automatically switches to AC. You may leave the batteries
inside the unit if you wish. There is no battery consumption when the AC
cord is connected to a power outlet and/or the the unit.
2 - GB
5 - GB
Hulp nodig? Stel uw vraag in het forum
Misbruik melden
Gebruikershandleiding.com neemt misbruik van zijn services uitermate serieus. U kunt hieronder aangeven waarom deze vraag ongepast is. Wij controleren de vraag en zonodig wordt deze verwijderd.
Product:
Spelregels forum
Om tot zinvolle vragen te komen hanteren wij de volgende spelregels:
lees eerst de handleiding door;
controleer of uw vraag al eerder door iemand anders is gesteld;
probeer uw vraag zo duidelijk mogelijk te stellen;
heeft u een probleem en al geprobeerd om dit op te lossen, vermeld dit erbij aub;
heeft u een oplossing gekregen van een bezoeker dan horen wij dat graag in dit forum;
wilt u een reactie geven op een vraag of antwoord, gebruik dan niet dit formulier maar klik op de knop 'reageer op deze vraag';
uw vraag wordt direct op de website gezet; vermijd daarom persoonlijke gegevens in te vullen;
Belangrijk! Als er een antwoord wordt gegeven op uw vraag, dan is het voor de gever van het antwoord nuttig om te weten als u er wel (of niet) mee geholpen bent! Wij vragen u dus ook te reageren op een antwoord.
Belangrijk! Antwoorden worden ook per e-mail naar abonnees gestuurd. Laat uw emailadres achter op deze site, zodat u op de hoogte blijft. U krijgt dan ook andere vragen en antwoorden te zien.
Abonneren
Abonneer u voor het ontvangen van emails voor uw Muse M-087 bij:
nieuwe vragen en antwoorden
nieuwe handleidingen
U ontvangt een email met instructies om u voor één of beide opties in te schrijven.
Ontvang uw handleiding per email
Vul uw emailadres in en ontvang de handleiding van Muse M-087 in de taal/talen: Engels als bijlage per email.
De handleiding is 1,03 mb groot.
U ontvangt de handleiding per email binnen enkele minuten. Als u geen email heeft ontvangen, dan heeft u waarschijnlijk een verkeerd emailadres ingevuld of is uw mailbox te vol. Daarnaast kan het zijn dat uw internetprovider een maximum heeft aan de grootte per email. Omdat hier een handleiding wordt meegestuurd, kan het voorkomen dat de email groter is dan toegestaan bij uw provider.
Uw handleiding is per email verstuurd. Controleer uw email
Als u niet binnen een kwartier uw email met handleiding ontvangen heeft, kan het zijn dat u een verkeerd emailadres heeft ingevuld of dat uw emailprovider een maximum grootte per email heeft ingesteld die kleiner is dan de grootte van de handleiding.
Er is een email naar u verstuurd om uw inschrijving definitief te maken.
Controleer uw email en volg de aanwijzingen op om uw inschrijving definitief te maken
U heeft geen emailadres opgegeven
Als u de handleiding per email wilt ontvangen, vul dan een geldig emailadres in.
Uw vraag is op deze pagina toegevoegd
Wilt u een email ontvangen bij een antwoord en/of nieuwe vragen? Vul dan hier uw emailadres in.