Technical Improvement
After the instruction manual had been printed, the unit was
equipped with the function “Video Motion Detector”. This
sheet will provide the required information for optimum
use of this function.
1 Adjusting the Function “Video Motion
Detector”
For the function “Video
Motion Detector”, the
adjusting menu has been
extended by the sub-
menu MOTION.
Please also note the modifications in the submenus
ALARM, SYSTEM, and EVENT described below.
1.1 ALARM (chapter 9.5 of the instruction manual)
ALARM DURATION
The alarm duration adjusted here does not only apply to
external alarms and alarms in case of video signal loss
but also to alarms triggered by the internal motion
detector.
RECORD IPS, QUALITY, RECORD MODE
The recording parameters adjusted here apply both to
recordings triggered by an external alarm signal and to
recordings triggered by the internal motion detector.
1.2 MOTION
Select the corresponding
line with the key or .
CAM1 – CAM4
Motion detection can be separately defined and acti-
vated/deactivated for each camera channel in the lines
CAM1 to CAM4. With the corresponding line selected,
the respective camera picture is displayed in the back-
ground. With the key or , the cursor can be moved
to the five adjusting fields of the line.
1) In the column SENS, adjust the sensitivity between 01
(maximum sensitivity) and 99 (minimum sensitivity)
with the key + or
-
.
2) In the column MD-NUM, adjust the minimum number
(01 – 99) of detection fields where a movement must
occur to activate motion detection with the key + or
-
.
With this setting, motion detection can be matched to
the size of the objects moving through the surveillance
zone. If motion detection is e. g. not to respond to small
animals moving through the surveillance zone, the
value of the minimum number must not be too small.
3) In the column RE, adjust the reference picture to which
the current picture is compared with the key + or
-
. The
higher the value, the more time has passed since the
reference picture and the more sensitively the motion
[MOTION]
SENS MD-NUM RE DET
CAM1 70 03 64 OFF AREA
CAM2 70 03 64 OFF AREA
CAM3 70 03 64 OFF AREA
CAM4 70 03 64 OFF AREA
MOTION RECORD OFF
DAY START END
DAILY 00:00 00:00
[ALARM]
ALARM ENABLE YES
ALARM DURATION 10 SEC
RECORD IPS 25
QUALITY HIGH
RECORD MODE MULTIPLEX
[MENU]
TIMER
CAMERA
RECORD
ALARM
DWELL
PIP
→ MOTION
DISPLAY
REMOTE
USER
SYSTEM
EVENT
detector responds to slow movements in the surveil-
lance zone.
4) In the column DET, activate (ON) or deactivate (OFF)
motion detection for the camera channel with the key +
or
-
.
5) In the submenu AREA, the surveillance zone for motion
detection is defined for the camera channel. With AREA
selected, press the key ENTER.
With the keys , , , and move the cursor to the
desired detection field:
– To activate/deactivate the detection field selected,
press the key .
– To activate/deactivate all detection fields of the line
selected, press the key +.
– To activate/deactivate all detection fields, press the
key
-
.
If a movement is detected in the activated fields, these
fields become violet. Thus, it is possible to check al-
ready during the adjustment if an optimum surveillance
zone for motion detection has been selected.
To exit the submenu AREA, press the key MENU.
MOTION RECORD
With the key + or
-
select ON or OFF:
With ON selected and a movement detected, the record-
er will automatically go to alarm recording, and for live
surveillance, the symbol is inserted in the picture of
the corresponding camera channel until the alarm dura-
tion set in the menu ALARM expires.* For recording in
the multiplex mode, the camera channels concerned
are scanned more frequently than the other channels,
i. e. the usual picture sequence of the channels 1-2-3-
4-1-2-3-4... will change to 1-2-1-3-1-4-1-2-1-3-1-4-1... if
a movement is detected for channel 1 and to 2-3-1-2-3-
4-2-3-1-2-3-4... if a movement is detected for channel 2
and channel 3.
Notes:
1. The camera channel must be set to ON in the column
REC of the menu CAMERA (chapter 9.3 of the
instruction manual), otherwise it is not recorded.
2. No recording is made if at the time of the alarm a
recording is replayed or a menu is called.
With OFF selected and a movement detected, the
recorder will not automatically go to alarm recording.
However, similar to the setting ON, the symbol is in-
serted in the corresponding camera picture for the time
of the alarm duration set and the picture scanning
sequence is changed in favour of the camera channels
concerned.
DAY/START/END
In the last line, a certain period can be defined when
motion detection is active. Outside this period, no
movement is detected.
To define a period, select the adjusting fields of the line
successively with the key or and make the settings
with the key + or
-
:
– Under DAY, select the day or days: DAILY, MON,
TUE, WED; THU, FRI, SAT, SUN, MO-FR, or SA-SU.
– Under START and END, define the starting point and
the end point (h : min) of the period.
However, if motion detection is to be active all the time,
maintain the basic setting “DAY: DAILY, START: 00:00,
END: 00:00”.
To exit the menu page MOTION and to return to the main
menu, press the key MENU. To make further settings, call
another submenu of the main menu or to memorize the
settings, exit the main menu by pressing the key MENU.
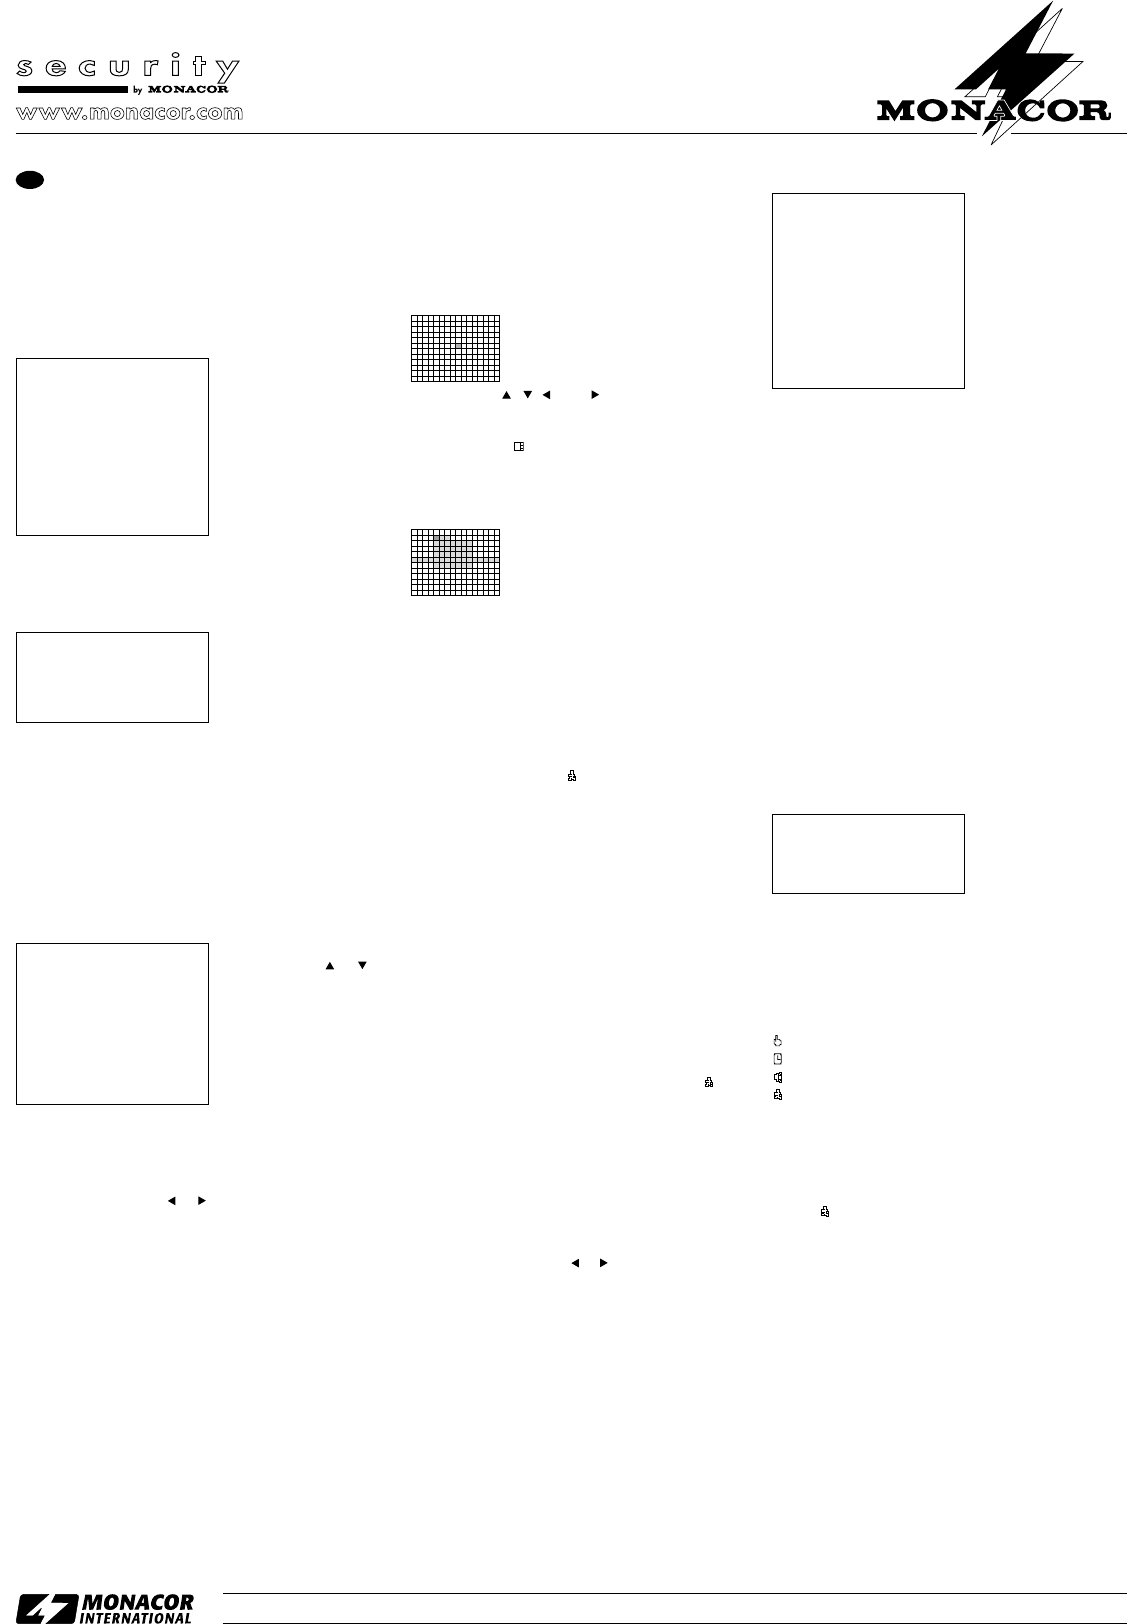
Activated detection fields are green.
The camera picture is divided into
12 x 16 detection fields. The detection
field currently selected is pink.
DMR-425
®
Copyright
©
by MONACOR INTERNATIONAL GmbH & Co. KG, Bremen, Germany. All rights reserved. A-0664.98.01.10.2006
®
1.3 SYSTEM (chapter 9.11 of the instruction manual)
The menu SYSTEM has
been extended by the
line MOTION ALARM.
Select MOTION ALARM with the key + or
-
and select ON
or OFF with the key + or
-
:
With ON selected, in case of motion detection by the
internal video motion detector, the internal buzzer will
sound (provided that the line BUZZER is set to ON) and
the alarm relay will respond (provided that the line EXT
ALARM is set to ON). After the alarm duration set in the
menu ALARM expires, the buzzer is switched off and
the relay is reset.*
With OFF selected, the buzzer and the alarm relay
are deactivated if an alarm is triggered by the motion
detector.
1.4 EVENT (chapter 9.12 of the instruction manual)
Each motion detection is listed in the event list, e. g. with a
motion detection for camera channel 1 on September
16th, 2006 at 11 p.m., 7 minutes, and 40 seconds, the fol-
lowing entry will appear on the list:
“C1 MOTION 2006-SEP-16 23:07:40”
2 Finding Recordings Started by the
Motion Detector via the Search Menu
The search menu (chap-
ter 8.4 of the instruction
manual) has been ex-
tended by the submenu
MOTION LIST.
Please also note the modification in the submenu FULL
LIST described below.
2.1 FULL LIST (chapter 8.4.2 of the instruction manual)
In the total list of all recordings, the four recording modes
are marked with different colours and provided with the fol-
lowing symbols:
manual recording
timer-controlled recording
recording triggered by an external alarm
recording started by the internal video motion detector
2.2 MOTION LIST
To merely list the recordings started by the motion detec-
tor, select MOTION LIST in the search menu and call the
list with the key ENTER. Each recording is marked with the
symbol at the beginning of the line. The further selection
is made as described for ALARM LIST (chapter 8.4.3 of
the instruction manual).
Subject to technical modification.
LAST RECORD
FULL LIST
ALARM LIST
→ MOTION LIST
TIME SEARCH
[SYSTEM]
BUZZER ON
EXT ALARM ON
VLOSS ALARM ON
→ MOTION ALARM ON
KEY MUTE NO
HDD OVERWRITE NO
MESSAGE LATCH NO
DATE DISPLAY Y/M/D
DATE 2004-SEP-30[THU]
TIME 16:50:06
CLEAR HDD NO
SYSTEM RESET NO
* To end the alarm before the adjusted alarm duration expires → chapter 10.3 of the instruction manual.
GB