543260
1
Verklein
Vergroot
Pagina terug
1/2
Pagina verder
MIDLAND G6 XT
PMR446 transceiver
Thanks for choosing Midland! Midland G6 XT is a portable
transceiver that is free use in almost all European countries. For
further information, we suggest you look at the “Restrictions on the
use” chart.
MIDLAND G6 XT joins all the advanced functions of last generation
transceivers with its simply and easy use.
MIDLAND G6 XT can operate as a “standard” radio with all the traditional
functions or as “baby monitor” , with only the specic “Baby Sitter”
functions.
CONTENT
2 Midland G6XT transceivers
2 Belt clip
2 600mAh Battery packs
1 double desktop charger
1 wall adaptor
COVERAGE/RANGE
The maximum range depends on terrain condition and is obtained during
use in an open spaces.
The only limitations to maximum possible range are environmental factors
such as blockage caused by trees, buildings, or other obstructions. Inside
a car or a metallic construction, the range can be reduced.
Normally the coverage in the city, with buildings or other obstructions is
about 1 or 2 Km. In open spaces but with obstructions like trees, leaves
or houses the maximum possible range is about 4-6 Km. In open spaces,
without obstructions and in sight, like for example in mountain, the
coverage can be more than 12 Km.
DESCRIPTION OF THE CONTROLS
AND FUNCTIONS
DISPLAY
Your midland G6 XT keeps you constantly updated about its operational
status through a Liquid Crystal Display (LCD). The symbols and their
corresponding parameters that may appear, according to the operational
status of the device, are described as follows:
1 TX Appears while you are transmitting a signal (PTT button
pressed)
2 RX Means that the radio is receiving a signal.
3
Indicates the channel selected
4
Indicates the sub audio tone selected. (of-38).
5 VOX Indicates if VOX MENU is active.
6
Indicates the battery level.
7
Indicates if the Out of Range is active.
8
Indicates that the baby sitting function is on.
9
Indicates that the Beep tone is on
10
Indicates that the Roger Beep function is active
11
Means that the keypad lock is on
12 SCAN Indicates that the radio is scanning the channels
DESCRIPTION OF THE CONTROLS
Refer to this picture to identify the various parts of the device:
13 ANTENNA
14 BUILT-IN SPEAKER - Here is where the speaker is housed.
15 BUILT-IN MICROPHONE - Here is where sound is picked up by
the microphone.
16 PTT (push to talk) Push this button to transmit.
17 MENU: Press this button to enter the radio’s menu.
18 ▲▼ use these buttons for changing the settings
19
/S Press this button to activate the scanning of the channels.
If you keep it pressed for about 5 seconds, the keypad lock is
activated.
20
/ Press this button to use the Out of range function. If you keep
it pressed for about 5 seconds, you turn on/turn off the radio.
21 EXTERNAL SPEAKER/MIC/CHG JACK - allows the connection
with external devices as headsets, microphones, charger…
OPERATIONS AND FUNCTIONS
POWER ON/POWER OFF
Press and keep pressing the button for about 3 seconds. The display
will do an auto scanning for about 1 second. You will visualize on the
display the last used channel.
VOLUME ADJUSTMENT
Use the ▲▼ to increase or decrease the volume setting.
CHANNEL SELECTION
Press the MENU button. The number of the channel will start ashing on
the display.
Press the scroll buttons ▼▲ till you select the desired channel. Press the
PTT button to conrm, or wait for 5 seconds.
Channel FREQ. RX/TX (MHz) Channel FREQ. RX/TX (MHz)
1 446.00625 5 446.05625
2 446.01875 6 446.06875
3 446.03125 7 446.08125
4 446.04375 8 446.09375
There are also 40 pre-set channels. Each pre-set channel corresponds to
a PMR channel with a CTCSS tone already attributed.
For displaying the channel/sub audio tone of the preset channel
To momentarily display the PMR446 channel and the subadio tone used
in the pre-set channels, go to the desired channel (from 9 to 48) and keep
pressed the MENU for 5 seconds.
TRANSMISSION AND RECEPTION
To communicate, all radios in your group must be set on the same
channel.
To transmit, press and hold the PTT button and speak in a normal voice
into the microphone. The TX” icon will appear continuously on the LCD
display while transmitting.
Confermare le impostazioni con il pulsante PTT o attendere 5 secondi.
Per inviare la richiesta manualmente premere il tasto
/ .
La radio in ricezione risponderà sempre e automaticamente ad una
richiesta da parte della radio richiedente, senza che anch’essa debba
essere precedentemente impostata.
Per disattivare la funzione, premere il tasto MENU sino a visualizzare sul
display “
AU” o “ PB”; quindi, selezionare con ▲▼ “OF”.
FUNZIONALITÁ BABY SITTER
Midland G6 XT può operare in due modalità distinte: radio standard
con tutte le funzionalità attive, oppure in modalità “Baby Sitter” con
attive solo le funzionalità speciche per l’utilizzo come baby monitor
(controllo del bambino nella culla). Per impostare la radio da posizionare
vicino alla culla del bambino, premere il tasto MENU due volte, no a
visualizzare sul display
OF” (baby sitter off). Ora grazie ai tasti
▲▼ potete scorrere tra le due opzioni possibili e selezionate la voce
“b” (che identica “baby”). Premete quindi il tasto PTT per conferma
o aspettate 5 secondi. Sul display l’icona
rimarrà ssa, indicandovi
che la funzione è attiva. Avendo selezionato l’opzione “b”, sul display
comparirà l’indicazione del canale “b1”. Ora prendete l’altra radio, quella
che utilizzerà il genitore e fate la stessa procedura selezionando però
questa volta l’opzione “P” (che indica “parent”). Anche in questo caso
apparirà l’icona
sullo schermo, che vi indicherà che la funzione è
attiva, insieme all’indicazione del canale “P1”. Potrebbe capitare che il
canale selezionato sia disturbato, quindi è opportuno scegliere un altro
canale. Premere il tasto MENU una volta e cambiate canale con i tasti
e ▼ (questa procedura va fatta su entrambe le radio). Sono disponibili
9 canali, da “P1” a “P9” per la radio del genitore (parent) e da “b1” a
“b9” per la radio del bambino (baby). Naturalmente entrambe le radio
devono essere posizionate sullo stesso numero di canale.
Esempio: se la radio posta vicino al bambino è stata impostata sul canale
“b4”, la radio del genitore dovrà essere posizionata sul canale “p4”.
La modalità “baby sitter” offre una serie di funzionalità speciche realizzate
per l’utilizzo come baby moniotr:
• Trasmissioneautomatica radiobaby (VOX): la radio del bambino
andrà automaticamente in trasmissione quando capterà un qualsiasi
rumore emesso nelle sue vicinanze (per esempio bambino che
piange)
• Verica della portata (automatico): se la radio del genitore si
allontana troppo e risulta essere fuori portata, dopo circa 2 minuti la
radio emette un segnale sonoro, indicando che se il bambino dovesse
piangere non lo si sentirebbe. Al riavvicinamento e quindi rientrando in
portata, la radio non emetterà più tale segnale sonoro.
• Vericadellaportata(manuale): se volete assicurarvi che la radio
del bambino sia in portata e funzionante, potete inviare manualmente
dalla radio del genitore, una richiesta di verica. Premete brevemente
il tasto
/ . Se la radio del bambino risponde, verrà emesso un
segnale sonoro.
• Parlare al bambino: in ogni momento potete parlare al bambino
semplicemente premendo il tasto PTT presente sulla radio. Mentre il
bambino piange, cioè quando la vostra radio è in ricezione, dovreste
aspettare che il bambino smetta di piangere perchè possiate parlare
(nel tentativo magari di tranquilizzarlo). Grazie alla funzione “Talk
Back” la radio smette automaticamente di trasmettere dopo circa
20 secondi di trasmissione continua (anche se il bambino sta ancora
piangendo), dandovi così la possibilità di parlargli.
Per disabilitare la funzione baby sitter è sufciente premere il tasto MENU
due volte, no a visualizzare sul display, accanto al canale baby o parent
impostato, b o P”.Conitasti▲▼selezionate“OF” poi premere il
tasto PTT per conferma o attendere 5 secondi.
Ora la radio ha la funzione baby sitter disattivata e tutte le funzionalità
standard sono tornate attive!
VANO BATTERIA
E CLIP DA CINTURA
La clip posteriore di serie vi permette di ssare
facilmente il ricetrasmettitore alla cintura.
Tuttavia questa va rimossa nel caso in cui
dobbiate rimuovere le batterie.
Per rimuovere la clip cintura sollevare la
linguetta e far scivolare la clip verso l’alto.
Dopo aver rimosso la clip, spingere la linguetta
del coperchio verso il basso e rimuovere il
coperchio sollevandolo tramite l’apposito
cavo. Inserire il pacco batteria oppure 4 pile
alcaline/ricaricabili.
RICARICA DELLE BATTERIE E RISPARMIO ENERGIA
Midland G6 XT è dotato di un dispositivo automatico di risparmio batterie
che consente di ridurre i consumi delle batterie no al 50%.
Se la radio non riceve alcun segnale per circa sette secondi la funzione
viene attivata automaticamente.
Per una carica completa delle batterie sono necessarie 8/10 ore.
Ricordiamo e raccomandiamo che per un rendimento migliore, la
carica va effettuata con l’apparato spento e quando le batterie sono
completamente scariche.
Quando il pacco batteria è scarico, l’icona icona
lampeggia sul display,
occorre quindi procedere alla ricarica il prima possibile.
La ricarica dell’apparato può avvenire in due modi, inserendolo
nell’apposito caricatore da tavolo, oppure utilizzando il caricatore da muro
direttamente nella presa CHG dell’apparato stesso.
ATTENZIONE:
! Non sovraccaricate le batterie! Quando le batterie sono
completamente cariche, il processo di carica non si blocca
automaticamente.
Non dimenticate quindi di staccare al più presto il ricetrasmettitore
dal caricabatteria non appena é trascorso il tempo necessario;
diversamente, potreste danneggiare le batterie e/o il
ricetrasmettitore.
! Non cercate di caricare batterie alcaline o comunque batterie non
ricaricabili. Accertatevi che nel vano batterie dell’apparecchio,
con il caricabatterie collegato, siano inserite esclusivamente
batterie ricaricabili NI-MH o il pacco batteria fornito in dotazione!
Le batterie alcaline non sono ricaricabili! Batterie non idonee
possono perdere liquido, esplodere o anche bruciare e causare
gravi danni!
! L’utilizzo di un caricabatterie non originale può causare danni al
vostro apparecchio o causare esplosioni e lesioni personali.
! Non gettate mai le batterie nel fuoco, né avvicinatele a sorgenti di
calore: possono causare esplosioni e lesioni personali.
Smaltite le batterie esclusivamente seguendo le normative
locali.
! Non mescolate assieme batterie vecchie e nuove e/o di tipo
diverso e/o utilizzate in modo diverso.
Effetto memoria delle batterie ricaricabili
Le batterie ricaricabili Ni-MH (Nickel-metal-idrato) possono essere soggette
a quello che viene chiamato “Effetto Memoria”. Quest’ultimo si manifesta
con una drastica diminuzione dell’autonomia d’uso dell’apparecchio
e viene innescato se, sistematicamente, ricaricate le batterie prima di
averlo scaricato del tutto e/o non le caricate completamente.
Per evitare il manifestarsi dell’effetto memoria:
Quando possibile, ricaricate le vostre batterie ricaricabili solo dopo
averlo scaricato completamente (no a che l’apparecchio si spegne
con il normale uso)
Non scollegate il caricabatterie prima del tempo necessario ad
effettuare una carica completa.
Scaricate e caricate a fondo le batterie almeno due volte al mese.
Per eliminare l’effetto memoria, basta semplicemente effettuare tre o
quattro cicli di scarica/carica profonda.
L’effetto memoria non va confuso con la normale vita delle batterie che
é mediamente di circa 300-400 cicli di carica/scarica. E’ normale che
l’autonomia operativa si riduca quando le batterie stanno raggiungendo il
termine del ciclo di vita; in questo caso sostituite le batterie.
INDICAZIONE LIVELLO DELLE BATTERIE
Il livello di potenza delle batterie del G6 XT viene indicato attraverso
un’icona posta in alto a destra del display
.
Quando il numero delle barre è completo, il pacco batteria è carico; mentre
quando il livello della batteria è basso il display mostrerà
lampeggiante.
Questo indicherà la necessità di ricaricare la batteria.
UTILIZZO E CURA DELLA RADIO
! Utilizzare un panno morbido per pulire la radio. Non usare alcool
o detergenti.
! Non immergere nell’acqua.
! Spegnere la radio e rimuovere le batterie durante un lungo tempo
di inutilizzo.
MIDLAND G6 XT
Ricetrasmettitore PMR446
Grazie per aver scelto i prodotti Midland! L’apparato Midland G6 XT
è un ricetrasmettitore che può essere utilizzato senza licenza, in
quasi tutta Europa. Per ulteriori informazioni, consultate la tabella
“Restrizioni all’uso”.
Come previsto da dl 259 del 01/08/2003 e da nota 101C del PNF, gli
apparati PMR446 sono soggetti ad una dichiarazione d’utilizzo e ad un
contributo annuo. Per ottenere la modulistica e le modalità di ottenimento
dell’autorizzazione generale contattate l’Ispettorato Territoriale nel
vostro capoluogo di regione o visitate il sito web del Ministero delle
Comunicazioni (www.urpcomunicazioni.it oppure www.urpcomunicazioni.
it/ispettorati).
L’utilizzo dell’apparato è consentito solamente dopo aver inviato la pratica
all’Ispettorato Territoriale.
Raccomandiamo di conservare una copia di tale pratica.
MIDLAND G6 XT unisce tutte le funzionalità avanzate di un
ricetrasmettitore di ultima generazione, con una modalità di utilizzo
semplice e immediata.
Infatti, MIDLAND G6 XT può funzionare in modalità “standard” con tutte
le funzioni attive, oppure in modalità “Baby sitter” con solo le funzionalità
speciche per l’utilizzo come Baby monitor.
DOTAZIONE
2 Ricetrasmettitori Midland G6XT
2 Clip da cintura
2 Pacchi batteria 600mAh
1 caricatore doppio da tavolo
1 adattatore da muro
COPERTURA/PORTATA
Le prestazioni dei ricetrasmettitori dipendono dalle condizioni ambientali
ed atmosferiche. Fattori ambientali quali alture, edici, alberi, fogliame
possono diminuire la copertura.
Le prestazioni ottimali si ottengono in campo aperto mentre la portata
si potrà ridurre, per esempio all’interno di un’automobile o di un edicio.
Tipicamente la copertura in città, in presenza di edici è di 1-2 Km.
In campo aperto, ma con presenza di alberi, case, fogliame, la copertura
è di 4-6 Km.
In campo aperto, a vista e senza nessun tipo d’interferenza, come per
esempio in montagna, la copertura può essere anche superiore ai 12
Km.
DESCRIZIONE DELLE PARTI
DISPLAY
Il vostro ricetrasmettitore utilizza un display LCD (a cristalli liquidi); i simboli
ed i parametri che possono apparire di volta in volta sono i seguenti:
1 TX Compare quando state trasmettendo (pulsante PTT premuto).
2 RX Appare sul display quando il ricetrasmettitore sta ricevendo
un segnale.
3
Indica il numero del canale selezionato.
4
Indica il codice del tono CTCSS selezionato (of-38).
5
Indica che la funzione “Out of range” è attiva.
6
Indica lo stato di carica delle batterie.
7
Indica che la funzione “Baby Sitter” è attiva.
8 VOX Indica che la funzione Vox è attiva.
9
Indica che il tono tastiera è attivo
10
Indica che la funzione Roger Beep è attiva.
11
Indica che il blocco tastiera è stato attivato.
12 SCAN Indica che la radio sta facendo lo SCAN dei canali.
DESCRIZIONE DELL’APPARATO
MIDLAND G6 XT
Fate riferimento all’immagine per identicare tutte le parti
principali dell’apparato.
13 ANTENNA
14 ALTOPARLANTE
Serve per ricevere l’audio.
15 mic In questo punto si trova il microfono per la trasmissione.
16 PTT Premendo il pulsante permette la trasmissione vocale.
17 MENU La pressione di questo pulsante permette di entrare nel
menu di congurazione della radio.
18 ▲▼ servono a variare le impostazioni all’interno del Menu e in
ricezione aumenta/decrementa il volume audio.
19
/S premendo questo pulsante, si avvia la funzione SCAN;
tenendolo premuto per circa 3 secondi si attiva il “Blocco tastiera”.
20
/ serve per inviare un segnale di chiamata dell’Out of
range oppure tenendo premuto per circa 3 secondi permette di
accendere/spegnere la radio.
21 PRESA ESTERNA “SPK/MIC-CHG”
Consente il collegamento a dispositivi esterni quali: cufe,microfoni,
caricatore ecc (2 pin).
OPERAZIONI G6 XT
ACCENSIONE/SPEGNIMENTO
Premere e tenere premuto il tasto per circa tre secondi. Il display
eseguirà un auto test per un secondo e visualizzerà l’ultimo canale
utilizzato.
REGOLAZIONE VOLUME
Per regolare il volume sul livello ottimale, premere i tasti ▲▼ nché non
si ottiene il livello desiderato.
SELEZIONE CANALI
Premere una volta il tasto MENU e di seguito i tasti ▲▼ per selezionare
uno dei canali disponibili. Premere PTT per confermare la selezione
effettuata oppure attendere circa 5 secondi.
I canali disponibili sono da 1 a 8.
CANALE FREQ. RX/TX (MHz) CANALE FREQ. RX/TX (MHz)
1 446.00625 5 446.05625
2 446.01875 6 446.06875
3 446.03125 7 446.08125
4 446.04375 8 446.09375
Vi sono anche 40 canali pre-registrati (dal 9 al 48) che corrispondo ad un
determinato canale PMR446 associato ad un tono CTCSS.
Per visualizzare momentaneamente il relativo canale PMR446 -tono sub
audio, tenere premuto per 5 secondi circa il tasto MENU.
TRASMISSIONE E RICEZIONE
Per comunicare con altre radio, è necessario che tutte siano sintonizzate
sullo stesso canale.
Per trasmettere, premere il pulsante PTT e parlare con un tono di voce
normale nel microfono. L’icona “TX apparirà sul display durante la
trasmissione. Per una massima chiarezza della voce tenere il microfono
distante dalla bocca 2/3 centimetri.
Per poter ricevere, rilasciare il pulsante PTT.
Quando la radio è in ricezione, sul display apparirà l’icona “RX”.
SQUELCH
eliminazione dei rumori di fondo/estenzione copertura
Nel MIDLAND G6 XT il ltro per la riduzione del rumore di fondo (squelch)
è sempre attivo.
BLOCCO TASTIERA
Mantenere premuto il tasto /S per più di 5 secondi. Il simbolo indica
che il blocco tastiera è stato attivato e tutti i pulsanti, eccetto PTT e
sono disabilitati.
Per disattivarlo, premerlo nuovamente
/S per più di 3 secondi.
TONI CTCSS
I toni CTCSS sono dei codici che possono essere aggiunti ai canali per
crearne altri personali.
Per ogni canale, si possono scegliere no a 38 codici CTCSS differenti.
L’implementazione di questi codici può essere fatta solo sugli 8 canali
principali (da 1 a 8).
I canali pre-registrati da 9 a 48 non possono essere modicati.
Per attivare i codici CTCSS premere tre volte il pulsante MENU, poi
tramite i tasti ▲▼ selezionare il tono desiderato “of-38”. Per confermare
premere il pulsante PTT o attendere cinque secondi. Sul display apparirà
il tono scelto.
Per disabilitare le funzioni CTCSS selezionare il canale desiderato,
premere il pulsante MENU sino a visualizzare sul display il codice del
tono CTCSS lampeggiante a destra, e selezionare “00” tramite ▲▼.
Per confermare premere PTT o attendere 5 secondi.
N.B.: Per poter comunicare con le altre radio le impostazioni dei toni
devono essere le stesse.
Toni CTCSS
Numero
sul display
Tono
frequenza Hz
Numero
sul display
Tono
frequenza Hz
Numero
sul display
Tono
frequenza Hz
01 67.0 14 107.2 27 167.9
02 71.9 15 110.9 28 173.8
03 74.4 16 114.8 29 179.9
04 77.0 17 118.8 30 186.2
05 79.7 18 123.0 31 192.8
06 82.5 19 127.3 32 203.5
07 85.4 20 131.8 33 210.7
08 88.5 21 136.5 34 218.1
09 91.5 22 141.3 35 225.7
10 94.8 23 146.2 36 233.6
11 97.4 24 151.4 37 241.8
12 100.0 25 156.7 38 250.3
13 103.5 26 162.2
VOX
Il G6 XT ha 4 livelli di VOX (off,1,2,3,4). Questa funzione permette di
attivare la comunicazione senza premere il pulsante PTT. E’ sufciente
parlare e la comunicazione viene attivata.
La sensibilità è regolabile su 3 livelli (livello 1 più sensibile) e attivabile con
o senza accessori, il quarto livello disponibile attiva la funzione VOX con
Talkback: nel caso in cui uno dei due apparati trasmette ininterrottamente
per più di 20 secondi, il VOX Talkback ne interrompe la trasmissione per
dieci secondi, liberando il canale e concedendo così all’altro utente la
possibilità di parlare.
Per attivare i vari livelli del VOX premere il tasto MENU no a visualizzare
sul display VOXlampeggiante, dopodiché tramite i tasti ▲▼ selezionare
“1”,”2”,”3” o “4” Per confermare premere il pulsante PTT o attendere
cinque secondi.
Sul display l’icona “VOX” rimarrà ssa, indicandovi che la funzione è
attiva.
Per disattivare la funzione VOX seguire le indicazioni sopra indicate
selezionando la voce “OF”.
BEEP TASTIERA
Questa funzione, se attiva, genera un beep audio ogni volta che si preme un
tasto. Nel caso si desideri escludere il beep audio, è possibile farlo premendo
il tasto MENU, sino a visualizzare sul display
eon, e poi selezionare
tramite i tasti ▲▼ “OF”.
Confermare premendo il pulsante PTT oppure attendere 5 secondi. In
questo modo, alla pressione di un tasto non si sentirà alcun suono. Per
attivare questa funzione ripetere la procedura indicata selezionando on”.
Confermare premendo il pulsante PTT oppure attendere 5 secondi.
Sul display l’icona
rimarrà ssa, indicandovi che la funzione è attiva.
ROGER BEEP
(Tonalitàdiconfermaneconversazione)
Al rilascio del tasto PTT, quindi alla ne di ogni trasmissione, viene emessa
una tonalità, che indica al vostro interlocutore che può iniziare a parlare.
Nel G6 XT questa funzione si attiva premendo il tasto MENU, sino a
visualizzare sul display
; con i tasti ▲▼ selezionare “on”.
Premere il pulsante PTT oppure attendere 5 secondi per confermare la
programmazione. Sul display l’icona
rimarrà ssa, indicandovi che la
funzione è attiva.
Per disattivare la funzione ripetere la procedura indicata selezionando “OF”.
CALL
G6 XT consente di inviare un segnale sonoro di avviso chiamata a tutti gli
utenti sullo stesso canale; per inviare la chiamata occorre premere due
volte velocemente il pulsante PTT.
Sul display apparirà l’icona “TX”.
SCAN: Scansione dei canali
SCAN esegue la scansione (ASCOLTO) di tutti i canali occupati.
Si utilizza per controllare le conversazioni su tutti i canali. In presenza di
un segnale su un canale (quindi di una conversazione), la scansione si
interrompe. Nel caso in cui sia presente un disturbo o una conversazione
non desiderata è possibile far avanzare la scansione premendo i tasti
▲▼.
Durante questa funzione è presente il riconoscimento automatico
(CTCSS detector) dei toni sub-audio in ricezione, ovvero la radio si
fermerà sui canali dove è presente un segnale e il display mostrerà il
tono sub-audio utilizzato dal chiamante. Il tono CTCSS decodicato
non viene automaticamente impostato in trasmissione dalla radio è
necessario quindi, per poter comunicare, impostarlo manualmente. (Vedi
par. “Impostazione toni CTCSS”)
Attivazione funzione SCAN
1. Premere il tasto SCAN: viene attivata la scansione dei canali e
“SCAN” verrà visualizzato sul display.
2. Premere i tasti ▲▼ per evitare temporaneamente l’ascolto di canali
che presentano un forte rumore di fondo o una conversazione non
desiderata.
Trasmissione durante funzione SCAN
Alla pressione del pulsante PTT la radio trasmette sul canale da dove si
è fatta partire la scansione oppure sul canale occupato utilizzando il tono
subaudio pre-impostato.
Per disattivare la funzione, premere nuovamente SCAN.
OUT OF RANGE
Midland G6 XT ha la possibilità di selezionare la funzione "out of range"
manuale o automatico.
Grazie a questa funzione è possibile vericare se una coppia di apparati
rimane sempre in portata.
Per attivare su entrambe le radio la funzione Out of Range:
Out of range automatico:
Premere il tasto MENU sino a visualizzare sul display
; selezionare
quindi con i tasti ▲▼ la modalità “AU”(automatico).
Confermare le impostazioni con il pulsante PTT o attendere 5 secondi.
Dal momento in cui le due radio hanno la funzione attiva, automaticamente
si trasmetteranno a vicenda un codice di controllo ogni 30 secondi. Non
appena questa trasmissione si interrompe ed uno dei due apparati non
riceve il codice di controllo per più di 2 volte consecutive, la radio emetterà
un suono di avviso e “OU NO” lampeggerà sul display nché la radio non
tornerà in portata.
Out of range manuale:
Premere il tasto MENU sino a visualizzare sul display
; selezionare
quindi con i tasti ▲▼ la modalità “PB”(manuale).
ITALIANOENGLISH
AVVERTENZE
NON APRITE LA RADIO PER NESSUN MOTIVO!!
La meccanica ed elettronica di precisione di cui é composto l’apparato
richiede esperienza e strumentazione; per lo stesso motivo la radio non
va assolutamente riallineata, essa infatti é già stata tarata in fabbrica per
le massime prestazioni.
L’apertura del ricetrasmettitore da parte di personale non autorizzato farà
decadere automaticamente la garanzia.
DEUTSCHESPAÑOL
is active. At the same time, on the display you will also see “b1”, that is
the “baby” channel in use.
Now take the other radio, the one used by the parent, follow the same
procedure and select the option “P”. Also in this case, the icon
will
appear on the screen together with “P1”, that is the “Parent” channel
in use.
If the channel in use is noisy, you can choose another baby sitter channel.
There are 9 available baby sitter channels: from “P1” to “P9” for the
parent’s radio and from “b1” to ”b9” for the baby’s one. Press the MENU
button once and then change the channel using the scroll buttons ▲▼
in both radios.
Remember that the 2 radio should operate in the same channel
number.
For example: if the radio placed near the baby is set on the channel “b4”,
the other one used for listening the baby should be set on channel “P4”.
The baby sitter mode allows some specic functions for monitoring the
baby:
• Automatictransmissionofthebaby’sradio(VOX): the baby’s radio
will automatically transmit when it picks any noises up. E.g.: when the
baby cries.
• Automaticoutofrange: if the parent’s radio moves too much away
from the baby’s radio, after 2 minutes an alert beep tone is emitted
from the “parent” radio, advising you that the two radios are not in
range anymore. You must reduce the distance between the radios to
stop the alert sound.
• Manualoutofrange: you can also manually check if the “baby” radio
is in range. Briey press the button
/ on the “parent” radio. If the
two radios are in range, you will hear a tone segnal, otherwise if you
don’t hear any tone, that means that your radio is out of range.
• Talktothebaby: normally at any moment, you can talk to the baby
just pressing the PTT button on the parent’s radio. But if the baby is
crying (that means that the radio is transmitting), you should wait until
the baby stops crying. Thanks to the Talk back function, if you hear
your baby crying for more than 20 seconds, the VOX Talkback stops
the transmission for 10 seconds, permitting you to talk and calm the
baby down.
To disable the baby sitter function, press the MENU button twice, till
visualize beside the baby sitter channel “b” or “P”. Press now the
buttons ▲▼ to chose OF”. Conrm your selection by pushing PTT or
wait for 5 seconds.
Now the baby sitter function is disable and all the standard functions are
back.
THE BATTERY COMPARTMENT
AND THE BELT CLIP
Installing and removing the belt clip:
with the belt clip you can easily attach the
transceiver to your belt.
The clip however, must be removed in
order to install or change the batteries.
To remove the belt clip lift the trigger and
slide the clip up.
Unhook the battery holder in the lower part
of the radio and gently slide the cover.
G6 XT accepts the supplied battery pack
or 4AAA alkaline/rechargeable batteries.
RECHARGING THE BATTERY AND POWER SAFE
The battery power saving feature enables a reduction in the consumption
of up to 50%; power saving comes on automatically when the transceiver
does not receive any signal for more than 7 seconds.
It takes 8/10 hours to fully recharge.
For maximum battery life, we recommend charging the battery pack
when the G6 XT is off and the low battery icon comes on blinking on the
display.
The recharge can be done in two ways: insert the radio into the proper
seat of the desktop charger or use the wall adaptor.
WARNINGS:
! Do not overcharge the batteries! When these are fully charged the
charging process does not stop automatically.
Do not forget therefore, to remove the transceiver from the
charger as soon as the batteries are charged.
! Do not try to charge alkaline batteries or non rechargeable
batteries. Make sure that when you charge the radio, only
rechargeable NI-MH batteries or the supplied battery pack should
be contained in the battery compartment! It is very dangerous
attempting to recharge other types of batteries (for example
alkaline or manganese batteries). Batteries which are not suitable
to be recharged may leak, explode or even burn and cause
damage!
! Using a different battery charger, other than the one specied can
cause damage to your device or may even cause explosions and
personal injuries.
! Do not throw batteries into re or place them near heat, as
this may cause explosions or personal injuries. Dispose of the
batteries according to procedures set out by local regulations.
! Do not mix old and new batteries or batteries of different types or
batteries which have been used in different manners.
MEMORY EFFECT OF RECHARGEABLE BATTERIES
Rechargeable NiMH (Nickel-Metal-Hydrate) batteries are affected by what
is known as the “memory effect”. This phenomenon is associated with a
drastic reduction of battery autonomy and is triggered if the batteries are
regularly charged before being fully discharged and/or are not completely
recharged.
To avoid the memory effect:
When possible, recharge the batteries only when they are completely
discharged (until the device turns itself off during normal use)
Do not disconnect the battery charger before the time indicated for a
full battery charge.
Discharge and recharge your batteries completely at least twice a
month.
In any case, the best solution for avoiding the memory effect is to use in
turn two battery sets: one in use, and the other as a spare set.
The memory effect can be easily eliminated by completely discharging/
charging the batteries 3 or 4 times.
The memory effect should not be confused with the normal battery life,
which is 300-400 cycles of charge/discharge on average.
It is completely normal for operating duty to decrease when the batteries
have reached the end of their life; at this point, you will need to substitute
the batteries.
BATTERY LEVEL INDICATOR
G6 XT has a BATTERY LEVEL METER that shows the battery power
level.
The greater the number of bars visible, the stronger the battery level will
be. When the battery level is low, the battery icon
will ash in the
display, indicating that your batteries should be replace or recharged if
using a rechargeable battery.
USE AND CARE
! Use a soft damp cloth to clean the radio. Do not use alcohol or
cleaning solutions.
! Do not immerse the radio in water.
! Turn off the radio and remove the batteries during long term
storage.
WARNINGS
! DO NOT OPEN THE RADIO FOR ANY REASON!
The mechanics and electronics radio precision require experience and
specialized equipment; for the same reason, the radio should under
no circumstances be realigned as it has already been calibrated for
maximum performance.
Unauthorized opening of the transceiver will void the warranty.
For a maximum clarity, hold the device at a distance of about 2/3 cm.
To receive a CALL, release the PTT button. The “RX” icon will appear on
the display when your radio is receiving a transmission.
SQUELCH
With the SQUELCH function, noises can be suppressed on the free
channel. In MIDLAND G6 XT this function is always active.
KEYPAD LOCK
Keep pressed the button /S for about 5 seconds. will appear on the
display. In this way, the Lock function is activated and all the buttons,
except PTT and
, will be disabled.
To disable this function, keep pressed again the button
/S for about 5
seconds.
CTCSS TONES
The CTCSS tones are codes that can be added to the channels for
creating new private ones. For each channel you can choose until 38
CTCSS.
The addition of these codes can be made on the main PMR channels
(from 1 to 8).
The pre-set channels from 9 to 48 can not be modied.
To select a privacy code for the current channel press 3 times the MENU
button, then with the scroll buttons ▲▼ select the desired code.
To conrm the selection, press the PTT button or wait for 5 seconds.
The selected Privacy Code will appear on the display.
To disable the CTCSS function, select the private code and then press the
MENU button, until you visualize the ashing CTCSS Privacy Code on the
display. Select then “00” using the scroll buttons ▲▼.
To conrm, press PTT or wait for 5 seconds.
Note: To communicate with other radios, they must be set to the same
channel and Privacy Code selections.
CTCSS TONE TABLE
Number
Displayed
Tone
Frequency Hz
Number
displayed
Tone
Frequency Hz
Number
displayed
Tone
Frequency Hz
01 67.0 14 107.2 27 167.9
02 71.9 15 110.9 28 173.8
03 74.4 16 114.8 29 179.9
04 77.0 17 118.8 30 186.2
05 79.7 18 123.0 31 192.8
06 82.5 19 127.3 32 203.5
07 85.4 20 131.8 33 210.7
08 88.5 21 136.5 34 218.1
09 91.5 22 141.3 35 225.7
10 94.8 23 146.2 36 233.6
11 97.4 24 151.4 37 241.8
12 100.0 25 156.7 38 250.3
13 103.5 26 162.2
VOX
Your G6 XT has 4 VOX levels (off, 1, 2, 3, and 4). This function allows the
user to activate the communication without pressing the PTT button. You
just have to speak and the communication is on.
You can set the VOX on 3 sensibility levels, with or without accessories.
The fourth level activates the VOX with Talkback function: when one of
the two devices transmit for more than 20 seconds, the VOX Talkback
stops the transmission for 10 seconds; so the other user has himself the
opportunity to talk.
To set the VOX level, press the MENU button, until the display shows
VOX” ashing on the display.
After that, with the scroll buttons ▲▼, select “1”,”2”,”3” or “4”.
To conrm, press the PTT button or wait for 5 seconds.The radio will
display “VOX” steadily. That means that the function is on. To disable the
VOX function, follow the previous indications, but select oF and then
push the PTT key to conrm.
BEEP TONE
This function permits you to produce a beep tone every time you press
a button.
If you want to disable this function, press the MENU button until the
display shows “
on”, then select by the scroll buttons ▲▼ “OF”.
To conrm, press the PTT button or wait for 5 seconds.
In this way, all “beeps” and “tones” are disabled.
To re-enable this function, repeat the procedure selecting the on” using
the scroll buttons ▲▼ and conrm by pressing the PTT button or wait
for 5 seconds.
The radio will display
steadily. That means that the function is on.
ROGER BEEP (end of transmission tone)
When the PTT button is released, the radio will beep to conrm to other
users that you’ve nished your transmission and that they can begin to
speak.
To turn the ROGER BEEP on, press the MENU button till the display
shows “
of”; than by the scroll buttons ▲▼, select “on”.
To conrm, push the PTT button or wait for 5 seconds. The radio will
display
steadily. That means that the function is on.
To disable this function, repeat the procedure selecting the “OF”.
CALL ALERT SELECTION
G6 XT allows to send a CALL alert signal to all the users of the same
channel.
To CALL, quickly press twice the PTT button. The “TXicon appears on
the display.
SCAN FUNCTION
The SCAN mode monitors the busy channels.
It is used to check speech trafc on the channels before transmitting and
allows the unit to stop on a channel that someone is talking on. In case
of undesired conversation, you can skip this channel by pushing the ▲▼
buttons.
When the SCAN function is enabled, the CTCSS detector is activated: the
radio automatically detects the sub-audio tone of the calling part, which
will be displayed. The CTCSS tone received won’t be automatically set
during transmission and, therefore, to talk, it must be manually set.
(See par. “CTCSS sub-tone setting”)
To enable SCAN:
1. Press SCAN key: channels will start scanning and SCAN will be
displayed.
2. Press ▲▼ to skip the channels with a strong background noise or
undesired conversation.
Transmission during the SCAN function
Pressing PTT, the radio will transmit on the channel where the scan
started or on the busy channel, using the pre-set subaudio tone.
To deactivate this function, push the SCAN key again.
OUT OF RANGE
The G6 XT is equipped with the “out of range” function.
With the MIDLAND G6 XT you can choose between the automatic Out of
Range or the manual one.
To enable/disable the Out-Of-Range function:
Automatic Out of Range
Press MENU till the display shows
, than select AU(automatic) with
the buttons ▲▼.
Conrm the settings with the PTT button or wait for 5 seconds.
By setting this function a pair of G6 XT transmitts every 30 seconds a data
control code. As soon as the contact between both units is getting lost and
one station doesn’t receive this data control code twice consecutively,
the icon “OU NOstarts ashing in the display and you will hear a beep
tone.
Manual Out of range:
Press MENU till the display shows
, than select “PB” (manual) with the
buttons ▲▼.
Conrm the settings with the PTT button or wait for 5 seconds.
The radio will display
steadily. That means that the function is on.
To switch on this function manually, press the button
/ .
To disable this function, push MENU till
AUor “ PBis displayed;
select “OF” (disabled) with the buttons ▲▼.
Conrm your selection by pushing PTT or waiting for 5 seconds.
BABY SITTER FUNCTION
Midland G6 XT can operate on 2 different ways: as a standard radio with
all the traditional functions, or as baby monitor, for holding your baby in
check.
If you set the radio in baby sitter mode, all the other traditional functions
are disabled and the transceiver works only as baby monitor.
To set the radio for the baby, that will be put near the cradle, press the
MENU button twice, until the display will show
OF”(baby sitter off).
Using the scroll buttons ▲▼, you can choose between the 2 possible
options: “b” or “P”; select “b” and then press the PTT button to conrm or
wait for 5 seconds. The radio will display
, that means that the function
TABLE OF SOLUTIONS
Problem Possible cause Solution
The radio doesn’t switch on The battery pack/batteries are discharged and/or have
not been installed correctly.
Verify that the battery pack/batteries are charged and
that they have been correctly installed.
The radio switches
off shortly after it has been
switched on
Discharged battery pack/batteries. Recharge the battery pack/batteries if they are
rechargeable or change them .
The battery does not recharge The battery-charger has not been connected or
installed correctly.
Inspect the connections of the battery-charger and the
installation of the battery pack/batteries.
The radio switches on but is
unable to receive signals
The site of installation is too shielded. Move to another area.
The volume is too low Adjust the volume.
Incorrect CTCSS Check that the CTCSS tone corresponds to the one set
by the parties you are communicating with.
It is not possible to
communicate with other
parties
An incorrect radio channel has been selected. Select the same radio channel used by the parties you
are communicating with.
The radio is installed in a shielded area or is too far
from the party you are communicating with
Move to another area.
Incorrect CTCSS Check that the CTCSS tone corresponds to the one set
by the parties you are communicating with.
Reception is fragmented
and/or disturbed
The transmission distance is excessive and/or there are
obstacles in the transmission path
Move closer to the party you are communicating with or
to another area.
The radio has been installed too close to equipment
that causes interference (televisions, computers, etc.)
Increase the distance between the radio and this
equipment.
VOX causes the radio
to accidentally enable
transmission
The sensitivity and/or environmental noise are too high.
Reduce the VOX sensitivity
The VOX feature requires
speaking in a loud voice The sensitivity is too low.
If the environmental noise is not high, increase the
sensitivity or use an optional microphone
Logic related faults
(unreadable displayed
symbols, functions )
Incorrect setting caused by a problem with the power
supply.
Recharge the batteries or change them.
TECHNICAL SPECIFICATIONS
Channels ................................................................................................................................................................ 1~8 PMR+ 40 CTCSS preset channels
Frequency generation................................................................................................................................................................................. PLL synthesizer
Frequency range .......................................................................................................................................................... 446.00625 - 446.09375MHz (PMR)
Channel separation .............................................................................................................................................................................................. 12.5 KHz
Rated power supply ....................................................................4,8 V 600mAh (Battery pack) - 4x AAA type 1,5 V (Alkaline/rechargeable) +/- 10% VDC
Operating temperature ............................................................................................................................................................................. from -20° to +55°
Size (without antenna .................................................................................................................................................................................. 58x160x28 mm
Weight (without batteries ....................................................................................................................................................................................... 0,095 kg
Operation cycle (% on 1 h .................................................................................................................................................... TX 5%, RX 5%, stand-by 90%
Transmitter
Output power (ERP) ................................................................................................................................................................................................500 mW
Type of modulation ......................................................................................................................................................................................................... FM
Suppression of spurious signals ................................................................................................................................................... Compliant with ETSI law
Max deviation ........................................................................................................................................................................................................ ±2,5 KHz
Antenna impedance................................................................................................................................................................................................. 50 Ohm
Receiver
Sensitivity at 12dB Sinad .......................................................................................................................................................................................... 0,35μV
Image rejection .............................................................................................................................................................................................................60dB
Spurious Rejection .......................................................................................................................................................................................................60dB
Inter Modulation Distortion............................................................................................................................................................................................60dB
Audio output power............................................................................................................................................................................. 300mW @ 10% THD
Medium frequencies ............................................................................................................................................................... 1°:21,250 MHz ; 2°:450 KHz
Connection for external microphone and recharge ............................................................................................................................... 2,5 mm jack stereo
Connector for external speaker .............................................................................................................................................................. 3.5 mm jack mono
Specications are subject to change without notice.
TABELLA DELLE SOLUZIONI
PROBLEMA POSSIBILE CAUSA SOLUZIONE
La radio non si accende Pacco batterie o batterie scariche e/o non installate
correttamente
Vericate che pacco batterie/batterie siano cariche e
installarle correttamente
La radio si spegne subito
dopo l’accensione
Pacco batterie o batterie scariche Caricare il pacco batterie o cambiare le batterie
Le batterie non si ricaricano Caricatore non connesso correttamente alla radio o
pacco batterie non installato correttamente
Vericate la connessione del caricatore e l’installazione
delle batterie
La radio si accende, ma non
riceve segnali
Radio collocata in un punto troppo schermato Spostatevi in un luogo più aperto
Livello del volume troppo basso Regolate il livello del volume
Errato CTCSS Vericate che il CTCSS sia lo stesso impostato dai
vostri corrispondenti
Non riuscite a mettervi in
contatto con la controparte
Errata selezione del canale radio Selezionate lo stesso canale radio della controparte
Radio collocata in un punto schermato o distante
rispetto la controparte
Spostatevi in un luogo più favorevole
Errato CTCSS Vericate che il CTCSS sia lo stesso impostato dai
vostri corrispondenti
La ricezione è spezzata e/o
disturbata
Corrispondente troppo lontano e/o ricetrasmettitore
schermato da ostacoli in direzione del corrispondente.
Avvicinatevi alla controparte e spostatevi in un luogo
più favorevole
Radio collocata troppo vicina ad apparati interferenti
(televisori, computer ecc.).
Allontanate la radio dagli apparecchi interferenti.
Il VOX fa trasmettere
accidentalmente la radio
Sensibilità eccessiva e/o rumore ambientale eccessivo Riducete la sensibilità del VOX
E’ necessario parlare a
volume alto per trasmettere
con il VOX
Sensibilità troppo bassa Se il rumore ambientale non è elevato aumentate la
sensibilità, oppure utilizzate un accessorio microfonico
opzionale
Malfunzionamenti della logica
(simboli incongruenti sul
display, blocco funzioni ecc.)
Impostazione errata indotta da qualche disturbo
nell’alimentazione
Ricaricare le batterie
SPECIFICHE TECNICHE
Canali .................................................................................................................................................................................. 1~8 PMR+ 40 preset channels
Generazione delle frequenze .................................................................................................................................................................. sintetizzatore PLL
Copertura di frequenza ............................................................................................................................................................. 446.00625 - 446.09375MHz
Passo Canalizzazione ............................................................................................................................................................................................12.5 KHz
Alimentazione ........................................................... 4,8 V 600 mAh (Pacco batteria) - 4x AAA type 1.5V@ 1050mAh+/-10% VCC(Alkaline/Ricaricabili)
Temperatura operativa .................................................................................................................................................................................. da -20° a +55°
Dimensioni (senza antenna) ....................................................................................................................................................................... 58x160x28 mm
Peso (senza batterie............................................................................................................................................................................................... 0,095 Kg
Ciclo di funzionamento ..........................................................................................................................................................TX 5%, RX 5%, stand-by 90%
Trasmettitore
Potenza di uscita ........................................................................................................................................................................................... .500 mW ERP
Tipo di modulazione .........................................................................................................................................................................................................FM
Reiezione Spurie ........................................................................................................................................................................ rispetta le normative ETSI
Deviazione massima ...............................................................................................................................................................................................±25 KHz
Impedenza antenna ..................................................................................................................................................................................................50 Ohm
Ricevitore
Sensibilità a 12dB Sinad........................................................................................................................................................................................... 0,35µV
Potenza di uscita audio ....................................................................................................................................................................... .300mW a 10% THD
Reiezione immagine .................................................................................................................................................................................................... 60 dB
Reiezione spurie .......................................................................................................................................................................................................... 60 dB
Distorsione inter-modulare ........................................................................................................................................................................................... 60dB
Frequenze intermedie.............................................................................................................................................................. 1°:21,250 MHz ; 2°:450 KHz
Presa per microfono esterno e ricarica.................................................................................................................................................. jack stereo 2,5 mm
Presa per altoparlante esterno ............................................................................................................................................................... jack mono 3.5 mm
Le speciche sono soggette a modica senza preavviso.
G6XT
MENU
S
G6XT
MENU
S
G6XT
MENU
S
1
2
3
12
7
9
5
10
11
6
4
8
G6XT
MENU
S
13
21
20
18
15
14
17
18
19
16
G6XT
MENU
S
1
2
3
12
7
9
5
10
11
6
4
8
G6XT
MENU
S
13
21
20
18
15
14
17
18
19
16
MIDLAND G6 XT
PMR446 Handfunkgerät
Vielen Dank, dass Sie Midland gewählt haben! Das Midland G6
XT ist ein Handfunkgerät zur freien Benutzung in den meisten
europäischen Ländern. Weitere Informationen finden Sie in den
„Benutzungsbeschränkungen”.
MIDLAND G6 XT verfügt über alle aktuellen Funktionen der neuesten
Funkhandy-Generation und zeichnet sich durch einfache und sinnvolle
Bedienung aus.
MIDLAND G6 XT kann sowohl als normales Standard PMR Funkhandy
arbeiten oder als Baby-Überwachungsanlage mit speziellen Baby-
Monitor-Funktionen als Baby- oder Elterngerät.
LIEFERUMFANG
2 MIDLAND G6 XT Handfunkgeräte
2 Akkupacks 600 mAh
2 Gürtelclips
1 Doppel-Standlader mit Steckerladegerät
REICHWEITE
Die Reichweite hängt von der Umgebung ab, die größte Reichweite wird
im freien Gelände erreicht.
Eine Verringerung der Reichweite haben Sie beispielsweise durch
Bäume, Gebäude oder sonstige Hindernisse. Bei Benutzung im Fahrzeug
oder innerhalb einer Stahlkonstruktion verringert sich die Reichweite
ebenfalls.
Gewöhnlich beträgt die Reichweite im städtischen Bereich, mit Gebäuden
und sonstigen Hindernissen, etwa 1 bis 2 km. Im offenen Gelände mit
Hindernissen wie Bäumen, Blättern oder Häusern ist die Reichweite
etwa 4-6 km. Im offenen Gelände ohne Hindernisse und mit freiem
Blickfeld, wie zum Beispiel in den Bergen, kann die Reichweite über 12
km betragen.
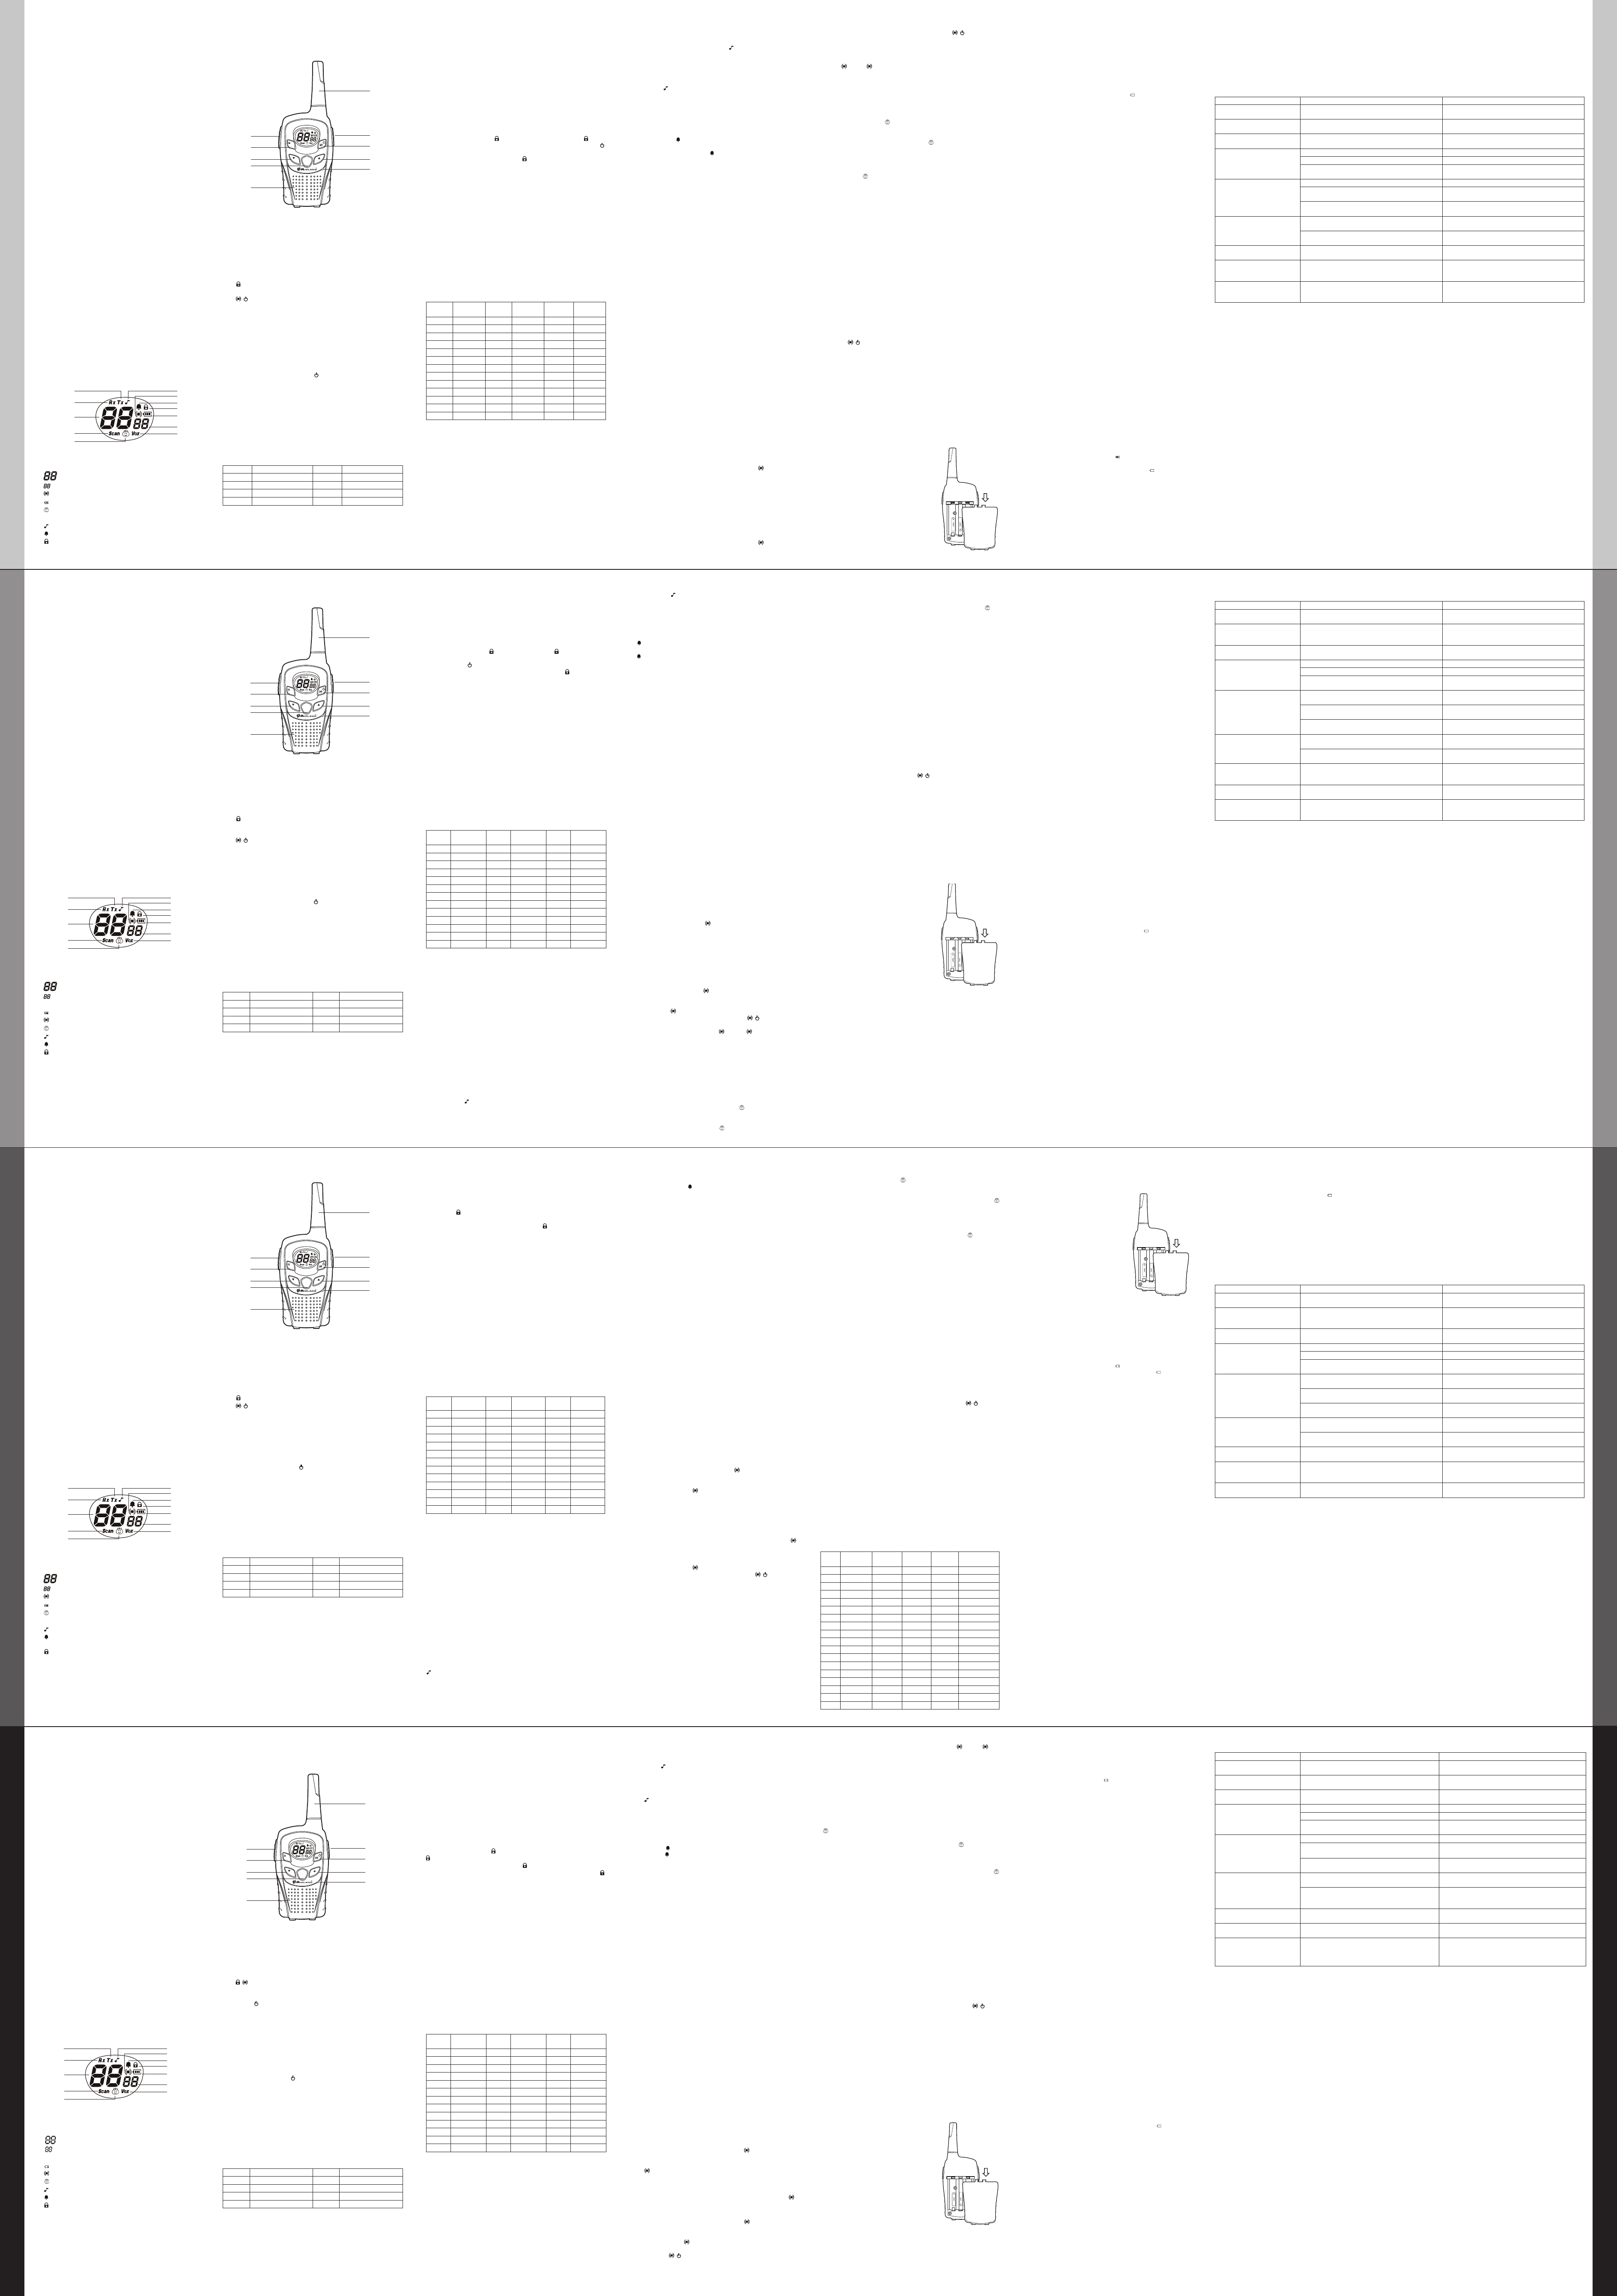
BEDIENELEMENTE UND FUNKTIONEN
DISPLAY
Ihr Midland G6 XT hält Sie durchgehend zu seinem Betriebsstatus über
die Flüssigkristallanzeige (LCD) auf dem Laufenden. Symbole und die
entsprechenden Parameter haben, entsprechend dem Betriebsstatus,
folgende Bedeutung:
1 TX Anzeige während des Sendens (PTT (Sendetaste)
gedrückt).
2 RX Anzeige während des Empfangs.
3
Anzeige des gewählten Kanals
4
Anzeige der Art des gewählten CTCSS- Subcodes (aus 38).
5
Anzeige bei aktivierter Außer-Reichweite-Funktion.
6
Anzeige des Batteriestatus.
7
Anzeige bei aktivierter Babysitterfunktion.
8 VOX Anzeige bei aktiviertem VOX-Modus.
9
Tastaturtöne sind eingeschaltet
10
Roger Beep Signal (nach Loslassen der Sendetaste) ist
eingeschaltet
11
Tastensperre ist eingeschaltet
12 SCAN Das Gerät sucht gerade die Kanäle auf Aktivität ab
BEDIENELEMENTE
Hier beschreiben wir die unterschiedlichen Bedienelemente/ Funktionen
13 ANTENNE
14 EINGEBAUTER LAUTSPRECHER
15 EINGEBAUTES MIKROFON
16 PTT (push to talk): Sendetaste drücken zum Senden.
17 MENU: Mit Tastendruck rufen Sie das Menü des Funkgeräts auf
und Sie schalten innerhalb des Menüs von Funktion zu Funktion
weiter.r 3 Sekunden zum Ein- und Ausschalten des Handfunkgeräts
gedrückt halten.
18 ▲▼ Mit Tastendruck aktivieren Sie die manuelle
19
/S Taste länger gedrückt halten: Aus bzw. Einschalten des Gerätes
20
/ : Kurz drücken = Suchlauf starten/stoppen
Lang drücken: Tastensperre aktivieren/deaktivieren-
21 EXTERNE Audio und Ladebuchse: - Hier schließen Sie externe
Geräte wie Headset, Mikrofon, Ladegerät usw. an.
BEDIENUNGSHINWEISE
EIN- UND AUSSCHALTEN
Halten Sie zum Einschalten für etwa 3 Sekunden gedrückt. Das
Handfunkgerät schaltet sich ein, führt zuerst einen kurzen Test durch.
dann zeigt das Display die zuletzt benutzte Einstellung an.
LAUTSTÄRKE
Mit ▲▼ erhöhen oder verringern Sie die Lautstärke.
KANALWAHL
Drücken Sie MENU 1 x. Die Kanalnummer im Display blinkt.
Drücken Sie die Wahltasten ▼▲, bis Sie den gewünschten Kanal
erreichen. Mit der Sendetaste PTT bestätigen Sie oder warten Sie 5
Sekunden ab.
Kanal FREQ. RX/TX (MHz) Kanal FREQ. RX/TX (MHz)
1 446.00625 5 446.05625
2 446.01875 6 446.06875
3 446.03125 7 446.08125
4 446.04375 8 446.09375
Anzeige des Kanals/Unterlagerungstons
Zur kurzzeitigen Anzeige des PMR446-Kanals und des CTCSS Toncodes
der voreingestellten Kanäle gehen Sie zu dem gewünschten Kanal (9 bis
48) und halten Sie MENU für 5 Sekunden gedrückt.
SENDEN UND EMPFANGEN
Zur Verständigung müssen alle Funkgeräte in Ihrer Gruppe auf die gleiche
Kanalnummer und (sofern benutzt) die gleiche CTCSS Codenummer
eingestellt sein.
Zum Senden halten Sie die Sendetaste PTT gedrückt und sprechen Sie
mit normaler Lautstärke in das Mikrofon. TX” wird während des Sendens
im Display angezeigt.
Für beste Tonqualität halten Sie das Handfunkgerät etwa 2 bis 3 cm vom
Mund entfernt.
Zum Empfangen lassen Sie die Sendetaste PTT los. „RXwird während
des Empfangs im Display angezeigt.
das Funkgerät arbeitet nur noch als Babymonitor.
Zum Einstellen des Geräts auf Babymodus im Kinderzimmer drücken
Sie 2 x MENU, bis im Display
OF” (Babysitter aus) angezeigt wird.
Mit den Navigationstasten ▲▼ können Sie nun zwischen „b” und
„P” umschalten; wählen Sie „b” und drücken Sie zur Bestätigung die
Sendetaste PTT oder warten Sie 5 Sekunden ab. Im Display wird
angezeigt, damit ist die Funktion aktiviert. Gleichzeitig wird im Display
„b1” als Hinweis angezeigt, dass nun der „Babykanal” benutzt wird.
Nehmen Sie nun das andere Funkgerät (das „Elterngerät”) zur Hand
und folgen Sie wieder den obigen Anleitungen, jedoch wählen Sie als
Option „P” (Parents = Eltern) Auch auf diesem Gerät wird
angezeigt.
Weiterhin wird „P1” als Hinweis angezeigt, dass nun der „Elternkanal
Nr. 1 ” benutzt wird.
Haben Sie Störungen auf dem benutzten Kanal, so können Sie
einen weiteren Babysitterkanal wählen, insgesamt stehen Ihnen 9
Babysitterkanäle von „P1” bis „P9” für das Elterngerät und von „b1” bis
„b9” für das Babygerät zur Verfügung. Drücken Sie einmal MENU und
stellen Sie den Kanal auf beiden Funkgeräten mit ▲▼ um.
Bitte beachten Sie, dass beide Funkgeräte auf die gleiche
Kanalnummer eingestellt sein müssen.
Beispiel: Ist das Funkgerät im Kinderzimmer auf Kanal „b4” eingestellt,
dann muss das elterliche Gerät auf Kanal „P4” eingestellt sein.
Der Babysittermodus bietet Ihnen besondere Funktionen zur Überwachung
von Kleinkindern:
Automatische Übertragung vom Babygerät (VOX): Das Babygerät
sendet automatisch, wenn es Geräusche wahrnimmt, beispielsweise
wenn das Baby schreit.
Automatische Außer-Reichweite-Funktion: Entfernt sich das
Elterngerät zu weit vom Babygerät, so hören Sie nach 2 Minuten einen
Signalton als Warnhinweis, dass Sie nun außerhalb der Reichweite
des Babygeräts sind. Verringern Sie den Abstand, um den Warnton zu
beenden.
Manuelle Außer-Reichweite-Funktion: Sie können ebenfalls manuell
überprüfen, ob Sie sich außerhalb der Reichweite des Babygeräts
benden. Drücken Sie auf dem Elterngerät einmal kurz
/ . Stehen
die beiden Geräte in Kontakt, so hören Sie nach einem Augenblick die
Rufmelodie. Hören Sie keinen Ton, so benden Sie sich außerhalb der
Reichweite des Babygeräts.
Wechselsprechen (Zurücksprechen) mit dem Baby: Normalerweise
können Sie jederzeit mit dem Kleinkind sprechen, hierzu müssen
Sie nur die Sprachtaste PTT auf dem Elterngerät drücken. Schreit
Ihr Kind jedoch (was bedeutet, dass das Funkgerät sendet), dann
müssten Sie normalerweise warten, bis es wieder ruhig wird. Dank der
Rücksprechfunktion (diese ist voreingestellt im Babymode!) unterbricht
die Rücksprechfunktion Ihr Baby jedoch nach 20 Sekunden und Sie
können für 10 Sekunden zur Beruhigung des Kindes auf Sendung
gehen. Dazu drücken Sie Ihre Sendetaste am Elterngerät.
Zur Deaktivierung der Babysitterfunktion drücken Sie wieder 2 x MENU
bis im Display „b” oder „P” angezeigt wird. Nun wählen Sie mit ▲▼
„OF”. das bedeutet Babymode und Elternmode aus- Bestätigen Sie
Ihre Auswahl mit der Sendetaste PTT oder warten Sie 5 Sekunden ab.
Das Gerät schaltet nun wieder zurück auf die normalen Funkhandy-
Funktionen als PMR 446 Sprechfunkgerät.
BABYSITTERKANÄLE
Kanal Frequenz
CTCSS-
Kanal
CTCSS-
Kanal
Außer Re-
ichweite
Entsprechender
Kanal
b1 446.00625 156.7 (25) On Lv 4 Of P1 25
b2 446.01875 156.7 (25) On Lv 4 Of P2 25
b3 446.03125 156.7 (25) On Lv 4 Of P3 25
b4 446.04375 156.7 (25) On Lv 4 Of P4 25
b5 446.05625 156.7 (25) On Lv 4 Of P5 25
b6 446.06875 156.7 (25) On Lv 4 Of P6 25
b7 446.08125 156.7 (25) On Lv 4 Of P7 25
b8 446.09375 156.7 (25) On Lv 4 Of P8 25
b9 446.09375 Of On Lv 4 Of P8
P1 446.00625 156.7 (25) Of On AU P1 25
P2 446.01875 156.7 (25) Of On AU P2 25
P3 446.03125 156.7 (25) Of On AU P3 25
P4 446.04375 156.7 (25) Of On AU P4 25
P5 446.05625 156.7 (25) Of On AU P5 25
P6 446.06875 156.7 (25) Of On AU P6 25
P7 446.08125 156.7 (25) Of On AU P7 25
P8 446.09375 156.7 (25) Of On AU P8 25
P9 446.09375 Of Of On AU P8
Zur vorübergehenden Anzeige des PMR446-Kanals und des benutzten
Unterlagerungstons gehen Sie zu dem gewünschten Kanal und drücken
Sie für 5 Sekunden MENU.
BATTERIEFACH UND GÜRTELCLIP
Anbringen und Abnehmen des Gürtelclips
Mit dem Gürtelclip können Sie das
Handfunkgerät leicht am Gürtel befestigen.
Der Clip muss jedoch entfernt werden, um die
Batterien auszutauschen. Zum Abnehmen des
Gürtelclips, ziehen sie bitte an der Rastfeder
und schieben Sie den Gürtelclip nach oben
weg.
Um das Batterie-/Akkufach zu öffnen, muss die
Batteriefachverriegelung gelöst und der Deckel
angehoben und abgezogen werden.
In das G6 XT können der mitgelieferte
Akkupack oder 4 AAA Batterien/Akkus
eingesetzt werden.
AKKU LADEN UND ENERGIE SPAREN
Die Batterie-Sparfunktion ermöglicht eine Einsparung des Verbrauchs
von bis zu 50 %. Der Energiesparmodus wird automatisch aktiviert, wenn
das Handfunkgerät länger als 7 Sekunden kein Signal empfängt.
Eine volle Ladung dauert etwa 8-10 Stunden.
Alternativ benutzen Sie den Standlader (sofern mitgeliefert). Für eine
maximale Lebensdauer der Akkus empfehlen wir die Ladung, wenn das
G6 XT ausgeschaltet ist und die Akku-Statusanzeige leuchtet.
Beim Entladen der Akkus wird im Display
angezeigt.
Wird der Akku-Pack Ihres Funkgerätes schwächer, blinkt
im Display.
Der Ladevorgang kann auf zweierlei Wegen erfolgen: entweder in den
Standlader oder benutzen Sie den Steckerlader (über die Mikrofon/
Ladebuchse).
WARNHINWEISE
! Überladen Sie die Akkus nicht! Die Ladung wird bei vollen Akkus
nicht automatisch unterbrochen.
Trennen Sie daher bitte das Handfunkgerät vom Ladegerät ab,
sobald die Akkus geladen sind.
! Laden Sie keinesfalls Alkali-Batterien oder sonstige “normale”
Batterien auf. Als aufladbare Akkus benutzen Sie ausschließlich
NI-MH Akkus im Funkgerät! Das Laden anderer Batterien ist
gefährlich. Batterien können auslaufen, explodieren oder brennen
und zu erheblichen Schäden führen!
! Die Benutzung eines anderen Ladegeräts als hier spezifiziert,
kann zu Schäden am Funkgerät, Explosion und Verletzungen
führen.
! Werfen Sie Batterien nicht ins Feuer und lagern Sie Batterien
nicht in unmittelbarer Nähe von Wärmequellen, das kann zu
Explosion und Verletzungen führen. Entsorgen Sie Batterien
umweltgerecht.
! Mischen Sie nicht erschöpfte und neue Batterien, Batterien
unterschiedlicher Bauart oder unterschiedliche Batterietypen.
Beim Wechsel von Batterien kann es vorkommen, dass die bisheri-
gen Einstellungen des Gerätes verlorengehen.
MEMORYEFFEKT BEI AKKUS
NiMH (Nickel-Metall-Hydrid) Akkus unterliegen dem sogenannten
„Memoryeffekt”. Hiermit ist eine drastische Verringerung der Akkukapazität
gemeint, die auftreten kann, wenn Akkus zu oft oder zu regelmäßig
geladen werden, bevor sie vollständig entladen sind oder wenn sie öfters
nicht vollständig geladen werden.
Vermeiden des Memoryeffekts:
Laden Sie Akkus möglichst erst nach, nachdem sie völlig erschöpft
sind (das Gerät schaltet sich automatisch aus).
Trennen Sie das Ladegerät nicht ab, bevor der Akku vollständig
geladen ist.
Laden und entladen Sie Ihre Akkus wenigstens zweimal monatlich.
Die beste Lösung zur Vermeidung des Memoryeffekts ist die Benutzung
von zwei Akkusätzen: einer ist in Gebrauch, der andere dient der
Reserve.
Der Memoryeffekt kann einfach vermieden werden, wenn Sie Akkus drei-
oder viermal vollständig entladen/laden.
Der Memoryeffekt sollte allerdings nicht mit der normalen Lebensdauer
von Akkus verwechselt werden, der durchschnittlich 300-400 Ladezyklen
beträgt.
Eine Verkürzung der Betriebszeit beim Erreichen der Lebensdauer von
Akkus ist vollkommen normal. Zu diesem Zeitpunkt müssen Sie Akkus
ersetzen.
SQUELCH
Mit der SQUELCH-Funktion stellen Sie die Rauschunterdrückung für den
benutzten Kanal ein. Beim MIDLAND G6 XT ist diese Funktion immer
aktiviert.
TASTENSPERRE
Halten Sie für etwa 5 Sekunden zur Aktivierung der Tastensperre
gedrückt. Im Display wird das Schloss-Symbol angezeigt.
Zur Deaktivierung der Tastensperre halten Sie
erneut für 5 Sekunden
gedrückt. Im Display erlischt das Schloss-Symbol wieder.
CTCSS-TÖNE
Die CTCSS-Töne sind Codes, welche dem Kanal zur „Privatisierung”
hinzugefügt werden können. Für jeden Kanal können Sie einen aus 38
CTCSS-Töne wählen.
Zusätzlich können weitere Codes auf den PMR-Hauptkanälen (1 bis 8)
erstellt werden.
Die voreingestellten Kanäle 9 bis 48 können nicht modifiziert werden, sie
sind im Werk eingestellt.
Zur Auswahl eines Privatcodes für den aktuellen Kanal drücken Sie 3 x
MENU, danach wählen Sie mit ▲▼ den gewünschten Code.
Drücken Sie zur Bestätigung die Sendetaste PTT oder warten Sie 5
Sekunden ab.
Der gewählte Privatcode wird im Display angezeigt.
Zur Deaktivierung der CTCSS-Funktion wählen Sie den Privatcode und
drücken Sie MENU, bis der CTCSS-Privatcode im Display blinkt. Wählen
Sie nun mit ▲▼„00”.
Zur Bestätigung drücken Sie die Sendetaste PTT.
Bitte beachten Sie: Zur Kommunikation mit anderen Funkgeräten
müssen diese auf den gleichen Kanal und CTCSS Privatcode eingestellt
sein.
CTCSS-TÖNE
Angezeigte
Nummer
Tonfrequenz Hz
Angezeigte
Nummer
Tonfrequenz Hz
Angezeigte
Nummer
Tonfrequenz Hz
01 67.0 14 107.2 27 167.9
02 71.9 15 110.9 28 173.8
03 74.4 16 114.8 29 179.9
04 77.0 17 118.8 30 186.2
05 79.7 18 123.0 31 192.8
06 82.5 19 127.3 32 203.5
07 85.4 20 131.8 33 210.7
08 88.5 21 136.5 34 218.1
09 91.5 22 141.3 35 225.7
10 94.8 23 146.2 36 233.6
11 97.4 24 151.4 37 241.8
12 100.0 25 156.7 38 250.3
13 103.5 26 162.2
VOX
Ihr G6 XT hat 4 VOX-Stufen (aus, 1, 2, 3 und 4). Mit dieser Funktion
können Sie senden, ohne die Sendetaste PTT zu drücken. Sprechen Sie
einfach in das Mikrofon.
Sie können VOX auf 3 verschiedene Stufen einstellen, mit oder ohne
Zubehörteilen.
Die vierte Stufe aktiviert VOX mit Rücksprechfunktion: Sendet eines der
beiden Geräte länger als 20 Sekunden, dann unterbricht VOX Talkback
die Übertragung für 10 Sekunden, damit die Gegenseite die Möglichkeit
zur Erwiderung erhält.
Zum Einstellen der VOX-Stufe drücken Sie (MENU), bis im Display
„OF ” und „VOX” im Display blinken.
Anschließend wählen Sie mit ▲▼ „1”, „2”, „3” oder „4”.
Zur Bestätigung drücken Sie die Sendetaste PTT oder warten Sie 5
Sekunden ab.
Zur Deaktivierung der VOX-Funktion gehen Sie folgen Sie der
vorstehenden Anleitung, wählen Sie jedoch „OF” und drücken Sie dann
die Sendetaste PTT zur Bestätigung.
TASTENTÖNE
Normalerweise hören Sie bei jedem Tastendruck einen kurzen Signalton.
Zur Deaktivierung / Aktivierung drücken Sie MENU so oft, bis im Display
angezeigt wird und wählen Sie mit ▲▼ „OF” bzw. “ON”.
Zur Bestätigung drücken Sie die Sendetaste PTT oder warten Sie 5
Sekunden ab.
ROGER BEEP (Signalton am Ende der Übertragung)
Beim Loslassen der Sendetaste PTT gibt das Funkgerät einen Signalton
ab, um der Gegenseite anzuzeigen, dass Sie die Übertragung beendet
haben und die Gegenseite nun sprechen kann.
Zur Aktivierung des ROGER BEEP drücken Sie MENU so oft, bis im
Display das Glockensymbol
angezeigt wird, dann wählen Sie mit ▲▼
ON”. (bzw. OF zum Deaktivieren).
Zur Bestätigung drücken Sie die Sendetaste PTT oder warten Sie 5
Sekunden ab.
ANRUFALARMIERUNG
Das G6 XT ermöglicht das Aussenden eines Rufsignals an alle Nutzer
des gleichen Kanals.
Zum Senden drücken Sie in schneller Folge zweimal die Sendetaste PTT.
Im Display wird TX” angezeigt und Ihr Gerät sendet eine Rufmelodie an
den (oder die) andere(n) Partner auf Ihrem Kanal.
SCAN: SUCHLAUF ÜBER DIE KANÄLE
Im Suchlauf (SCAN) Mode kann man die Funkkanäle nach Signalen
absuchen, also besetzte Kanäle finden.
Dabei werden alle Kanäle nacheinander automatisch abgesucht. Auf
belegten Kanälen stoppt der Suchlauf und Sie hören den Funkbetrieb
mit.
Hinweis: beim Suchlauf kann das Gerät erkennen, ob eine gefundene
Gegenstation mit einem CTCSS Ton codiert sendet. Ist das der Fall, dann
wird die Nummer des Ton-Codes im Display angezeigt. Wenn Sie mit
einer so beim Suchlauf gefundenen Station in Kontakt treten wollen, dann
müssen Sie natürlich die Ton-Code-Nummer auch bei Ihrem Gerät für
diesen Kanal übernehmen, sonst kann der andere Teilnehmer dort Sie ja
nicht hören (lesen Sie bitte mehr über CTCSS im nächsten Kapitel).
Suchlauf aktivieren
1. SCAN Taste drücken. Im Display sehen Sie die Kanäle durchlaufen.
2. Bei Suchlaufstops auf nicht interessanten Sendungen kann man mit
▲▼ ggf. weiterschalten.
Senden während des Suchlaufs
Beim Drücken von PTT, sendet das Gerät entweder auf dem Kanal, wo
der Suchlauf gestartet wurde, oder, falls der Suchlauf auf einem belegten
Kanal angehalten hatte, mit den eingestellten Werten auf diesem Kanal.
Zum Abschalten des Suchlaufs erneut SCAN drücken.
AUSSER REICHWEITE-TEST
Das G6 XT ist mit der Außer Reichweite-Testfunktion ausgestattet.
Mit dem MIDLAND G6 XT können Sie zwischen der automatischen und
manuellen Außer-Reichweite-Funktion wählen.
Aktivierung/Deaktivierung der Außer-Reichweite-Funktion:
Automatische Außer-Reichweite-Funktion
Drücken Sie MENU mehrfach, bis im Display
erscheint. Sie können
jetzt mit ▲▼ wählen “AU” (automatisch).
Zur Bestätigung drücken Sie die Sendetaste PTT oder warten Sie 5
Sekunden ab. Im Display wird
konstant angezeigt.
Nach Aktivierung dieser Funktion sendet ein Paar G6 XT alle 30
Sekunden einen Datenkontrollcode. Sobald der Kontakt zwischen
den beiden Geräten verloren geht und der Datenkontrollcode zweimal
nacheinander nicht empfangen wird, blinkt im Display OU NO”, Sie hören
einen Signalton und das Kontrollsymbol blinkt jetzt.
Manuelle Außer-Reichweite-Funktion
Drücken Sie (wie oben) MENU mehrfach, bis im Display wieder
erscheint, und wählen Sie mit ▲▼ „ PB” (manueller Reichweitentest auf
Knopfdruck).
Zur Bestätigung drücken Sie die Sendetaste PTT oder warten Sie 5
Sekunden ab. Im Display wird
angezeigt.
Zum Testen der Reichweite drücken Sie kurz auf die
/ ”. Ihr Gerät
sendet ein Testsignal aus, was Sie am Aufleuchten des "TX" Zeichens
sehen. Sind die beiden Geräte in Kontakt, so antwortet das andere Gerät
und Sie hören die Rufmelodie in Ihrem Lautsprecher. Sollten Sie nichts
hören, dann bedeutet das, dass Sie ausserhalb der Reichweite Ihres
Partnergeräts sind.
Zur Deaktivierung dieser Funktion drücken Sie wieder MENU, bis „ "PB"
oder "AU" angezeigt wirden und wählen Sie mit ▲▼ “OF”.
Zur Bestätigung drücken Sie die Sendetaste PTT oder warten Sie 5
Sekunden ab.
Hinweis: Der manuelle Reichweitentest von Ihrem Gerät aus funktioniert
immer, selbst wenn Ihr Partner bei seinem Gerät die Reichweitenkontrolle
abgestellt haben sollte.
BABYSITTERFUNKTION
Das Midland G6 XT kann auf zwei unterschiedliche Arten betrieben
werden: als gewöhnliches Funkgerät mit allen herkömmlichen Funktionen
oder als Babymonitor zur Überwachung von Kleinkindern (oder
gebrechlichen oder behinderten Personen).
Im Babysittermodus sind die herkömmlichen Funktionen deaktiviert und
G6XT
MENU
S
G6XT
MENU
S
1
2
3
12
7
9
5
10
11
6
4
8
G6XT
MENU
S
13
21
20
18
15
14
17
18
19
16
BATTERIE-STATUSANZEIGE
Das G6 XT ist mit einer BATTERIE-STATUSANZEIGE ausgestattet,
welche den Ladezustand anzeigt.
Je mehr Balken angezeigt werden, desto höher ist der Ladezustand.
Bei geringem Ladezustand blinkt das Symbol
im Display, Ihre Batterien
müssen nun ausgetauscht bzw. Ihre Akkus geladen werden. Am besten
Testen Sie den Ladezustand beim Senden oder kurz nach dem Senden.
Sinkt bei Senden oder nach dem Senden die Ladezustandsanzeige ab,
dann ist das schon ein Zeichen für Entladung!
WARTUNG UND PFLEGE
! Benutzen Sie zum Reinigen des Funkgeräts nur ein
weiches, feuchtes Tuch. Benutzen Sie keine Lösungs- oder
Reinigungsmittel.
! Tauchen Sie das Funkgerät nicht in Wasser ein.
! Bei längerer Nichtbenutzung entnehmen Sie bitte die Batterien/
Akkus.
WARNHINWEIS
! ÖFFNEN SIE KEINESFALLS DAS GERÄTEGEHÄUSE!
Zur Wartung von Funkgeräten werden neben Erfahrung auch besondere
Werkzeuge benötigt. Aus diesem Grunde nehmen Sie bitte auch keine
Einstellungen am Funkgerät vor, es ist bereits werksseitig für beste
Leistung abgeglichen.
Unerlaubte Eingriffe führen zum Verlust Ihrer Garantieansprüche.
MIDLAND G6 XT
Transceptor PMR446
¡Gracias por elegir MIDLAND! MIDLAND G6 XT es un transceptor
portátil que se puede usar, en casi todos los países Europeos.
Para más informaciones revise la tabla “Restricciones al uso”.
MIDLAND G6 XT aúna todas las funciones avanzadas de un transceptor
de última generación con un uso sencillo e inmediato.
MIDLAND G6 XT puede funcionar en modo “estándar” con todas las
funciones activas, o bien en modo “Baby sitter” solo con las funciones
especícas para su uso como “Baby monitor”
DOTACIÓN
2 transceptores MIDLAND G6 XT
2 clips de cinturón
2 Packs de baterías de 600mAh
1 cargador doble de sobremesa
1 alimentador de pared
COBERTURA
Las prestaciones óptimas se obtendrán en campo abierto y sin obstáculos.
Factores ambientales como la altura, edicios, árboles, etc... pueden
reducir el alcance. En el interior de un automóvil o de una construcción
metálica, la cobertura puede reducirse sensiblemente.
Normalmente la cobertura en la ciudad, con edicios u otros obstáculos
es de 1 ó 2 Km. En espacios abiertos pero con obstáculos como árboles
ó casas la máxima cobertura posible es de 4-6 Km. En espacios abiertos,
sin obstáculos, como por ejemplo en la montaña, la cobertura puede ser
superior a 12 Km.
DESCRIPCIÓN DE LOS CONTROLES Y
FUNCIONES
DISPLAY
El Midland G6 XT le mantendrá constantemente informado sobre el
estado de operación a través de una pantalla de cristal líquido (LCD). Los
iconos y sus correspondientes parámetros que aparecen dependiendo
del estado operativo del equipo, se describen de la siguiente manera:
1 TX Aparece mientras está transmitiendo una señal (tecla PTT
presionada)
2 RX Signica que la radio está recibiendo una señal.
3
Indica el canal seleccionado.
4 Subtono CTCSS seleccionado.
5 VOX Indica si el modo VOX está activado.
6
Informa del nivel de batería restante.
7 Indica si la función “fuera de cobertura” está activada.
8
Función Baby Sitter está activada.
9 Tono “beep” está activado.
10 Función Roger Beep está activada.
11
Bloqueo del teclado está activado.
12 SCAN Indica que la radio esta explorando los canales.
DESCRIPCIÓN DE LOS CONTROLES
La siguiente información le servirá de guía para localizar las diferentes
partes del equipo y familiarizarse con él
13 ANTENA
14 ALTAVOZ - altavoz interno.
15 MICRÓFONO- Aquí se encuentra el micrófono para la transmisión.
16 PTT (push to talk - pulsar para hablar): pulsando esta tecla se
activa la transmisión del equipo.
17 MENU pulse este botón para entrar en el menu de la radio
18 ▲▼. Sirven para cambiar los ajustes del Menu seleccionado
19
/ - Pulsando este botón podrá usar la función fuera de
cobertura. Si lo pulsa durante 5 segundos, el bloqueo del teclado
se activará.
20 MODE/
- Pulse esta tecla para entrar en los menús de ajustes de
la radio. Manteniéndola pulsada durante 3 segundos, apagará o
encenderá la radio.
21 TOMA ALTAVOZ EXTERNO/MIC/CHG - Permite la conexión de
accesorios externos como auriculares, micrófonos, cargadores,
etc...
OPERACIONES Y FUNCIONES
ENCENDIDO/APAGADO
Mantenga pulsada la tecla durante aproximadamente 3 segundos. El
display mostrará un auto-test durante un segundo y visualizará el último
canal utilizado.
AJUSTE DEL VOLUMEN
Para regular el volumen a un nivel óptimo, pulse las teclas ▲▼ hasta que
obtenga el nivel deseado.
SELECCIÓN DEL CANAL
Pulse la tecla MENU. El número de canal estará parpadeando en el display.
Pulse las teclas ▼▲ hasta obtener el canal deseado. Pulse PTT para
conrmar, o bien espere 5 segundos.
Canal FRECUENCIA RX/TX (MHz) Canal FRECUENCIA RX/TX (MHz)
1 446.00625 5 446.05625
2 446.01875 6 446.06875
3 446.03125 7 446.08125
4 446.04375 8 446.09375
El equipo dispone tambien de 40 canales pre-programados. Cada canal
pre-programado corresponde a un canal pmr446 conbinado con un
subtono CTCSS.
Para que aparezca en el display el canal/subtono de audio
Para mostrar el canal pmr446 y el subtono CTCSS utilizado en los
canales pre-programados, vaya al canal deseado (desde 9 a 48) y
mantenga presionada la tecla MENU durante 5 segundos.
Para desactivar esta función, pulse MENU hasta que “
AUó “ PB
aparezca en el display; seleccione“OF(desactivado) con las teclas de
desplazamiento ▲▼.
Conrme su selección pulsando el PTT ó espere durante 5 segundos.
CANALES BABY SITTER
Midland G6 XT puede operar de dos maneras : como radio estandar con
todas las funciones tradicionales, o como vigila bebés (baby sitter).
Si la radio está en modo baby sitter, todas las funciones tradicionales
están desactivadas y el transceptor opera solo como monitor.
Ponga la radio del bebé cerca de él (el equipo solo radiará cuando él
llore), pulse la tecla MENU dos veces, hasta que en el display aparezca
OF” (baby sitter off). Usando las teclas de desplazamiento ▲▼
podrá elegir entre dos posibilidades: b o P”; seleccione b(baby) y
luego pulse el PTT para conrmar. La radio mostrará
en el display,
signicando que la función está activa. Al mismo tiempo, en el display
podrá ver “b1”, que es el canal “baby” en uso.
Ahora coja la otra radio, la que van a usar los padres, y siga el mismo
prodecimiento pero con la opción “P”. También en este caso, el icono
aparecerá en la pantalla junto con “P1”, que es el canal “Parent” en uso.
Si el canal que está utilizando es ruidoso, puede elegir otro canal baby
sitter. Hay 9 canales baby sitter disponibles: desde el P1al P9para
los padres y del “b1” al “b9” para los bebes. Pulse la tecla MENU para
cambiar el canal mediante las teclas ▲▼ en ambas radios.
Recuerde que las dos radios deben operar en el mismo canal.
Ejemplo: Si la radio que está cerca del bebe esta en el canal “b4”, la otra
debe estar en el canal “P4”.
El modo baby sitter permite algunas funciones especícas para
monitorizar al bebé.
La transmisión automática de la radio del bebé (VOX): la radio
del bebé automáticamente transmitirá cuando detecte un ruido. Ej.
Cuando el bebé empiece a llorar.
• Fueradecoberturaautomático:si la radio de los padres se mueve
queda fuera de cobertura durante 2 minutos, la radio de los padres
emitirá un beep de alerta avisando de este hecho. Deberá reducir
la distancia entre las dos radios para obtener cobertura y detener la
señal de alerta.
• Fueradecoberturamanual: también puede comprobar manualmente
si las radios tienen cobertura. Pulse brevemente la tecla
/ .en la
radio de los “padres”. Si las dos radios están dentro de cobertura,
oirá un tono de señal previamente establecido, de lo contrario si no
escucha ningún tono, signica que la radio está fuera de cobertura.
• Hableconelbebé: en cualquier momento podrá hablar con el bebé
pulsando el PTT. Pero si el bebé esté llorando (signica que la radio
está transmitiendo) deberá esperar a que actúel la función Talk back
que, después de 20 segundos de transmisión contínua, parará la
transmisión durante 10 segundos, permitiéndole hablar y calmarlo.
Para desactivar la función Babysitter, pulse la tecla MENU dos ve-
ces, hasta que visualice el canal babi/sitter Bo P”. Seleccione OF”
Conrme la selección pulsando el PTT.
Cuando se desavtiva la función Babysitter desactivada se restablecen
todas las funciones estándar.
Para mostrar momentaneamente el canal pmr446 sintonizado y el
subtono de audio, ir al canal deseado y mantenga pulsadas la tecla
MENU durante 5 segundos.
EL COMPARTIMENTO DE LA
BATERÍA Y CLIP DE CINTURÓN
Con el clip de cinturón puede fácilmente
jar el transceptor a su cinturón.
El clip sin embargo, debe quitarse cuando
ponga o cambie las baterías. Para quitar el
clip de cinturón, suba la leva central y haga
deslizar el clip.
El G6XT acepta el pack de baterías en
dotación o 4 baterías alcalinas/recargables
AAA
CARGANDO LAS BATERÍAS Y AHORRO DE ENERGIA
Si el equipo no recibe ninguna señal durante 7 segundos o más, entra
en funcionamiento un circuito automático de ahorro de baterías el cual
puede incrementar la autonomía de las baterías un 50%.
Para recargar las baterías debe conectar el alimentador de pared a la
toma de corriente e insertar el jack del alimentador en la toma ubicada en
la parte posterior del cargador.
Se tardan 8/10 horas para recargarlas completamente.
Para alargar al máximo la capacidad de las baterías, recomendamos
recargarlas mientras el G6XT esté apagado y cuando aparezca el icono
de bajo nivel de baterías. Cuando las baterías están descargadas,
aparece en el display el icono “bt lo
.
ADVERTENCIAS:
! No sobrecargue las baterías! Cuando éstas estén completamente
cargadas, el proceso de carga no se detiene automáticamente.
No olvide por lo tanto, sacar el transceptor del cargador tan
pronto como se hayan cargado las pilas.
! No intente recargar pilas alcalinas o cualquier pila no recargable.
Asegúrese de recargar la radio, solo con baterías NI-MH o con
el pack de baterías suministrado. Es muy peligroso intentar
recargar la radio con otro tipo de baterías (por ejemplo alcalinas o
baterías de magnesio) ¡Las pilas no aptas pueden perder líquido,
explotar o también quemar y causar graves daños!
! El uso de un cargador no original puede causar daños al equipo
o causar explosiones y lesiones personales.
! No tire nunca las pilas al fuego, ni las acerque a fuentes de calor:
pueden causar explosiones y lesiones personales. Deseche las
pilas siguiendo la normativa medioambiental vigente.
! No mezcle pilas viejas y nuevas y/o de tipo diverso y/o
usadas de forma diferente. Cada juego de pilas usado
debe estar compuesto siempre de los mismos elementos.
EFECTO MEMORIA DE LAS PILAS RECARGABLES
Las pilas recargables NiMH (Niquel Metal Hidruro) pueden ser afectadas
por lo que se conoce como el “efecto memoria”. Este fenómeno se
asocia a una reducción drástica de la autonomía de la batería y se activa
si las baterías se recargan regularmente antes de ser descargadas
completamente y/o no estan recargadas completamente.
Para evitar el efecto memoria:
Cuando sea posible, recargue las baterías solo cuando estén
completamente descargadas (hasta que el dispositivo se apage solo
durante el uso normal).
No desconecte el cargador antes del tiempo indicado para una carga
de batería total.
Descargue y cargue sus baterías completamente al menos dos veces
al mes.
En cualquier caso, la mejor solución para evitar el “efecto memoria” es
ir turnando dos juegos de baterías: una en uso, y la otra como un juego
de recambio.
Puede eliminarse fácilmente el efecto memoria realizando un ciclo
completo de carga/descarga de la batería 3 ó 4 veces.
El efecto memoria no debe confundirse con la duración de la vida normal de
la batería que es de aproximadamente 300-400 ciclos de carga/descarga.
Es completamente normal que la capacidad de las baterías disminuya
cuando están llegando al nal de su duración normal de vida, llegado a
este punto necesitará sustituir las baterías.
INDICADOR NIVEL DE BATERÍA
El G6XT tiene un CONTADOR DE NIVEL DE BATERÍA que muestra el
nivel de batería. A mayor número de barras visibles, más alto será el nivel
de la batería. Cuando el nivel de batería es bajo, el icono
parpareará
en el display indicando que sus baterías deben ser reemplazadas o
recargadas si utiliza unas baterías recargables.
CUIDADOS Y MANTENIMIENTO
! Utilice un paño suave para limpiar la radio. No utilice detergentes,
alcohol o productos abrasivos.
! No sumerja la radio en el agua
! Apague la radio y quite las baterías si no va a utilizarla durante un
largo periodo de tiempo.
ATENCIÓN
¡ NO ABRA LA RADIO BAJO NINGÚN MOTIVO!
Ha sido ajustada en fábrica para las máximas prestaciones. La
mecánica y electrónica de precisión del equipo, requieren experiencia e
instrumentación adecuadas. La apertura de la radio o de los accesorios
por parte de personal no autorizado, supondrá la anulación inmediata
de la garantia. Las intervenciones deberán ser efectuadas por personal
autorizado.
TRANSMISIÓN Y RECEPCIÓN
Para poder comunicarse con todas las radios de su grupo, todas deben
tener operativo el mismo canal.
Para transmitir, pulse y mantenga pulsada la tecla PTT y hable
normalmente en el micrófono. El icono TX” aparecerá constantemente
en el display LCD mientras transmite. Para una máxima claridad, hable a
una distancia de 2/3 cm del micrófono.
Para poder escuchar a su interlocutor, suelte la tecla PTT. El icono “RX
aparecerá en el display mientras la radio esté recibiendo.
SQUELCH
Con la función SQUELCH se suprime el ruido de fondo. En el MIDLAND
G6 XT esta función es automática y está siempre activa.
BLOQUEO DE TECLADO
Mantenga pulsada la tecla durante 5 segundos. Aparecerá en el display
. La función de bloqueo se activará y todas las teclas, exceptuando el
PTT y la tecla de Bloqueo/Desbloqueo
.
Para desactivar esta función, mantenga pulsada otra vez la tecla
durante 5 segundos aprox.
SUBTONOS CTCSS
Los subtonos CTCSS son códigos que pueden añadirse a los canales
para la creación de nuevos sub-canales privados. Para cada canal puede
seleccionar hasta 38 subtonos CTCSS.
La adición de estos códigos se podrá realizar en los canales principales
pmr446 (desde 1 a 8).
Los canales pre-programados (desde 9 a 48) no pueden modicarse.
Para seleccionar un código privado para el canal actual pulse tres
veces la tecla MENU. Después, con las teclas de desplazamiento ▲▼
seleccione el código deseado.
Para conrmar la selección, pulse el PTT o espere durante 5 segundos
El subtono seleccionado aparecerá en el display.
Para desactivar la función CTCSS, seleccione el canal y pulse la tecla
MENU hasta que visualice parpadeando el subtono CTCSS en el display.
Seleccione entonces “OF” usando las teclas de desplazamiento ▲▼.
Para conrmar, pulse PTT.
Nota: Para poder comunicar con otras radios, TODAS deben estar
sintonizadas en el mismo canal y con el mismo subtono.
TABLA TONOS CTCSS
Numero
visualizado
Tono
Frecuencia Hz
Numero
visualizado
Tono
Frecuencia Hz
Numero
visualizado
Tono
Frecuencia Hz
01 67.0 14 107.2 27 167.9
02 71.9 15 110.9 28 173.8
03 74.4 16 114.8 29 179.9
04 77.0 17 118.8 30 186.2
05 79.7 18 123.0 31 192.8
06 82.5 19 127.3 32 203.5
07 85.4 20 131.8 33 210.7
08 88.5 21 136.5 34 218.1
09 91.5 22 141.3 35 225.7
10 94.8 23 146.2 36 233.6
11 97.4 24 151.4 37 241.8
12 100.0 25 156.7 38 250.3
13 103.5 26 162.2
VOX
Su G6 XT tiene 4 niveles de VOX (1, 2, 3 y 4). Esta función permite
al usuario activar la comunicación sin necesidad de pulsar el PTT. Sólo
tendrá que hablar y la transmisión se efectuará automáticamente.
Podrá seleccionar 3 niveles de sensibilidad del VOX, con o sin
accesorios.
El cuarto nivel activará el VOX con la función Talkback: cuando uno de
los dos equipos transmite durante más de 20 segundos, el VOX Talkback
parará la transmisión durante 10 segundos; así el otro usuario tendrá la
oportunidad de hablar.
Para seleccionar el nivel de VOX, pulse la tecla MENU, hasta que en
el display aparezca VOX” parpadeando. A continuación, con las teclas
▲▼, selecione “1”,”2”,”3” ó “4”.
Para conrmar, pulse el PTT o espere durante 5 segundos. En el Display
aparecerá “VOX” que signica que la función está activada.
Para desactivar la función VOX, siga las intrucciones anteriores, pero
seleccione “oF” y entonces pulse el PTT para conrmar.
TONO BEEP
Esta función reproduce un tono beep cada vez que pulse una tecla.
Si quiere desactivar esta función, pulse la tecla MENU hasta que en el
display aparezca
y “ON”, entonces seleccione mediante ▲▼ “OF”.
Para conrmar, pulse el PTT o espere durante 5 segundos
De esta manera, todos los “beeps” y “tonos” quedarán desactivados.
Para reactivar esta función, repita el procedimiento selecionando ON
y conrme pulsando el PTT o esperando 5 segundos. En el display
aparecerá
que signica que la función está activada
ROGERBEEP(tonondetransmisión)
Si está activada, al soltar el PTT (nalizar la transmisión), emitirá una
tonalidad que indicará a su interlocutor que ha nalizado su transmisión y
que puede comenzar a hablar.
Para activar la función ROGER BEEP, pulse la tecla MENU hasta que en
el display aparezca
; con las teclas ▲▼, seleccione ON”. En el display
aparecerá el icono
, lo que signica que la función está activada.
Para conrmar, pulse el PTT o espere durante 5 segundos.
Para desactivar esta función, repita el procedimiento seleccionando
OF”.
SELECCIÓN LLAMADA ALERTA
G6 XT permite emitir una señal de llamada de alerta CALL a todos los
usuarios del mismo canal.
Para activar la función CALL haga doble click sobre el PTT. En el display
aparecerá el icono “TX
SCAN
La función SCAN explora todos los canales en busca de señales. Esta
función se utiliza para comprobar el tráco en los canales antes de la
transmisión y permite detenerse en el canal que alguien está usando.
En el caso de ser una conversación no deseada, podrá saltar el canal
pulsando las teclas ▲▼
Cuando se activa la función SCAN, se activa el detector CTCSS: la radio
automáticamente detecta el subtono de la radio que está llamando, el
cual aparecerá en el Display. Los subtonos CTCSS detectados no se
ajustarán automáticamente durante la transmisión, por lo que para poder
comunicar con el interlocutor, deberá seleccionar el subtono detectado
según el procedimiento indicando en el apartado SUBTONOS CTCSS
Para activar la función SCAN:
1. Pulse la tecla SCAN: La radio iniciará la exploración y SCAN aparecerá
en el display.
2. Pulse ▲▼para saltar los canales con ruido de fondo o conversaciones
no deseadas.
Transmisión durante la función SCAN
Durante la exploración, pulsando el PTT la radio transmitirá sobre el
canal de inicio de la exploración o sobre el canal ocupado, utilizando el
subtono pre-establecido.
Para desactivar esta función, vuelva a pulsar la tecla SCAN.
FUERA DE COBERTURA
El G6 XT esta equipado con la función fuera de cobertura (out of
range”).
Con el MIDLAND G6 XT podrá elegir entre la función automática de
fuera de cobertura” y la manual.
Para activar/desactivar la función “fuera de cobertura”:
“Fuera de cobertura” automático
Pulse MENU hasta que en el display aparezca
”, seleccione AU
(automático) con las teclas de desplazamiento ▲▼.
Conrme con la tecla PTT o espere durante 5 segundos. En el display
aparecerá
. que conrma que la función está activa.
Mediante el establecimiento de este modo una pareja de G6 XT estará
transmitiendo cada 60 segundos un código de control de datos. Tan pronto
como el contacto entre ambas unidades se esté perdiendo y una estación
no reciba este código de control dos veces consecutivas, el icono
empezará a parpadear en la pantalla y se oirá un beep de tono
“Fuera de cobertura” manual:
Pulse MENU hasta que en el display aparezca
”, seleccione PB
(manual) con las teclas de desplazamiento ▲▼.
Conrme pulsando la tecla PTT o espere durante 5 segundos. En el
display aparecerá el icono
.
Puede comprobar manualmente si las radios tienen cobertura. Pulse
brevemente la tecla
/ . Si las dos radios están dentro de cobertura,
oirá un tono de señal previamente establecido, de lo contrario si no
escucha ningún tono, signica que la radio esta fuera de cobertura.
TABLA DE PROBLEMAS Y SOLUCIONES
Problema Posible causa Solución
La radio no se enciende El pack de baterías/las baterías esta descargado o no
están colocados correctamente.
Verique que el pack de baterías/las baterías está
cargado y colocado correctamente.
La radio se apaga al poco de
encenderla
El pack de baterías/las baterías está descargado. Si usa baterías alcalinas (no recargables), cámbielas y si
usa baterías recargables o el pack de baterías, cárguelas.
Las baterías no se recargan El cargador no está correctamente conectado o el
pack de baterías esta mal colocado.
Verique las conexiones del pack de baterías y/o si está
bien colocado.
La radio se enciende pero no
recibe nada
La radio está en una zona de sombra. Muévase a otro espacio más abierto.
El volumen es demasiado bajo Regule el volumen.
Incorrecto CTCSS Verique que usa el mismo subtono CTCSS que su
interlocutor.
No es posible comunicar con
otros
Ha seleccionado un canal incorrecto de radio Seleccione el mismo canal que su interlocutor.
La radio está en una zona de sombra o su
intercomunicador está muy lejos
Muévase a un espacio más favorable.
Incorrecto CTCSS Verique que usa el mismo subtono CTCSS que su
interlocutor.
Recepción defectuosa Su interlocutor está muy lejos y/o la radio está fuera
de cobertura debido a obstáculos en su dirección.
Muévase más cerca de su interlocutor hacia un espacio
más favorable.
La radio está situada cerca de dispositivos que
pueden causar interferencias, como un televisor, un
ordenador, etc.
Mueva la radio lejos de tales dispositivos.
El VOX hace a la radio
transmitir accidentalmente
Excesiva sensibilidad o ambiente muy ruidoso. Baje la sensibilidad del VOX
Hay que hablar muy alto con
el VOX activado
La sensibilidad es muy baja. Si el ruido ambiental no es muy alto, ajuste el nivel de
sensibilidad más alto o use un micrófono axterno
Mal funcionamiento de la
lógica de la radio (símbolos
extraños en el display,
funciones bloqueadas, etc)
Ajustes defectuosos causados por alguna anomalía
en la alimentación .
Recargue o cambie las baterías.
ESPECIFICACIONES TÉCNICAS
Canales ............................................................................................................................. 1~8 Ppmr446 + 40 preprogramados (canal pmr446 + CTCSS)
Generación de frecuencia ..........................................................................................................................................................................Sintetizador PLL
Rango de frecuencias...............................................................................................................................................446.00625 - 446.09375MHz (pmr446)
Aerial .................................................................................................................................................................................................................... 12.5 KHz
Alimentación .......................................................... 4,8 V 600MAH (PACK DE BATERÍAS) o 4xAAA 1,5V (ALCALINAS / RECARGABLES) +/- 10% Vcc
Temperatura ..................................................................................................................................................................................................de -20° a +55°
Dimensiones (sin antena) .........................................................................................................................................................................58 x 160 x 28 mm
Peso (sin baterias) .......................................................................................................................................................................................................95 gr
Ciclo de trabajo (% en 1 h) ................................................................................................................................................... TX 5%, RX 5%, stand-by 90%
Transmisor
Potencia de salida (ERP) .......................................................................................................................................................................................500 mW
Modulación ..................................................................................................................................................................................................................... FM
Rechazo de espurias .......................................................................................................................................................................Según normativa ETSI
Impedancia Antena .................................................................................................................................................................................................. 50 Ohm
Receptor
Sensibilidad 12dB SINAD ..........................................................................................................................................................................................0,35μV
Rechazo canal adyacente ............................................................................................................................................................................................60dB
Rechazo Imagen ..........................................................................................................................................................................................................60dB
Rechazo espúreas........................................................................................................................................................................................................60dB
Potencia de salida de audio (10% THD ................................................................................................................................................ 300mW a 10% THD
Frecuencias intermedias ........................................................................................................................................................ 1°:21,250 MHz ; 2°:450 KHz
Toma para micrófono exterior y carga ....................................................................................................................................................2,5 mm jack stereo
Toma para altavoz externo ............................................................................................................................................................................ 3,5 mm mono
Las especicaciones pueden estar sujetas a cambios sin previo aviso.
G6XT
MENU
S
G6XT
MENU
S
1
2
3
12
7
9
5
10
11
6
4
8
G6XT
MENU
S
13
21
20
18
15
14
17
18
19
16
STÖRUNGSERKENNUNG
Problem Mögliche Ursache Lösungsvorschlag
Funkgerät schaltet sich nicht
ein.
Akkus erschöpft und/oder nicht korrekt eingesetzt. Vergewissern Sie sich, dass die Akkus frisch und
korrekt eingesetzt sind.
Funkgerät schaltet sich
aus, kurz nachdem es
eingeschaltet wurde.
Akkus erschöpft. Laden Sie die Akkus.
Akku wird nicht geladen. Ladegerät nicht korrekt angeschlossen oder Akkus
falsch installiert.
Überprüfen Sie den Anschluss des Ladegeräts und die
Installation der Akkus.
Funkgerät schaltet sich
ein, empfängt jedoch keine
Signale.
Standort ist zu sehr abgeschirmt. Begeben Sie sich zu einem anderen Standort.
Lautstärke zu gering eingestellt. Regeln Sie die Lautstärke hoch.
CTCSS falsch. Vergewissern Sie sich, dass der CTCSS-Ton der
Einstellung auf den anderen Geräten entspricht.
Kommunikation ist nicht
möglich.
Falscher Funkkanal gewählt. Wählen Sie den gleichen Kanal, wie auf den anderen
Geräten.
Standort ist zu sehr abgeschirmt oder zu weit von der
Gegenseite entfernt.
Begeben Sie sich zu einem anderen Standort.
CTCSS falsch. Vergewissern Sie sich, dass der CTCSS-Ton der
Einstellung auf den anderen Geräten entspricht.
Empfang unterbrochen und/
oder gestört.
Entfernung zu groß und/oder Hindernisse. Gehen Sie dichter an die Gegenseite heran oder
wechseln Sie Ihren Standort.
Funkgerät ist zu dicht an Störquellen installiert
(Fernseher, Computer usw.).
Entfernen Sie sich mit dem Funkgerät von diesen
Störquellen.
VOX-Funktion schaltet das
Funkgerät auf Senden.
Empndlichkeit und/oder Umweltgeräusche zu hoch. Verringern Sie die VOX-Empndlichkeit.
Für die VOX-Funktion muss
sehr laut gesprochen werden.
Empndlichkeit zu gering eingestellt. Sind die Umweltgeräusche zu hoch, so erhöhen Sie
die Empndlichkeit oder benutzen Sie ein anderes
Mikrofon.
Logische Fehler (unlesbare
Symbole, Funktionen).
Fehlfunktion durch Problem bei der
Spannungsversorgung.
Laden Sie die Akkus.
TECHNISCHE SPEZIFIKATIONEN
Kanäle ............................................................................................................................................1~8 PMR+ 40 voreingestellte+ CTCSS kombinationen
Frequenzerzeugung .................................................................................................................................................................................. PLL-Synthesizer
Frequenzbereich........................................................................................................................................................... 446.00625 - 446.09375MHz (PMR)
Kanalabstand......................................................................................................................................................................................................... 12.5 KHz
Stromversorgung ........................................................................................4,8 V 600mAh (Akkupack)- 4 x AAA 1,5 V (Alkalinen Batterien) +/- 10 % VDC
Arbeitstemperatur ........................................................................................................................................................................................ 20°C bis +55°C
Abmessungen (ohne Antenne) .................................................................................................................................................................... 58x160x28 mm
Gewicht (ohne Batterien/Akkus) ............................................................................................................................................................................. 0,095 kg
Intermittierender Betrieb (% in 1 Stunde) ......................................................................................................................... TX 5 %, RX 5 %, Stand-by 90 %
Sender
HF Ausgangsleistung (ERP) ................................................................................................................................................................................... 500 mW
Modulation .......................................................................................................................................................................................................................FM
Ober-und Nebenwellenunterdrückung..................................................................................................................................Entsprechend ETSI Standards
Spitzenhub............................................................................................................................................................................................................. ±2,5 KHz
Antennenimpedanz.................................................................................................................................................................................................. 50 Ohm
Empfänger
Empfindlichkeit bei 12dB Sinad ................................................................................................................................................................................ 0,35μV
Spiegelfrequenzunterdrückung....................................................................................................................................................................................60 dB
Nebenempfangsstellen-unterdrückung.........................................................................................................................................................................60dB
Interkanalmodulationsabstand......................................................................................................................................................................................60dB
NF-Ausgangsleistung .............................................................................................................................................................. 300mW bei 10 % Klirrfaktor
Zwischenfrequenzen .................................................................................................................................................................1: 21,250 MHz; 2: 450 KHz
Anschluss externes Mikrofon und Ladegerät ............................................................................................................................................... 2,5 mm Stereo
Anschluss externer Lautsprecher/Ohrhörerbuchse ........................................................................................................................................ 3,5 mm Mono
Änderung der Spezifikationen vorbehalten, auch ohne Vorankündigung.
1

Hulp nodig? Stel uw vraag in het forum

Spelregels

Misbruik melden

Gebruikershandleiding.com neemt misbruik van zijn services uitermate serieus. U kunt hieronder aangeven waarom deze vraag ongepast is. Wij controleren de vraag en zonodig wordt deze verwijderd.

Product:

Bijvoorbeeld antisemitische inhoud, racistische inhoud, of materiaal dat gewelddadige fysieke handelingen tot gevolg kan hebben.

Bijvoorbeeld een creditcardnummer, een persoonlijk identificatienummer, of een geheim adres. E-mailadressen en volledige namen worden niet als privégegevens beschouwd.

Spelregels forum

Om tot zinvolle vragen te komen hanteren wij de volgende spelregels:

Belangrijk! Als er een antwoord wordt gegeven op uw vraag, dan is het voor de gever van het antwoord nuttig om te weten als u er wel (of niet) mee geholpen bent! Wij vragen u dus ook te reageren op een antwoord.

Belangrijk! Antwoorden worden ook per e-mail naar abonnees gestuurd. Laat uw emailadres achter op deze site, zodat u op de hoogte blijft. U krijgt dan ook andere vragen en antwoorden te zien.

Abonneren

Abonneer u voor het ontvangen van emails voor uw Midland G6 XT bij:


U ontvangt een email met instructies om u voor één of beide opties in te schrijven.


Ontvang uw handleiding per email

Vul uw emailadres in en ontvang de handleiding van Midland G6 XT in de taal/talen: Duits, Engels, Frans, Italiaans, Portugees, Spaans, Pools als bijlage per email.

De handleiding is 10,61 mb groot.


U ontvangt de handleiding per email binnen enkele minuten. Als u geen email heeft ontvangen, dan heeft u waarschijnlijk een verkeerd emailadres ingevuld of is uw mailbox te vol. Daarnaast kan het zijn dat uw internetprovider een maximum heeft aan de grootte per email. Omdat hier een handleiding wordt meegestuurd, kan het voorkomen dat de email groter is dan toegestaan bij uw provider.

Uw handleiding is per email verstuurd. Controleer uw email

Als u niet binnen een kwartier uw email met handleiding ontvangen heeft, kan het zijn dat u een verkeerd emailadres heeft ingevuld of dat uw emailprovider een maximum grootte per email heeft ingesteld die kleiner is dan de grootte van de handleiding.

Er is een email naar u verstuurd om uw inschrijving definitief te maken.

Controleer uw email en volg de aanwijzingen op om uw inschrijving definitief te maken

U heeft geen emailadres opgegeven

Als u de handleiding per email wilt ontvangen, vul dan een geldig emailadres in.

Uw vraag is op deze pagina toegevoegd

Wilt u een email ontvangen bij een antwoord en/of nieuwe vragen? Vul dan hier uw emailadres in.


Info