■
CHARACTERISTICS
1. Analogue & digital time displays: Hour,
Minute, Second, Month, Date and day of the
week.
2. Time Indication:
12-hour display format with
PM indicator and 24-hour display format are
available.
3. Daily alarm:
The alarm can be set to sound
at the designated time on a 24-hour basis.
4. Chime: The chime can be set to sound every
hour on the hour with a single beep.
5.
Stop wa t ch: The stopwatch can mea s u re
up to 23 hours 59 minutes and 59 seconds in
1/100-second increments. Lap time measure-
ment is available.
6. 100 M Water Resistant
7. I ll u mi n at i ng l i gh t : T he b u i l t - i n ele ct ro-
luminescent (EL) back l i g h t illuminates the
display for easy viewing in darkness.
■
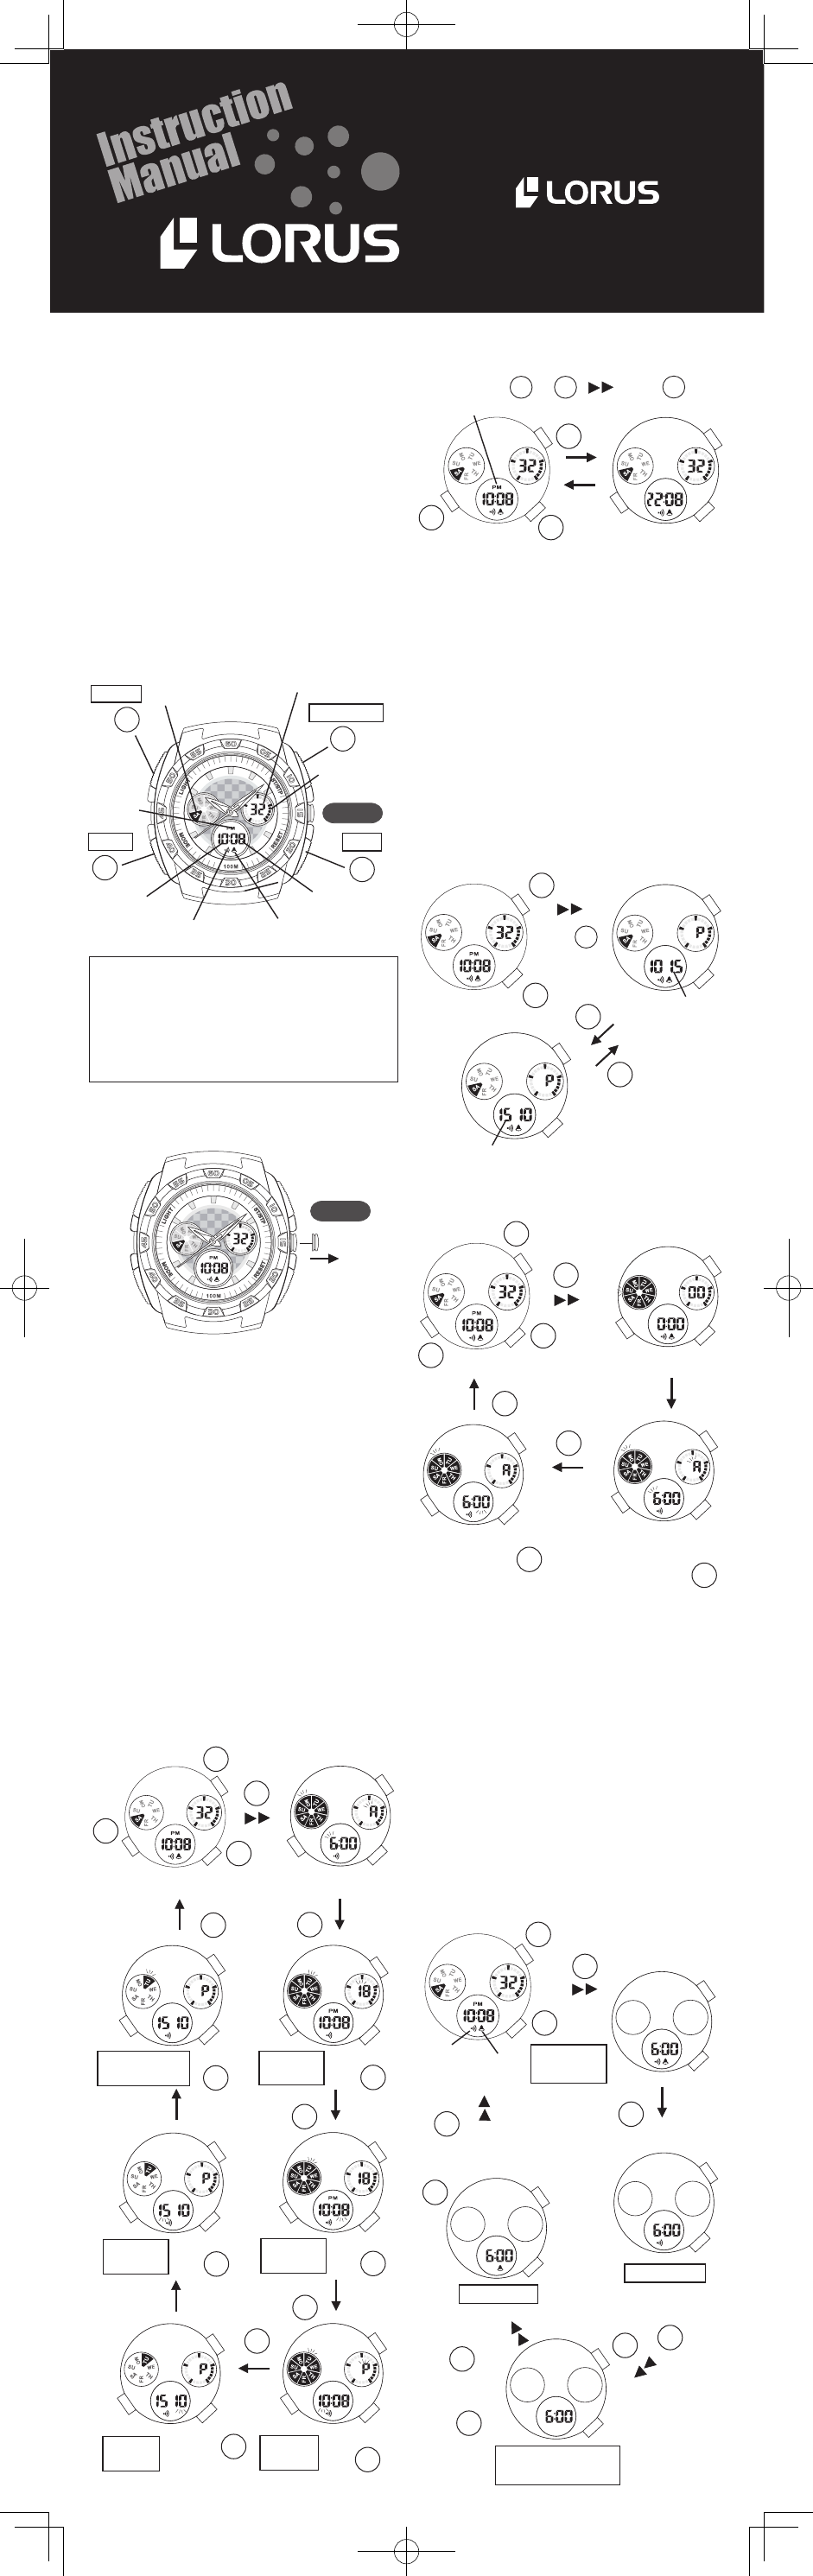
DISPLAY A N D B U T T O N O P E R AT I O N
■
HOW TO S E T N O R M A L TIME
■
HOW TO S E T ALARM T I M E
1. From NORMAL TIME display, press and hold S3
button for 2 seconds to show the ALARM TIME
display. The hour digits start flashing.
* The display is changed automatically to the
ALARM TIME after 2 seconds.
2. Press S3 button again to move on to SECONDS
setting. The second digits start flashing.
3. Press S2 button to set SECONDS setting.
4. Press S1 button to move on to MINUTES setting.
* Selection of the digits to be adjusted (flashing)
is made in the order below by pressing S1 but-
ton and then pressing S2 button to be set.
5. After all the adjustment are completed, press
S3 button to return to the NORMAL TIME display.
■
HOW TO D I S P L AY M O N T H / DATE
* Press S2 button and hold to show the ALARM
TIME. Release S2 button to return to the NOR-
MAL TIME display.
* Press S1 button and hold to show the MONTH/
DATE or DATE/MONTH. Release S2 button to re-
turn to the NORMAL TIME display.
* Press S3 button at any time to retur n to the
NORMAL TIME display.
■
SETTING T H E T I M E ( A N A L O G U E )
1. Pull the crown out one step, the second hand
will stop.
2. Set the correct time by turning the crown.
3. Push the crown back to the original position.
The watch will start running again.
* The analogue indication and digital display of
the time setting can be adjusted separately.
1. From NORMAL TIME display, press and hold S3
button for 2 seconds to show the ALARM TIME
display. The hour digits start flashing.
* The display is changed automatically to the
ALARM TIME after 2 seconds.
2. Press S2 button to set HOURS setting.
3. Press S1 button to move on to MINUTES setting.
4. Press S2 button to set MINUTES setting.
5. After all the setting are completed, press S3
button to return to the NORMAL TIME display.
■
HOW T O SWITC H 1 2 - H O UR/24-H O U R
FORMAT
HOU R S
DAY O F
WEE K
CHI M E
SIG N AL
MIN U TES
SEC O NDS
ALA R M
SIG N AL
ANI M AT I ON
DOTS
MON T H/DATE
NORMAL TIME
MINUTES
SETTING
SECONDS
SETTING
Engagement/Disengagement of ALARM &
CHIME
* Press S2 button and hold it, and then press S1
button, the ALARM and CHIME can be en-
gaged or disengaged in the order below.
* The ALARM signal and/or CHIME signal appear
or disappear on the display accordingly.
1. Press S1 or S2 button and hold it. Then press S3
button to switch the display.
* The time display format in either 12-hour indi
-
cation or in 24-hour indication can be selected
alternately.
* Under the 12-hour indication format, "PM" mark
appears in the afternoon, but no AM mark ap-
pears in the morning. Under the 24-hour indi-
cation format, no mark appears on the display.
PRESS
1. From NORMAL TIME display, press S1 button
and hold it to show the MONTH/DATE display.
2. Press S2 button to switch to the DATE/MONTH
display.
3. Press S2 button again to switch back to the
MONTH/DATE display.
* The display format in either DATE/MONTH in
-
dication or in MONTH/DATE indication can be
selected alternately by pressing S2 button.
PRESS
AND HOLD