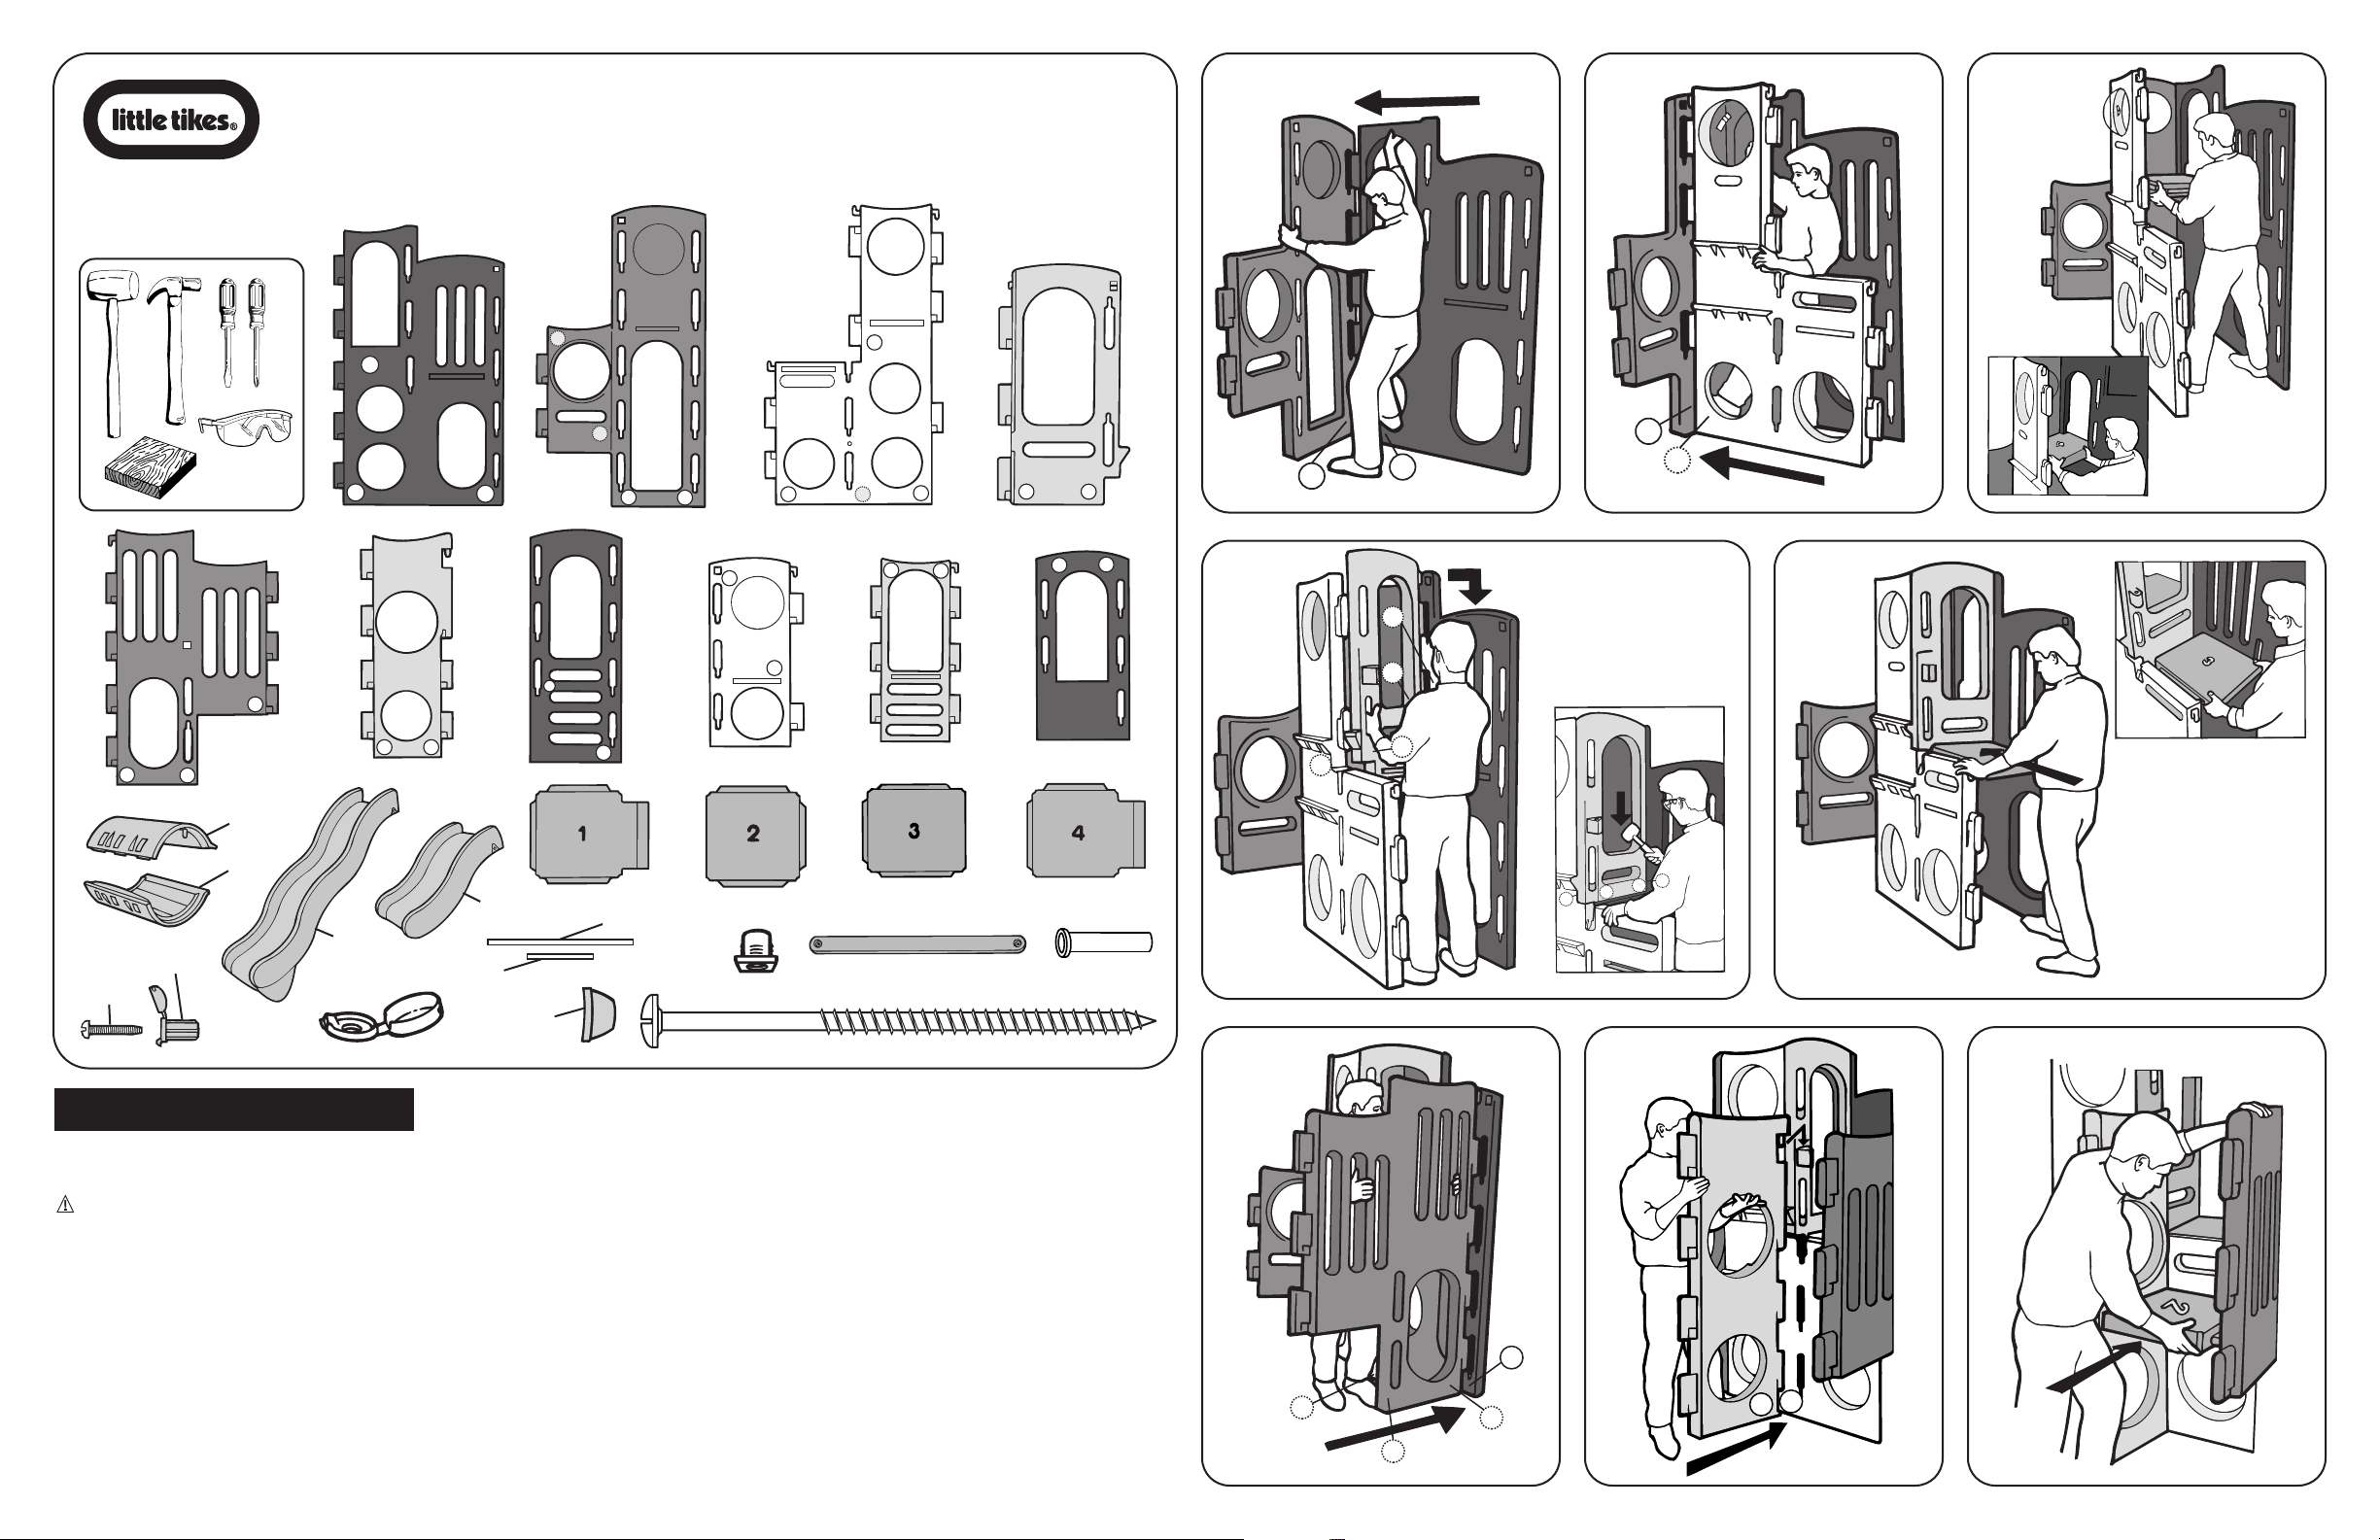
Push down on the wall with the hooks to “lock”wall in place.
NOTE: Place a block of wood on walls with D molded in (see Illus. 4) and
pound with a hammer. A rubber mallet may be used in place of the hammer
and block of wood.
TUNNEL ASSEMBLY (Illus. 11 - 17)
Place tunnel bottom (B - tunnel piece without pegs) on lower “shelf”on
the wall with the bubble window. Insert two 1 5/8" (4.1 cm) bolts (C) with bolt
covers (D) in holes inside tunnel bottom. Tighten with a screwdriver.
NOTE: The 1 5/8" (4.1 cm) bolts may be tightened with a slotted or
Phillips® screwdriver. Do not overtighten bolts. The bolt cover will not snap shut
if bolt is too tight.
Insert two 1 5/8" (4.1 cm) bolts with bolt covers in holes underneath
tunnel. Tighten with a screwdriver.
Place tunnel top (A - tunnel piece with pegs) on top “shelf”on the wall
with the bubble window. Line up pegs on the inside rim of tunnel with holes in
the walls at each end of tunnel and push down. Insert two 1 5/8" (4.1 cm)
bolts with bolt covers in holes in tunnel top and tighten with a screwdriver.
Insert three 1 5/8" (4.1 cm) bolts with bolt covers in tunnel top and into
threaded bushing inside holes in tunnel bottom. (Threaded bushings are
already installed in tunnel bottom.) Tighten with a screwdriver.
DISASSEMBLY
Two adults are needed. Remove tunnel first.
Wear safety glasses when performing the following procedure. It may be
necessary to use a slotted screwdriver to pry out the small hooks at the top of
walls. When disassembling the tunnel, pry open bolt covers with a slotted
screwdriver.
littletikes.com
624370092 - 11/11
ENGLISH
LITTLE TIKES® PLAYGROUND
Ages 3 - 10 years
Please save sales receipt for proof of purchase.
WARNING:
ADULT ASSEMBLY REQUIRED.
2 people are required for assembly.
• Keep these instructions for future reference.
• Prior to assembly, this package contains small parts: hardware which is a
choking hazard and may contain sharp edges and sharp points. Keep away
from children until assembled.
• Falls onto hard surfaces can result in head or other serious injuries. Never place
on concrete, asphalt, wood, packed earth, grass or other hard surfaces. Carpet
over hard floors may not prevent injury. Always use protective surfacing on the
ground under and surrounding the playground equipment according to the
enclosed “Consumer Information Sheet for Playground Surfacing Materials.”
Maximum fall height protection up to 6 feet (2 m) required.
• Adult supervision required. Do not leave children unattended.
• This product is intended for use by children ages 3 - 10 years.
• Maximum weight per child: 100 lbs. (45 kg). Limit 8 children.
• Shoes must be worn at all times.
• This product is intended for outdoor domestic family use only.
• Observing the following statements and warnings reduces the likelihood of
serious or fatal injury.
• Place this product on level ground and at least 6' (2 m) away from any
object. Objects to be avoided include, but are not limited to, fences,
buildings, overhead branches, laundry lines or electrical wires.
• To prevent serious injury, children must not use the equipment until
properly installed.
• It is recommended that the orientation of the assembled product be such
that direct sunlight is minimized on surfaces intended for standing or sitting.
• Instruct children on proper use of this product, only after properly placed,
and not in a manner other than intended.
• Do not allow children to climb on product when product is wet.
• Instruct children not to attach items to the product that are not specifically
designed for use with the product such as, but not limited to, jump ropes,
clotheslines, pet leashes, cables and chains, as they may cause a
strangulation hazard.
• Instruct children to remove their bike or other sports helmet before playing
on this product.
• Dress children appropriately: do not allow children to wear loose-fitting
clothing including ponchos, scarves and garments with drawstrings. Well-
fitting shoes must be worn at all times.
• Protect your eyes. Always wear safety glasses when using a hammer.
WALL ASSEMBLY:
The order of assembly corresponds with the letters molded into each wall.
For example, match up the two walls with A molded into the bottom corners.
Lift up the wall with hooks and insert hooks into the openings in opposite wall.
4370