98
HOW TO ADJUST THE POSITION OF THE SEAT
For effective exercise,
the seat should be in
the proper position.
As you pedal, there
should be a slight
bend in your knees
when the pedals are
in the farthest posi-
tion. IMPORTANT:
After you adjust the
position of the seat,
make sure that your
knees will not hit
the console when you pedal. To adjust the seat, first
turn the seat knob counterclockwise two or three turns
to loosen it (if the seat knob is not loosened enough,
the seat knob may scratch the frame). Next, pull the
seat knob, slide the seat to the desired position, and
release the seat knob. Make sure to move the seat
back and forth slightly until it locks in position.
Then, turn the seat knob clockwise to tighten it.
HOW TO ADJUST THE PEDAL STRAPS
To adjust the pedal
straps, first pull the
straps off the tabs
on the pedals.
Press the straps
back onto the tabs
using different
holes in the straps.
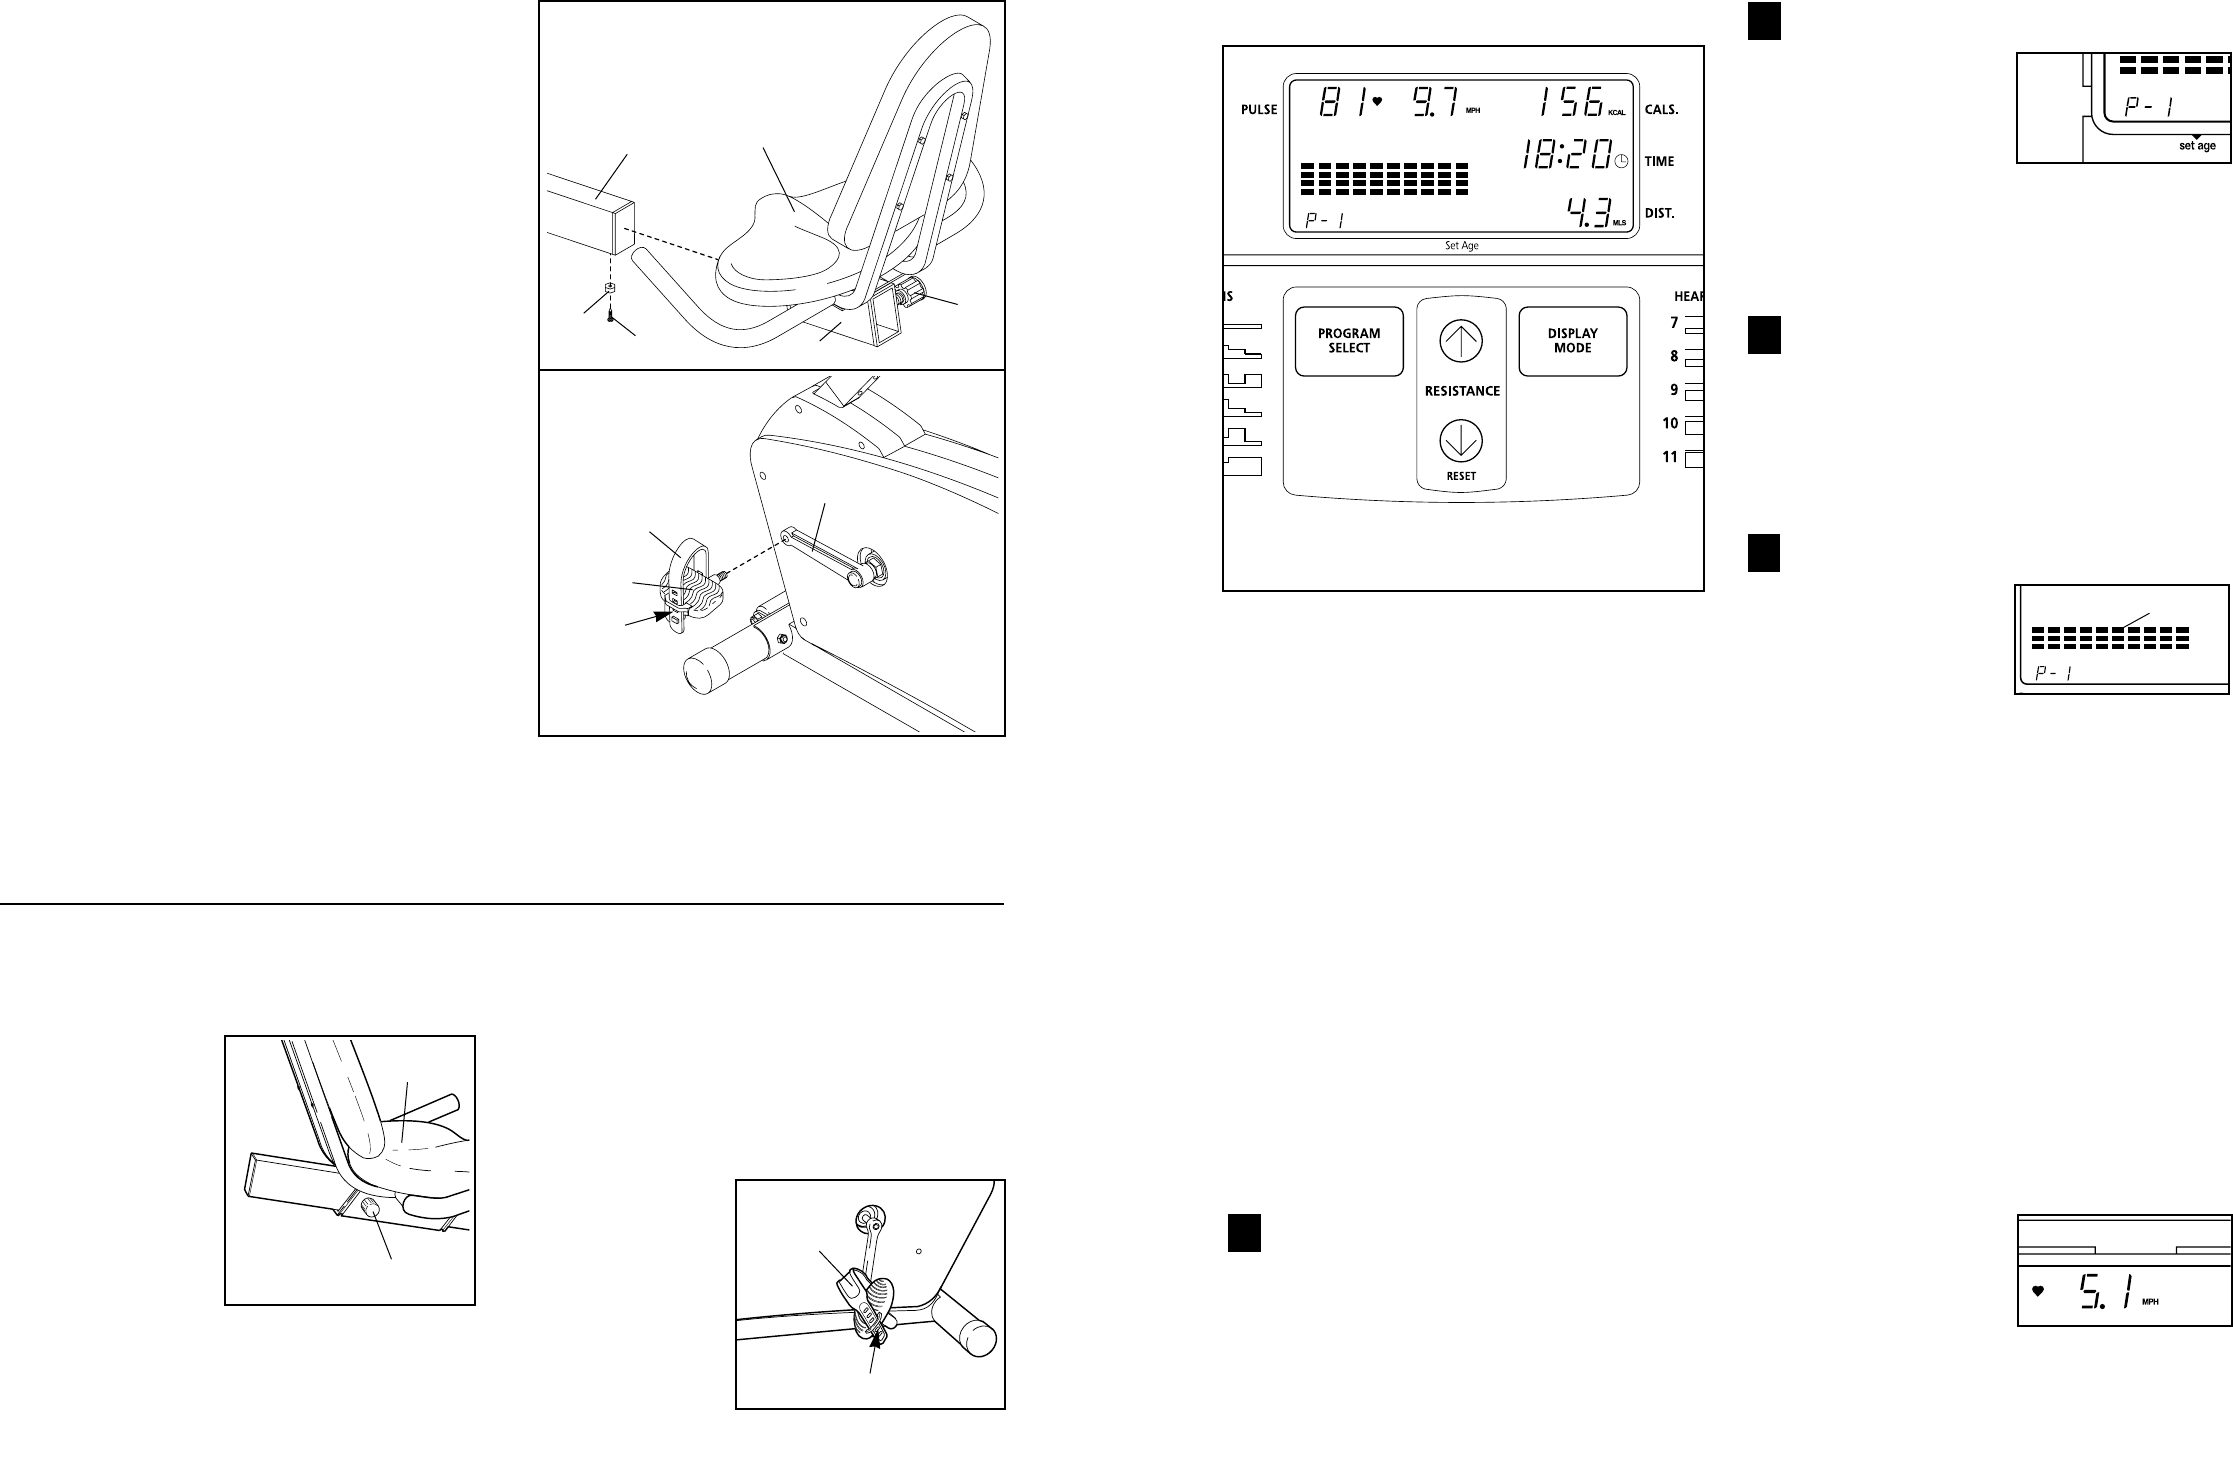
Seat
Seat Knob
Strap
Tab
HOW TO OPERATE THE RECUMBENT CYCLE
10. Turn the Seat Knob (8) counterclockwise two or
three turns to loosen it (if the Seat Knob is not loos-
ened enough, the Seat Knob may scratch the
Frame [1]). Next, pull the Seat Knob and slide the
Seat Carriage (11) onto the Frame (1). Move the
Seat (12) to the desired position and release the
Seat Knob. Make sure to move the Seat Carriage
back and forth slightly until it locks in position.
Then, turn the Seat Knob clockwise to tighten it.
Attach the Nut (54) to the Frame (1) with the #10 x
5/8” Screw (30).
11. Identify the Left Pedal (40) (there is an “L” on the
Left Pedal for identification). Using an adjustable
wrench, tighten the Left Pedal counterclockwise into
the left Crank Arm (34).
Tighten the Right Pedal clockwise into the right
Crank Arm (not shown).
Adjust the Pedal Strap (41) on the Left Pedal (40) to
the desired position. Press the Pedal Strap onto the
tab on the Left Pedal. Adjust the Pedal Strap on the
Right Pedal in the same manner (not shown).
12
54
30
1
8
11
10
34
40
41
Tab
11
12. Make sure that all parts are tightened before you use the recumbent cycle. Place a mat beneath the
recumbent cycle to protect the floor.
DESCRIPTION OF THE CONSOLE
The innovative console offers an impressive array of
features to help you get the most from your workouts.
When the manual program is selected, you can adjust
the pedaling resistance with a touch of a button. As
you exercise, the console will display your pedaling
speed, the number of Calories you have burned, the
elapsed time and the distance you have pedaled. You
can even measure your heart rate using the built-in
pulse sensor.
The console also offers ten preset workout programs.
Five programs automatically change the pedaling
resistance as they guide you through effective work-
outs, and five programs automatically adjust the ped-
aling resistance to keep your heart rate near a prese-
lected level during your workouts.
Note: Before the console can be operated, two “AA”
batteries must be installed. See assembly step 4 on
page 6 for installation instructions.
HOW TO USE THE MANUAL PROGRAM
Turn on the power
To turn on the power, press any button on the
console or simply begin pedaling. Note: If batteries
were just installed, the power will already be on.
Select the manual program
Each time the power
is turned on, the
manual program will
automatically be
selected, as shown
by the “P-1” in the
display. (P-1 is the manual program.) If you have
selected a different program, select the manual
mode again by pressing the program button
repeatedly until the “P-1” reappears.
Begin pedaling and adjust the resistance of
the pedals as desired
As you exercise, press the resistance + and –
buttons to adjust the resistance of the pedals.
Note: After the buttons are pressed, it may take
a moment for the selected resistance setting to
be reached.
Follow your progress with the console display
As you exercise, the
matrix on the left side
of the display will
show your progress.
During the first
minute that you
pedal, the first column of the matrix will flash;
during the second minute, the second column
will flash; during the third minute, the third col-
umn will flash, and so on, until the tenth column
is flashing. After you have pedaled for ten min-
utes, the matrix will reset and the first column will
begin to flash again.
The matrix will also show the resistance level of
the pedals. As you press the resistance + or –
button, the height of the columns in the matrix
will increase or decrease.
In addition to the matrix, the display will show
your pedaling speed, the number of Calories you
have burned, the elapsed time and the distance
you have pedaled. The display will also show
your heart rate when the pulse sensor is used
(see step 5).
Note: The console
can display speed in
miles per hour, kilo-
meters per hour or
repetitions per
minute. The letters
“MPH,” “KMH,” or “RPM” will appear in the dis-
play to show which unit of measurement is
4
3
2
1
Matrix
Note: If there is a thin sheet of clear
plastic on the console, remove it.