583043
2
Verklein
Vergroot
Pagina terug
1/3
Pagina verder
5.5 Setting the resolution
Press the [DPI] button to select High / Medium / Low resolution. High/Medium/Low resolution
icon will be displayed on status LCD.
5.6 Setting the scan mode
Press the [JPG/PDF] button to select JPG/PDF mode. JPG/PDF icon will be displayed on status
LCD.
5.7 Setting the color/mono mode
Press the [COLOR/MONO] button to select scan type Color/Monochromatic mode. Color/Mono
icon will be displayed on status LCD.
5.8 Calibrating the scanner
NOTE: Perform calibration only when white balance needs adjustment
1. With the dry cleaning cloth provided, clean the scanning lens located on the bottom of the
scanner.
2. Turn on the scanner by pressing the [POWER] button. Place the scanner on the white
area of the White Balance Calibration paper provided.
3. Press and hold the [COLOR/MONO] button. While holding the [COLOR/MONO] button,
press the [POWER] button and then release both buttons to enter into auto-calibration
mode. SD symbol will flash and then stop. “GREEN” and “RED” LED light will turn on.
4. Do not move the scanner. Wait until the “RED” LED turns off. “GREEN” LED will stay on.
5. With only the “GREEN” LED light on, start scanning the white paper by sliding the scanner
across the paper until the “GREEN” LED light turns off. (Slide the scanner backwards if
necessary).
6. Press and hold the [POWER] button to power off the scanner. Calibration is complete.
5.9 Scanning a document
NOTE: To scan, make sure your scanner is not connected to the computer and not in WiFi mode.
1. Turn on scanner by pressing the [Power/Scan] button for 2 seconds.
2. Hold the document firmly with one hand on a flat surface.
3. Place the scanner on the edge of the paper to ensure the whole document can be scanned.
Make sure to keep the scanning area in between the scanning width indicators marked on the
side of the scanner.
4. Hold the scanner flat against the material and then press the [SCAN] button once.
5. Slide the scanner slowly, keeping your hand stable to get the best quality picture.
6. Press the [SCAN] button again to stop scanning.
6. Using Wi-Fi function
6.1 Enabling Wi-Fi function
View and transfer file from the scanner to your computer, laptop, smart devices and tablets via
Wi-Fi mode.
1. Turn on the scanner and slide the Wi-Fi switch ON. 口口口口” will display on status LCD.
2. Wait about 30 seconds for Wi-Fi to initialize. “BLUE” LED light will flash every 3 seconds
once Wi-Fi mode is enabled and ready for connection.
NOTE: The use of Wi-Fi function will reduce battery life more rapidly. Turn Wi-Fi mode
OFF when not in use to save battery. In Wi-Fi mode, Can not use the scanner to scan file
and can not complete calibration mode naturally.
6.2 View files from Internet Browser via Wi-Fi
1. Turn on Wi-Fi mode on your scanner.
2. Go to network setting on your computer/smart device to enable Wi-Fi setting
3. Search the WIFISCAN-xxxxxx network
4. Enter password 123456789” to connect to the scanner
5. Open Internet browser and input “10.10.1.1 at the address bar to enter navigation page to
view and download files
6. In navigation page, click the choose file button to upload the file into the scanner.
!
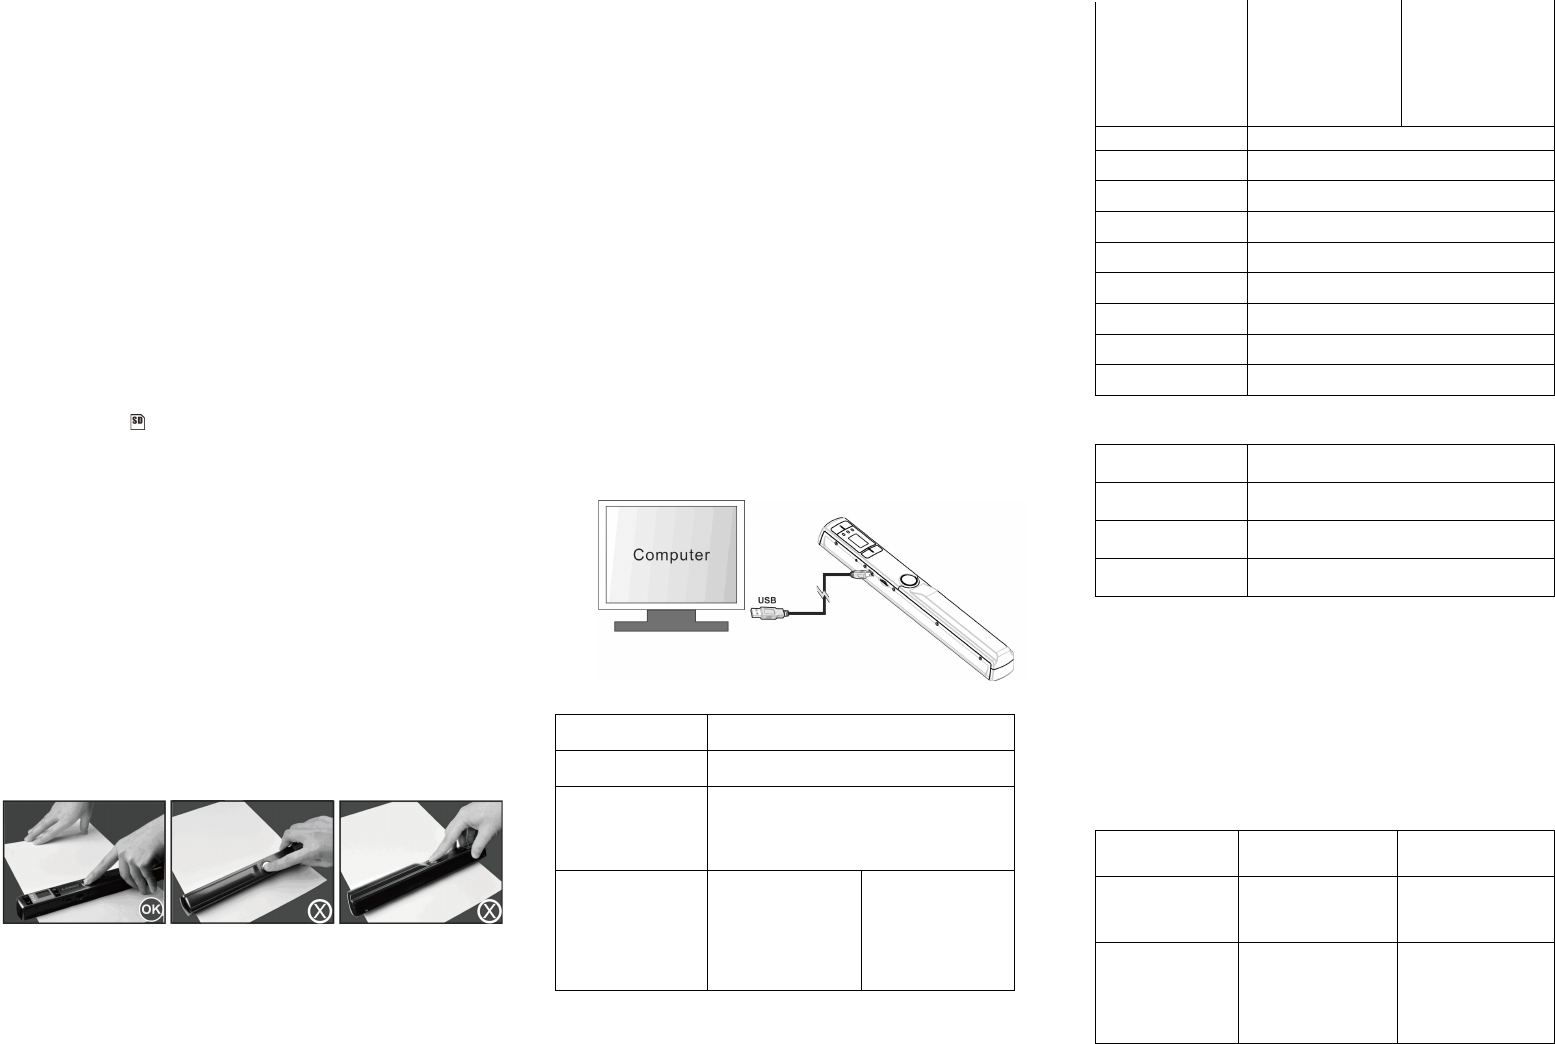
7. USB Connection with Computer
1. Connect your scanner to your computer and then turn on your scanner.
2. Your computer will recognize the scanner as a “Removable Disk”,口口口” symbol will
display on status LCD. Click “Open folder to view files” to view, import, copy, move or
delete scanned files.
NOTE: If the Removable Device Window did not launch automatically, go to your “My Computer”
and find the device under Removable Storage. Before connected your scanner to computer
please conform the canner is not in WiFi mode.
8. Specifications
Image sensor
Color Contact Image Sensor
Number of sensor
5136 dots (1st~5104 dots available)
Resolution
Low resolution: 300x300 dpi
Middle resolution: 600x600 dpi
High resolution: 900x900 dpi
Maximum scanning speed
for Letter size document
Color High resolution
Mono High resolution
Color Medium resolution
Mono Medium resolution
Color Low resolution
Mono Low resolution
12.0 Seconds
10.0 Seconds
8.0 Seconds
6.0 Seconds
3.0 Seconds
2.0 Seconds
Capacity (Based on
1GB microSD card.
Scan Letter size file, the
quantity of scans varies
depending on the content
complexity)
Color High resolution
Mono High resolution
Color Medium resolution
Mono Medium resolution
Color Low resolution
Mono Low resolution
300 Scans (Min.)
320 Scans (Min.)
640 Scans (Min.)
700 Scans (Min.)
1600 Scans (Min.)
1800 Scans (Min.)
Scan width
212mm
Scan length (max.)
300dpi: 98", 600dpi: 45", 900dpi:35"
File format
JPG/PDF
LCD
Scanning status display
Auto Power Off
3 Minutes
USB Port
USB 2.0 high speed
External memory
microSD/microSDHC memory card to up 32GB
Standard Battery
2X AA alkaline batteries
Wi-Fi®
802.11b/g/n
9. Computer system minimum requirement
Operating System
Windows 7 / Vista / XP(SP3) and Mac OS 10.4 or above
(Driver Free))
CPU
Pentium or above
RAM
At least 256MB
Interface
USB port
10. Troubleshooting
Problem
Cause
Solution
Cannot turn on the
scanner
1. Low battery power.
2. Battery not inserted
properly
Replace or install the
battery correctly
Pictures cannot be saved
when you are scanning
them
1. The microSD card has
not been installed
2. Memory is full
3. The MicroSD card has
not been formatted
1. Install microSD card
2. Download the pictures
from the scanner to the
computer to create
storage space
2

Hulp nodig? Stel uw vraag in het forum

Spelregels

Misbruik melden

Gebruikershandleiding.com neemt misbruik van zijn services uitermate serieus. U kunt hieronder aangeven waarom deze vraag ongepast is. Wij controleren de vraag en zonodig wordt deze verwijderd.

Product:

Bijvoorbeeld antisemitische inhoud, racistische inhoud, of materiaal dat gewelddadige fysieke handelingen tot gevolg kan hebben.

Bijvoorbeeld een creditcardnummer, een persoonlijk identificatienummer, of een geheim adres. E-mailadressen en volledige namen worden niet als privégegevens beschouwd.

Spelregels forum

Om tot zinvolle vragen te komen hanteren wij de volgende spelregels:

Belangrijk! Als er een antwoord wordt gegeven op uw vraag, dan is het voor de gever van het antwoord nuttig om te weten als u er wel (of niet) mee geholpen bent! Wij vragen u dus ook te reageren op een antwoord.

Belangrijk! Antwoorden worden ook per e-mail naar abonnees gestuurd. Laat uw emailadres achter op deze site, zodat u op de hoogte blijft. U krijgt dan ook andere vragen en antwoorden te zien.

Abonneren

Abonneer u voor het ontvangen van emails voor uw Easypix EasyScan WiFi bij:


U ontvangt een email met instructies om u voor één of beide opties in te schrijven.


Ontvang uw handleiding per email

Vul uw emailadres in en ontvang de handleiding van Easypix EasyScan WiFi in de taal/talen: Engels als bijlage per email.

De handleiding is 7,14 mb groot.


U ontvangt de handleiding per email binnen enkele minuten. Als u geen email heeft ontvangen, dan heeft u waarschijnlijk een verkeerd emailadres ingevuld of is uw mailbox te vol. Daarnaast kan het zijn dat uw internetprovider een maximum heeft aan de grootte per email. Omdat hier een handleiding wordt meegestuurd, kan het voorkomen dat de email groter is dan toegestaan bij uw provider.

Andere handleiding(en) van Easypix EasyScan WiFi

Easypix EasyScan WiFi Gebruiksaanwijzing - Nederlands - 2 pagina's

Easypix EasyScan WiFi Gebruiksaanwijzing - Deutsch - 2 pagina's

Easypix EasyScan WiFi Gebruiksaanwijzing - Français - 2 pagina's

Easypix EasyScan WiFi Gebruiksaanwijzing - Italiano - 2 pagina's

Easypix EasyScan WiFi Gebruiksaanwijzing - Português - 2 pagina's

Easypix EasyScan WiFi Gebruiksaanwijzing - Espanõl - 2 pagina's


Uw handleiding is per email verstuurd. Controleer uw email

Als u niet binnen een kwartier uw email met handleiding ontvangen heeft, kan het zijn dat u een verkeerd emailadres heeft ingevuld of dat uw emailprovider een maximum grootte per email heeft ingesteld die kleiner is dan de grootte van de handleiding.

Er is een email naar u verstuurd om uw inschrijving definitief te maken.

Controleer uw email en volg de aanwijzingen op om uw inschrijving definitief te maken

U heeft geen emailadres opgegeven

Als u de handleiding per email wilt ontvangen, vul dan een geldig emailadres in.

Uw vraag is op deze pagina toegevoegd

Wilt u een email ontvangen bij een antwoord en/of nieuwe vragen? Vul dan hier uw emailadres in.


Info