
-
Het toestel heeft als toetsenbord azerty maar staat ingesteld in qwerty, hoe kan ik dit wisselen? Gesteld op 11-3-2024 om 09:25
Reageer op deze vraag Misbruik melden -
ik krijg continu de melding: Labels zijn vastgelopen Labelmanager 160 Gesteld op 8-11-2023 om 16:22
Reageer op deze vraag Misbruik melden -
hij print letters over elkaar, niet altijd dezelfde. Zit lint er niet goed in of hoe komt dit? Gesteld op 6-10-2023 om 10:41
Reageer op deze vraag Misbruik melden -
het lint komt er niet meer uit . Na het afknippen blijft het steeds in de machine haperen
Reageer op deze vraag Misbruik melden
Hoe zou dit komen? Gesteld op 26-6-2023 om 11:27 -
sommige knoppen doen het niet op mijn nieuwe labelprinter, zoals de backspace knop. Resetten werkt ook niet en de tekst gaat dus niet weg. Iemand een idee hoe dit kan worden opgelost? Gesteld op 1-6-2023 om 11:39
Reageer op deze vraag Misbruik melden -
Eerste ingebruikname van de labelprinter. Er staat al meteen tekst op het scherm. Als we deze tekst verwijderen typt hij zelf automatisch terug de letter G en moet zonder iets te vragen. Je krijgt hier zelf bijna geen tekst ingetypt zonder dat de labelprinter er een G tussen steekt. Je kunnen we dit oplossen? Dank bij voorbaat Gesteld op 16-1-2023 om 18:51
Reageer op deze vraag Misbruik melden -
Nieuwe Dymo labelprinter 160, bij test krijg ik melding 'Labels zijn vastgelopen! ; cassette eruit gehaald en opnieuw erin... de melding blijft echter. Graag spoedige feedback. Gesteld op 29-7-2022 om 08:17
Reageer op deze vraag Misbruik melden-
Herkenbaar!
Waardeer dit antwoord Misbruik melden
Heeft u al een gouden tip gehad? Zo ja, wil u hem delen? Geantwoord op 8-9-2023 om 15:48
-
-
skryver ut, is de melding op het apparaat. print niets uit maakt wel geluid dat het aan het printen is Gesteld op 17-1-2022 om 10:36
Reageer op deze vraag Misbruik melden -
OP HET SCHERM STAAT CONTINU DE TEKST ; EASSY - TO - USE. ALS IK HEM AANZET BLIJFT D TEKST ER OP STAAN Gesteld op 10-1-2022 om 21:56
Reageer op deze vraag Misbruik melden-
goedemorgen, ik vermoed dat dit bij alle labelwriters van Dymo zo is. Geantwoord op 29-7-2022 om 08:56
Waardeer dit antwoord Misbruik melden
-
-
Dit is een sticker, die kun je eraf halen. Dan is het als het goed is weg. Geantwoord op 7-2-2023 om 15:16
Waardeer dit antwoord Misbruik melden -
De Dymo LabelManager 160 gaat niet aan.
Reageer op deze vraag Misbruik melden
Nieuwe batterijen geplaatst en schoongemaakt. Gesteld op 9-9-2021 om 11:56 -
Ik heb een AZERTY klavier maar er komt qwerty op het scherm.
Reageer op deze vraag Misbruik melden
Hoe verander ik dit? Gesteld op 23-8-2021 om 16:48-
Op het scherm staat Easy -To-Use; Hij wil niet aangaan als je op het knopje aan drukt Geantwoord op 10-1-2022 om 21:49
Waardeer dit antwoord Misbruik melden
-
-
De labelwriter print de letters niet, wat moet ik doen Gesteld op 8-6-2021 om 10:06
Reageer op deze vraag Misbruik melden -
Hoe kan ik de taal opnieuw instellen ?? Staat nu op Fins of zo iets
Reageer op deze vraag Misbruik melden
Gesteld op 3-3-2021 om 12:01 -
heb een dymo 160 en heb nieuwe cassettes besteld, maar drukt niet duidelijk af.
Reageer op deze vraag Misbruik melden
Gesteld op 15-1-2021 om 12:19 -
De label print niet de gehele letter en geeft een krassende, gestreepte tekst.
Reageer op deze vraag Misbruik melden
Hoe kunnen we dit oplossen Gesteld op 8-11-2020 om 15:22 -
Lettergrootte gaat niet verder dan 12 mm er zit een 12 mm cassette
Reageer op deze vraag Misbruik melden
in dus geen 6 maar 3 grootte 8,10 en 12 Gesteld op 28-9-2020 om 14:32-
zet 'm op 12mm en regel de grootte met de knop met AAA op.
Waardeer dit antwoord Misbruik melden
succes. anders download de gebruiksaanwijzing van Dymo 160. Geantwoord op 13-10-2020 om 15:09
-
-
Ik heb het letter type op 12 staan ,maar alsnog zijn het kleine lettertjes Gesteld op 5-8-2020 om 15:31
Reageer op deze vraag Misbruik melden -
Is er een sneltoets om vorige melding te verwijderen Gesteld op 24-7-2020 om 12:34
Reageer op deze vraag Misbruik melden-
staat toch heel duidelijk vermeld in de gebruikershandleiding hoor Geantwoord op 24-7-2020 om 12:38
Waardeer dit antwoord Misbruik melden
-
-
Hoe krijg je het papier verwijderd van de strip. Ik.zie nergens een breuklijn en zonder nagels lukt het niet. Gesteld op 30-5-2020 om 13:03
Reageer op deze vraag Misbruik melden-
In het midden van het stripje zit een naadje, waardoor je het er gemakkelijk af kan halen. Geantwoord op 30-5-2020 om 19:16
Waardeer dit antwoord Misbruik melden
-
-
hartelijk bedankt voor het advies :) Geantwoord op 31-5-2020 om 17:50
Waardeer dit antwoord (2) Misbruik melden -
Ik gebruik oplaadbare batterijen, maar steeds zijn deze plat als ik de Dymo wil gebruiken. Hoe komt het dat deze steeds leeg zijn? Gesteld op 23-5-2020 om 09:42
Reageer op deze vraag Misbruik melden-
Als je die een tijd niet gebruikt, moet je de batterijen eruit halen. Geantwoord op 23-5-2020 om 11:51
Waardeer dit antwoord Misbruik melden
-
-
Mijn dymo wilt niet meer printen hoe kan ik dat oplossen Gesteld op 15-5-2020 om 18:04
Reageer op deze vraag Misbruik melden -
Kan ik 2 regels onder elkaar op 1 etiket printen?? Gesteld op 11-5-2020 om 14:21
Reageer op deze vraag Misbruik melden -
Kun je 2 regels onder elkaar typen op 1 etiket??
Reageer op deze vraag Misbruik melden
Gesteld op 11-5-2020 om 14:17 -
We krijgen het lettertype niet meer via de normale weg vergroot naar max. 24 Gesteld op 14-1-2020 om 13:39
Reageer op deze vraag Misbruik melden -
In het scherm is het symbool voor 2 regels verschenen, hoe krijg ik deze er niet meer uit. In de handleiding wordt wel aangeeven hoe je het kunt krijgen maar niet hoe je hem er weer uit kunt krijgen. Wie weet hoe?
Reageer op deze vraag Misbruik melden
Gesteld op 17-10-2019 om 16:53-
Heb ik ook last van.... Geantwoord op 10-7-2020 om 14:51
Waardeer dit antwoord (4) Misbruik melden
-
-
het strookje haperd , nieuw. je kunt het het toch maar op 1 manier inleggen.? Gesteld op 9-8-2019 om 09:48
Reageer op deze vraag Misbruik melden-
Hier ook de rol zit er goed in maar dan print hij er 1 en dan loopt hij op de helft van print vast en knippert het blauwe lichtje vooraan.... bijna hele rol al verneukt hierdoor Geantwoord op 28-8-2019 om 13:10
Waardeer dit antwoord (7) Misbruik melden
-
-
De printknop print niks af. Nu las ik in de handleiding dat de printkop schoongemaakt dient te worden met een reiniger die in het apparaatje moet zitten. Maar die zit er niet in.
Reageer op deze vraag Misbruik melden
Is er nog een andere manier om de printkop schoon te maken
Gesteld op 10-4-2019 om 11:07-
Met alcohol. Er komen plakresten op te zitten en dan loopt het vast. Geantwoord op 10-4-2019 om 11:51
Waardeer dit antwoord (1) Misbruik melden
-
-
wij hebben een Dymo Labelmanager 160. label breedt 12 mm. Zou de letter moeten kunnen vergrootte tot 24 pt. maar hij gaat maar tot 12. Hoe kan ik vergrootte Gesteld op 24-1-2019 om 08:37
Reageer op deze vraag Misbruik melden-
DAN STAAT HIJ INGESTELD OM EEN DUBBELE LIJN AF TE DRUKKEN BATTERIJEN ERUIT EN OPNIEUW STARTEN
Waardeer dit antwoord (1) Misbruik melden
Geantwoord op 13-3-2019 om 11:03
-
-
op onze brieven bus zijn stickers geplaatst en die moeten er terug af geen probleem naar er blijf lijn hangen
Reageer op deze vraag Misbruik melden
hoe kan ik die verwijderen
bedankt voor de informatie
Gesteld op 8-6-2018 om 12:00-
Met lijmverwijderaar! Geantwoord op 26-5-2020 om 17:10
Waardeer dit antwoord Misbruik melden
-
-
Wij hebben een Labelmanager 160.
Reageer op deze vraag Misbruik melden
Er wordt niets meer uitgeprint.
Het is alsof de inkt op is!
We hebben er al een nieuwe label cassette in gedaan.
Wat kan dit zijn?
met vriendelijke groet,
Annie Bader
van den Berg Greenhouse
info@greenhouse.nl Gesteld op 1-2-2016 om 12:42-
Met datzelfde probleem kamp ik ook steeds. Nu al voor tweede keer..... Geantwoord op 18-3-2016 om 10:42
Waardeer dit antwoord (54) Misbruik melden
-
-
Ik heb alle 6 :( de batterijen vervangen en nu print 'ie weer. Misschien ook voor u het proberen waard... Geantwoord op 27-3-2018 om 18:15
Waardeer dit antwoord (8) Misbruik melden -
Hoe kan ik tekst kopiëren om het nog een aantal keer te herhalen Gesteld op 23-9-2015 om 18:05
Reageer op deze vraag Misbruik melden-
Hoe kan ik een tekst meermaals na elkaar uitprinten Geantwoord op 10-3-2016 om 09:20
Waardeer dit antwoord (9) Misbruik melden
-
-
hoe kan ik de lengte instellen van mijn label bij de dymo 160? Gesteld op 3-3-2015 om 09:39
Reageer op deze vraag Misbruik melden-
door te klikken op menu! Geantwoord op 27-7-2015 om 13:23
Waardeer dit antwoord (9) Misbruik melden
-
-
Ik steek een nieuwe rol met labels op, maar wanneer ik wil printen komt er niets uit? Gesteld op 26-1-2015 om 12:07
Reageer op deze vraag Misbruik melden-
casette zit niet goed Geantwoord op 27-7-2015 om 13:24
Waardeer dit antwoord Misbruik melden
-
-
hoe kom ik in menu om grootte van letters anders in te stellen Gesteld op 1-5-2014 om 11:07
Reageer op deze vraag Misbruik melden-
bovenaan de toets met de A letters kun je de grootte van de letters instellen! Geantwoord op 27-7-2015 om 13:26
Waardeer dit antwoord (4) Misbruik melden
-
-
Krijg de plakstrip heel moeilijk verwijderd. Gesteld op 17-4-2014 om 12:41
Reageer op deze vraag Misbruik melden-
in het midden van het label vastnemen! Geantwoord op 27-7-2015 om 13:26
Waardeer dit antwoord (7) Misbruik melden
-
-
In het scherm verschijnt een kader om de letter, hoe kan ik die verwijderen en hoe kan je je scherm weer leeg maken als er een fout is gemaakt? Gesteld op 11-4-2014 om 15:54
Reageer op deze vraag Misbruik melden-
leegmaken met onderaan de letter X ! Geantwoord op 27-7-2015 om 13:27
Waardeer dit antwoord (2) Misbruik melden
-
-
nadat de tekst is ingegeven drukt de labelmaker de tekst onleesbaar af dan verschijnt er op de display een uitroepteken + een batterij. Ik heb nieuwe batterijen in de labelmaker gezet maar het probleem is niet opgelost.
Reageer op deze vraag Misbruik melden
Graag uw antwoord
Mevr Claes Gesteld op 16-2-2014 om 19:19-
Ik heb hier hetzelfde probleem. Heb hem op stroom aangesloten ook dit helpt niet.
Waardeer dit antwoord (11) Misbruik melden
Geantwoord op 20-2-2014 om 20:10
-
-
Hier hetzelfde probleem! Wat te doen? Geantwoord op 30-6-2014 om 15:07
Waardeer dit antwoord (2) Misbruik melden -
Dit is al een oude vraag zie ik, ik heb hetzelfde probleem, is er al een oplossing? Geantwoord op 15-5-2015 om 14:30
Waardeer dit antwoord (2) Misbruik melden -
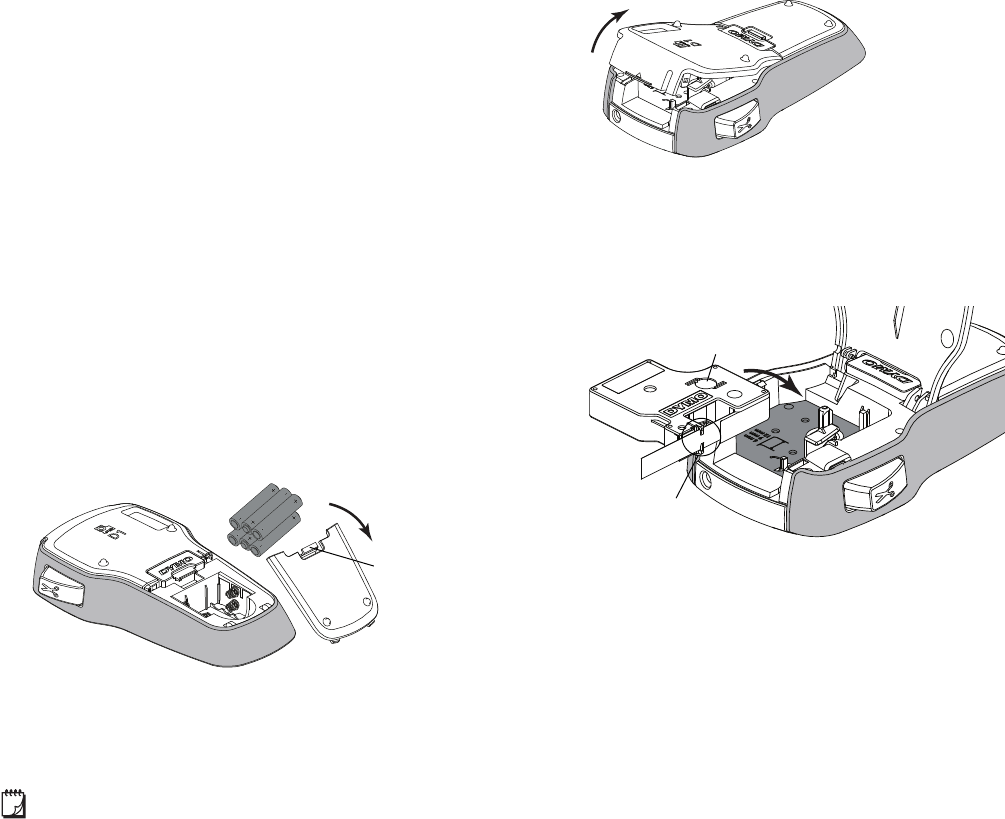
mijn toestel heeft een azerty klavier en is net hetzelfde als op de afbeelding
Reageer op deze vraag Misbruik melden
mijn vraag is hoe kan ik die tekst verwijderen Gesteld op 11-12-2013 om 13:30-
tekst verwijderen met onderaan de X in te drukken Geantwoord op 27-7-2015 om 13:29
Waardeer dit antwoord Misbruik melden
-
-
ik heb labelmanager 160 gekocht en er is geen handleiding bij
Reageer op deze vraag Misbruik melden
ik weet niet hoe ik mijn tekst moet verwijderen Gesteld op 11-12-2013 om 13:02-
tekst verwijderen met onderaan de X in te drukken Geantwoord op 27-7-2015 om 13:30
Waardeer dit antwoord (2) Misbruik melden
-
-
hoe kan ik een tekst die ik niet meer wil delete, verwijderen! Gesteld op 21-11-2013 om 12:06
Reageer op deze vraag Misbruik melden-
druk op het witte pijltje met kruis rechts naast de M. Geantwoord op 2-12-2013 om 11:45
Waardeer dit antwoord (1) Misbruik melden
-
-
ik heb dat geprobeert maar hier staat naast de M niets meer Geantwoord op 11-12-2013 om 13:10
Waardeer dit antwoord Misbruik melden -
onderaan op het Xteken drukken! Geantwoord op 27-7-2015 om 13:31
Waardeer dit antwoord Misbruik melden -
Ik heb het probleem ook met het verwijderen van oude tekst.
Waardeer dit antwoord (9) Misbruik melden
Je kan wel die "X" een aantal keren intoetsen, maar mijn vraag van onderhand een jaar geleden was hoe ik de hele tekst met 1 druk op de knop kon verwijderen.
Geantwoord op 27-7-2015 om 15:39 -
Even het officiële antwoord uit de handleiding pag 6: X backspace/ wissen.
Waardeer dit antwoord (1) Misbruik melden
Door de X ingedrukt te houden wil je regels (letter voor letter) uit.
(Er is dus geen clear all functie, zoals wel op de Labelpoint 350 zit) Geantwoord op 30-3-2021 om 22:25