FR
Work as Standalone Alarm Panel
When it works as a standalone alarm panel, it should be connected
with wireless sensors or wired sensors in advance, when the
illegal intruders.
Connect with accessory: press the learn button on the siren and
trigger the accessory once, the connection is successful after one
beep is heard from siren.
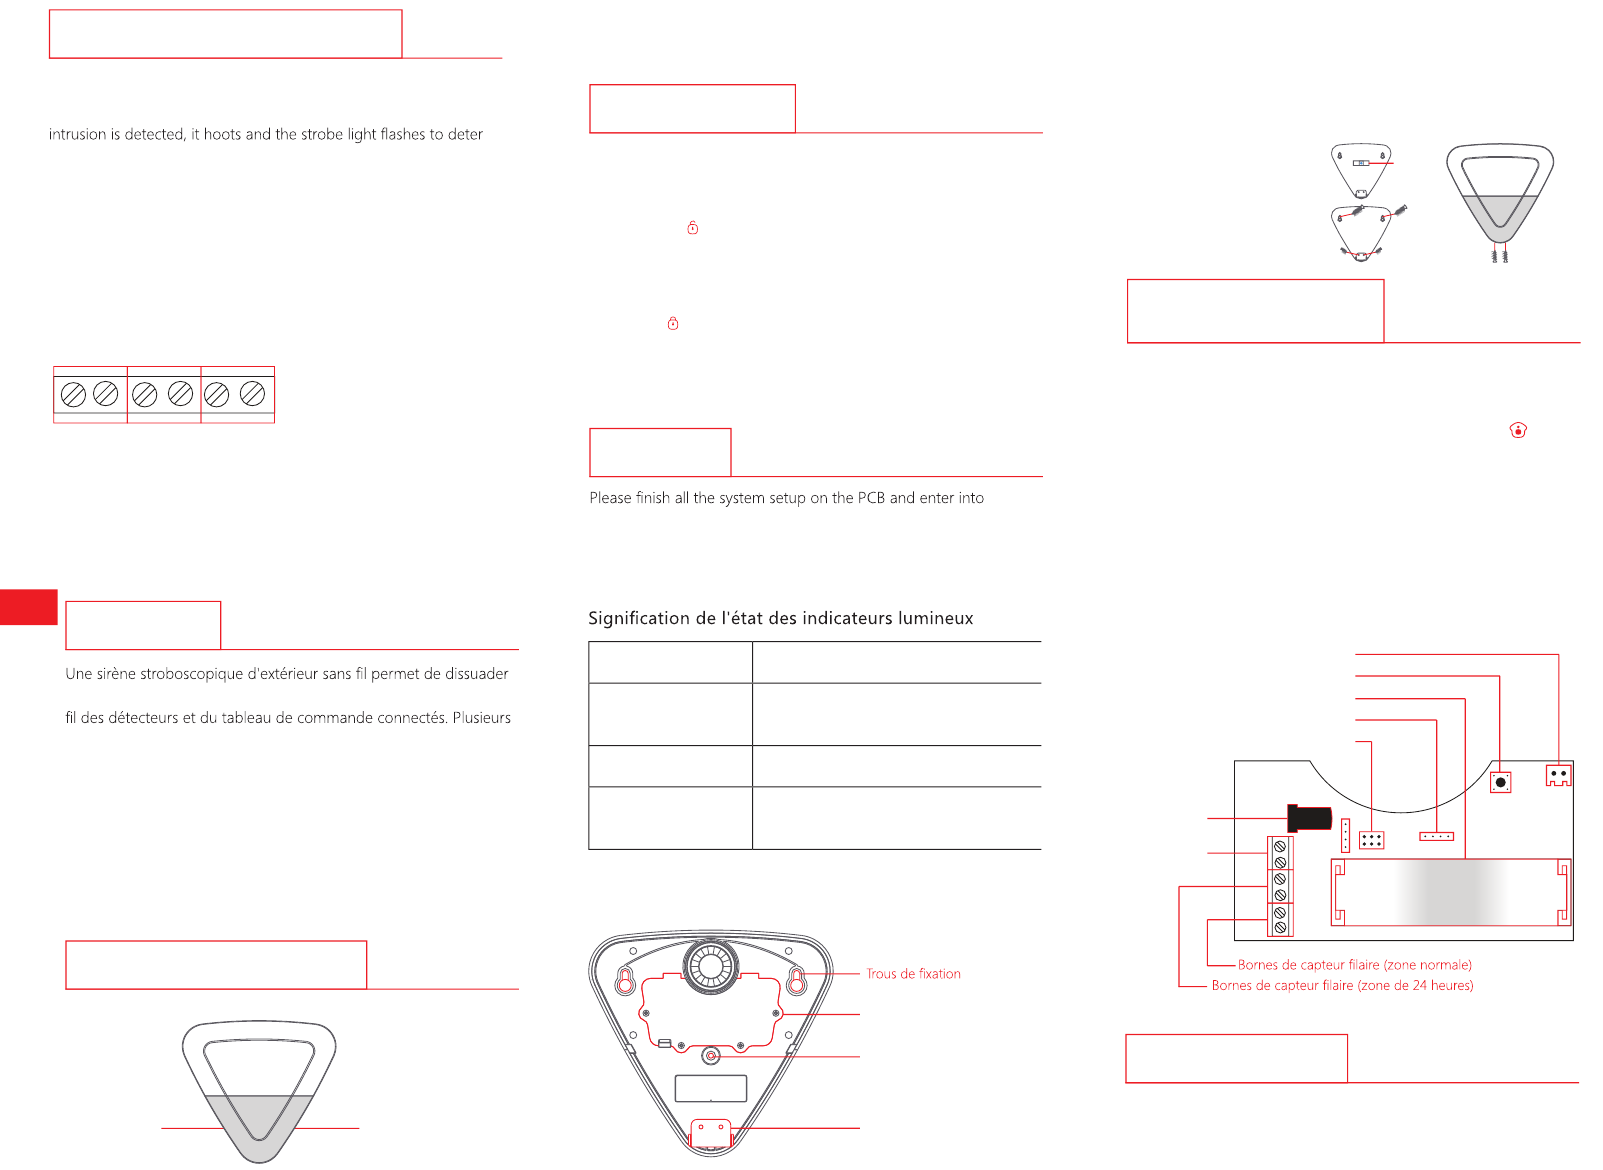
Wired Terminals
The siren has terminals for power supply and wired sensors. Just
connect the power line or wired sensors to this wired terminals.
Please make sure the positive and negative are distinguished.
-DC12V+ 24-ZONE ZONE
-DC12V+ : Power input
ZONE (normal zone mode): After a wired sensor is connected with
"ZONE" terminal, means it will work as a normal zone sensor, once
it is triggered in Arm or Home Arm state, alarm panel will alarm
immediately.
24-ZONE (24-hour zone mode): After a wired sensor is connected
with "24-ZONE" terminal, means it will work as a 24-hour zone
sensor, siren will alarm immediately once it is triggered.
Installation Mode
Installation Mode is designed for users to dismount or remount the
siren without triggering a tamper alarm. Thus not to disturb other
people.
①
Press [Disarm ] button on the remote control continuously for
3 times, then the siren comes to installation mode after a long beep
is heard. Any sensor or tamper triggered during installation mode
will not result in siren hooting but 3 beeps will be heard instead.
②
Press [Arm ] button, the siren will exit from installation mode
after a long beep is heard. Or the siren will exit from connection
status when no operation is carried out within 10 minutes.
Note: Also you can press the tamper switch 7 times to enter installation
mode.
Installation
installation mode before installation.
①
Hold the positioning paper in right place, stick the gradienter on the
positioning paper to check and adjust the position.
②
Install two screws into the top screw holes.
③
Mount the bracket into the bottom screw holes and tighten with
screws.
④
Tear off the positioning paper.
⑤
Mount the siren to the wall, tighten the screw and make sure the
siren is well positioned.
Gradienter
Positioning
paper
Enter Connection Status
Through Remote Control
This function is designed for users to connect newly-purchased
accessories without dismounting the siren from the wall.
When the siren is in installation mode, press [Home Arm
] on the
remote control continuously for 3 times, then the siren comes to
connection status after a long beep is heard, and then trigger the
new accessory once to complete the pairing.
The siren will exit from connection status when no operation is
carried out in 15 seconds.
Introduction
des intrus au moyen de sa sonnerie dès qu'elle reçoit un signal sans
sirènes stroboscopiques peuvent être connectées au même tableau
de commande pour renforcer l'effet de dissuasion. Lorsque la sirène
est connectée au tableau de commande comme accessoire, elle
se mettra à sonner et son éclairage stroboscopique sera activé dès
que le système se déclenche. Lorsque la sirène est connectée à
des accessoires tels que télécommande, contact de porte/fenêtre,
détecteur de mouvement PIR, etc. comme dispositif d'alarme
autonome, elle se mettra à sonner et son éclairage stroboscopique
sera activé dès qu’un détecteur quelconque se déclenche.
Vue d'ensemble du produit
Vue de face
Indicateurs
lumineux
d'alarme
Indicateur
lumineux d'état
État Indicateur lumineux
Armer/Mode à
domicile
Clignote une fois toutes les 5 secondes
Désarmer Aucune indication lumineuse
Aucun désarmement
après alarme
Un clignotement toutes les 2 secondes
pendant 2 heures
Vue arrière
Couvercle arrière
Contact anti-sabotage
Support
Description de la carte de circuit imprimé
Interface de la sirène
Bouton d'acquisition
Prise de
l'adaptateur
Bornes
12 V CC
Logement de la batterie
Réglage du volume d'alarme
Réglage de la durée d'alarme
Cavalier de réglage
Veuillez régler le volume et la durée de l'alarme sur la carte de
circuit imprimé selon vos besoins.