5
6
a
S
ʋ
ʋ
Information on laundry ...
Labelling of fabrics
Follow the manufacturer's care information.
(cDrying at normal temperature.
'cDrying at low temperature a also select & Low Heat.
)cDo not machine dry.
Observe safety instructions without fail a Page 11!
Do not tumble-dry the following fabrics for example:
– Impermeable fabrics (e.g. rubber-coated fabrics).
– Delicate materials (silk or curtains made from synthetic material) a they may crease
– Laundry contaminated with oil.
Drying tips
– To ensure a consistent result, sort the laundry by fabric type and drying programme.
– Always dry very small items (e.g. baby socks) together with large items of laundry
(e.g. hand towel).
– Close zips, hooks and eyelets, and button up covers.
Tie fabric belts, apron strings, etc. together
– Do not over-dry easy-care laundry a risk of creasing!
Allow laundry to finish drying in the air.
– Do not dry woolens in the dryer, only use to freshen them up a Page 7, Woollens finish
Programme (depending on model).
– Do not iron laundry immediately after drying, fold items up and leave for a while a
the remaining moisture will then be distributed evenly.
– The drying result depends on the type of water used during washing. a Fine adjustment
of the drying result a Page 5/6.
– Machine-knitted fabrics (e.g. T-shirts or jerseys) often shrink the first time they are dried a
do not use the Very Dry programme.
– Starched laundry is not always suitable for dryers a starch leaves behind a coating that
adversely affects the drying operation.
– Use the correct dosage of fabric softener as per the manufacturer's instructions when
washing the laundry to be dried.
– Use the timer programme for small loads a this improves the drying result.
Environmental protection / Energy-saving tips
– Before drying, spin the laundry thoroughly in the washing machine a the higher the spin
speed the shorter the drying time will be (consumes less energy), also spin easy-care
laundry.
– Put in, but do not exceed, the maximum recommended quantity of laundry a
programme overview a Page 7.
– Make sure the room is well ventilated during drying.
– Do not obstruct or seal up the air inlet.
– Keep the air cooler clean a Page 6 “Care and cleaning”.
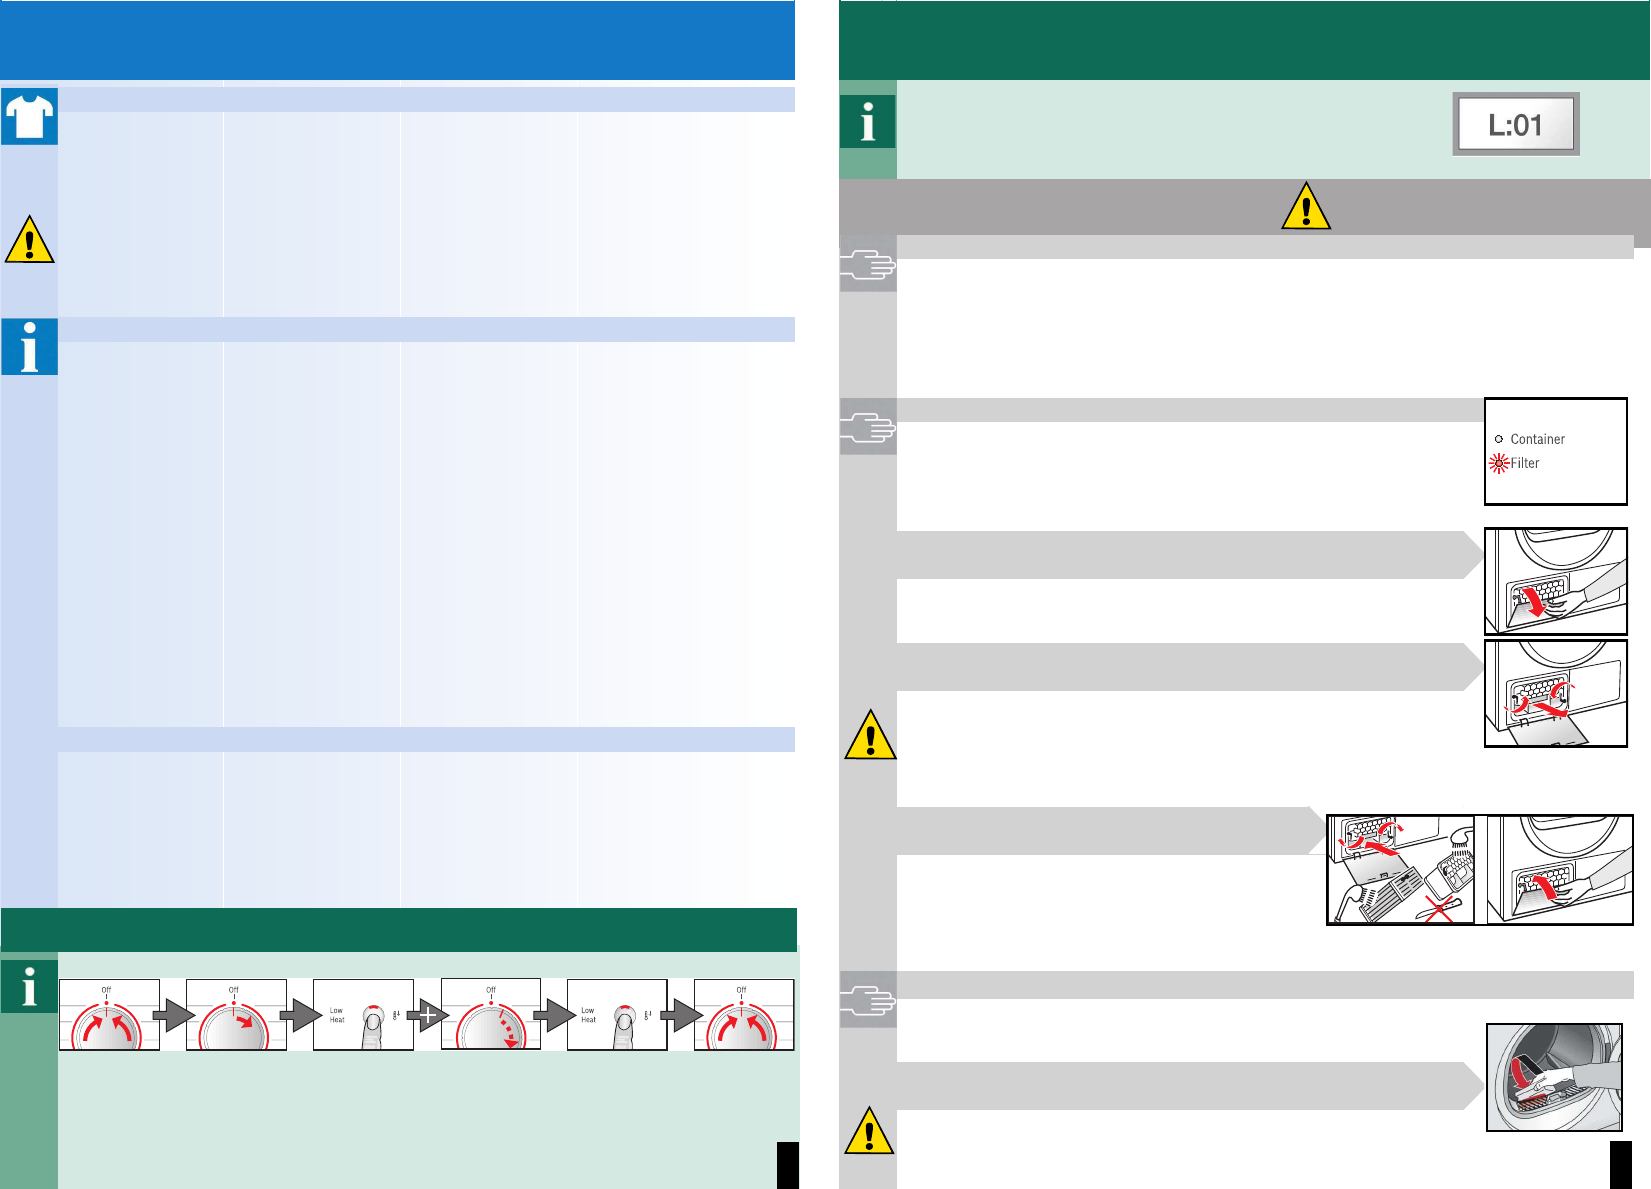
Fine adjustment of the drying result
Adjustment of the levels of dryness
1 x to the right
Press and hold
Low Heat until
the required level is reached
Turn to Off
Turn to Off
a
ˎ &
' ˎ &
ˎ S
ʋ
ʋ
ʋ
ʋ
ʋ
ʋ
ʋ
ʋ
ʋ
ʋ
ʋ
ʋ
ʋ
ˎ
a
L I / a
a
Fine adjustment of the drying result
Care and cleaning
Dryer housing, control panel, air cooler, moisture sensors
– Wipe with a soft, damp cloth.
– Do not use harsh cleaning agents and solvents.
– Remove detergent and cleaning agent residue immediately.
– During drying, water may collect between the door and seal.
This does not affect your dryer's functions in any way.
Clean the protective filter 5 - 6 times a year
or if Filter flashes after cleaning the fluff filter.
Air cooler / Protective filter
When cleaning, only remove the protective filter. Clean the air cooler
behind the protective filter once a year.
– Allow the dryer to cool.
– Residual water may leak out, so place an absorbent towel
underneath the maintenance door.
1. Unlock the maintenance door.
2. Open the maintenance door fully.
3. Turn both locking levers towards each another.
4. Pull out the protective filter/air cooler.
Do not damage the protective filter or air cooler.
Clean with warm water only. Do not use any hard or sharp-edged
objects.
5. Clean the protective filter/air cooler thoroughly,
Allow to drip dry.
6. Clean the seals.
7. Re-insert the protective filter/air cooler,
with the handle facing down.
8. Turn back both locking levers.
9. Close the maintenance door until the lock clicks into place.
Moisture sensors
The dryer is fitted with stainless steel moisture sensors. The sensors
measure the level of moisture in the laundry. After a long period of
operation, a fine layer of limescale may form on the sensors.
1. Open the door and clean the moisture sensors with a damp sponge
which has a rough surface.
Do not use steel wool or abrasive materials.
L:00, L:01, L:02, L:03 are shown in sequence
Short signal when changing
from L:03 to L:00, otherwise long
signal.
Only when switched off!