Important information
Before washing for the first time
Do not put any laundry in the machine. Turn the tap on. Pour into compartment II:
– approx. 1 litre water
– detergent (dosage according to the manufacturer's instructions for light soiling and the appropriate
degree of water hardness)
Turn the programme selector to I Easy-care 60 °C and press Start/Pause. At the end of the
programme, turn the programme selector to Off.
Protecting the laundry and the machine
– When measuring the amount of all detergents/additives and cleaning agents, always check the
manufacturer's instructions.
– Empty pockets.
– Look out for metal items (paperclips, etc.).
– Wash delicates in a laundry bag (tights, curtains, underwired bras).
– Fasten zips, do up any buttons.
– Brush sand out of pockets and collars.
– Remove curtain fittings or place in the laundry bag.
Loading laundry
Load items of laundry of varying sizes.
Take care not to trap items of laundry between the washing machine door and the rubber seal.
Laundry with varying degrees of soiling
Wash new items of clothing separately.
light Do not prewash. If required, select the i Turbo Perfect option.
Pretreat any stains as necessary.
heavy
Do not load as much laundry. Select the programme with prewash
.
Soaking Load laundry of the same colour
Pour soaking agent/detergent into compartment II in accordance with the manufacturer's instructions.
Turn the programme selector to Cottons 30 °C and press Start/Pause. After approx. 10 minutes,
press Start/Pause to stop the programme. Once the required soaking time has elapsed, press
Start/Pause again to continue the programme or to select a different programme.
Starching Laundry must not be treated with fabric softener
Starching is possible in all wash programmes if liquid starch is used. Pour starch into the ~ fabric
softener compartment in accordance with the manufacturer's instructions (rinse first if necessary).
Dyeing/bleaching
Dye should only be used in normal household quantities. Salt may damage stainless steel. Always
follow the dye manufacturer's instructions. Do not use the washing machine for bleaching clothes.
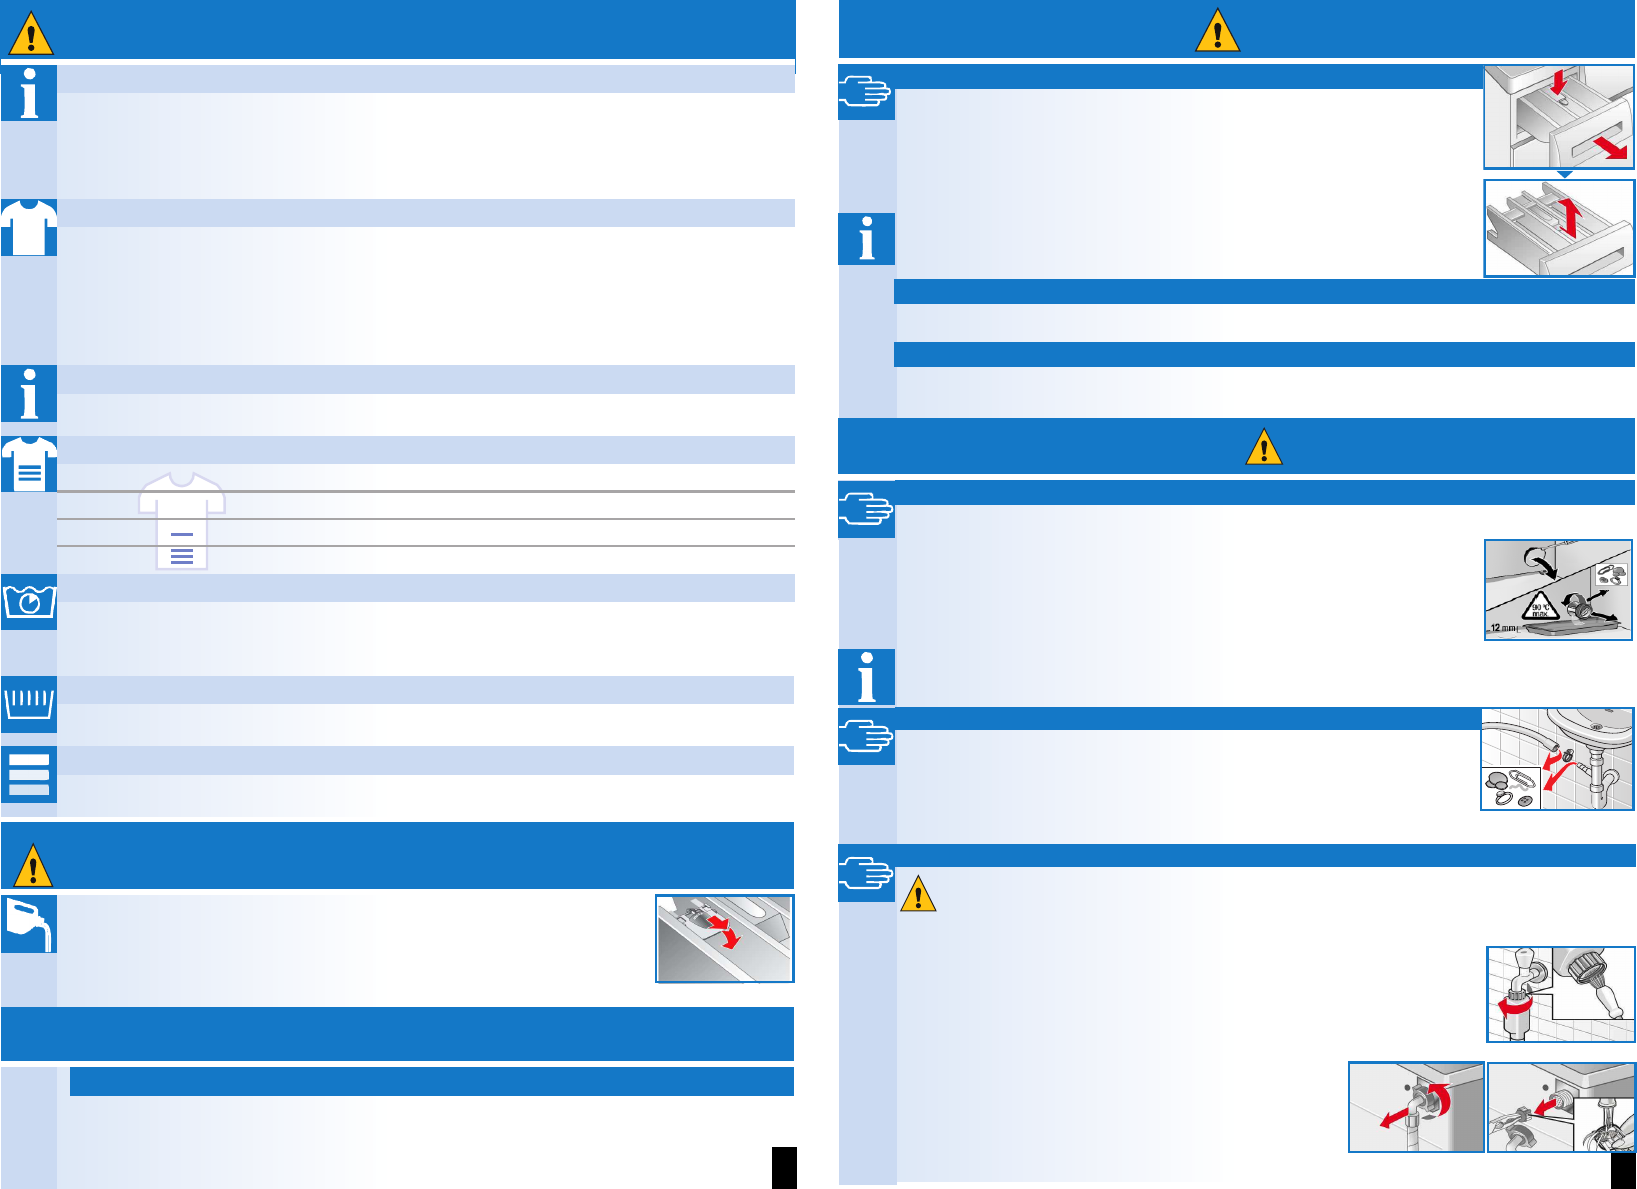
Insert for liquid detergent depending on model
Position the insert for dispensing liquid detergent:
– Remove the detergent drawer completely a page 10.
– Slide the insert forwards.
Do not use the insert (slide upwards):
– For gel-type detergents and washing powder,
– for programmes with Prewash (Vorwäsche) or the (Ready in) function.
Cleaning and care
ʑ
Machine housing, control panel
– Remove detergent residue immediately.
– Wipe off with a soft, damp cloth.
– Do not clean with a jet of water.
Cleaning and care
Cleaning the detergent drawer ...
... if it contains detergent or fabric softener residues.
1.
Pull out, press insert down, remove drawer completely.
2. To remove the insert: press the insert upwards from below with your finger.
3. Clean the detergent dispenser tray and insert with water and a brush and dry it.
4. Attach the insert and engage (connect the cylinder to the guide pin).
5. Push in the detergent drawer.
Leave the detergent drawer open so that any residual water can evaporate.
ʑ
Drum
Leave the washing machine door open so that the drum can dry out.
Rust stains - use chlorine-free cleaning agent, not steel wool.
ʑ
Descaling Make sure that there is no laundry in the machine.
This should not be necessary if the correct detergent dosage has been used. If it is necessary, however,
proceed according to the descaling agent manufacturer's instructions. Suitable descalers can be obtained via
our website or from our after-sales service (a page 1).
Maintenance
Detergent solution pump
Turn the programme selector to Off and disconnect the mains plug.
6. Open the service flap
7. Carefully unscrew the pump cover (residual water).
8. Clean the interior, pump cover thread and pump housing (the impeller in the
detergent solution pump must rotate).
9. Replace the pump cover and screw it on tightly.
10. Replace the service flap.
To prevent unused detergent from flowing straight into the drain during the next wash: Pour 1 litre of
water into compartment II and start the Empty > programme.
Drainage hose at the siphon is blocked
Turn the programme selector to Off and disconnect the mains plug.
1. Loosen the hose clamp and carefully remove the drainage hose (caution: residual
water).
2. Clean the drainage hose and siphon connecting piece.
3. Reattach the drainage hose and secure the connection with the hose clamp.
Filter in the water inlet is blocked
Risk of electric shock
Do not immerse the Aqua-Stop safety device in water (it contains an electric valve).
Reduce the water pressure in the supply hose:
1.
Turn off the tap.
2. Select any programme (except for Spin c/ Empty >).
3. Press Start/Pause. Let the programme run for approximately 40 seconds.
4. Turn the programme selector to Off. Disconnect the mains plug.
Clean the filter:
5. Disconnect the hose from the tap.
Clean the filter with a small brush.
and/or on standard and Aqua-Secure models:
Remove the hose from the rear of the appliance,
Take out the filter with a pair of pliers and clean it.
6. Connect the hose and check for leaks.
Risk of scalding
– Allow the detergent solution to cool down.
– Turn off the tap.
– Risk of electric shock. Disconnect the mains plug.
– Risk of explosion. No solvents.