Babytalker 3600www.topcom.netThis product is in compliance with the essential requirements and other relevant provisions of the R&TTE directive 1999/5/EC. The Declaration of conformity can be found on: http://www.topcom.net/cedeclarations.aspMD10600412 ECO V1.0
1
BABYTALKER 3600
1Getting started
Thank you for purchasing this TOPCOM product. This
product has been designed and assembled with utmost
care for you and the environment. Because we at
TOPCOM like to think of the future of our planet and our
children, we aim to do our best to help saving the
environment. This is why we decided to reduce the
number of pages of our user guides and product manuals.
If you keep in mind that it takes up to 24 trees to produce
1 ton of paper, publishing product manuals in many
languages costs our planet a lot of trees. In this short manual provided with
your TOPCOM device you can find a brief explanation of how to install and
use your TOPCOM device.If you would still like to discover all the features
of your new TOPCOM device, please visit our website (www.topcom.net)
where you can download the complete user manual in your language. By
doing this TOPCOM hopes to do its share to make our planet a better place,
but we can only succeed with your help!
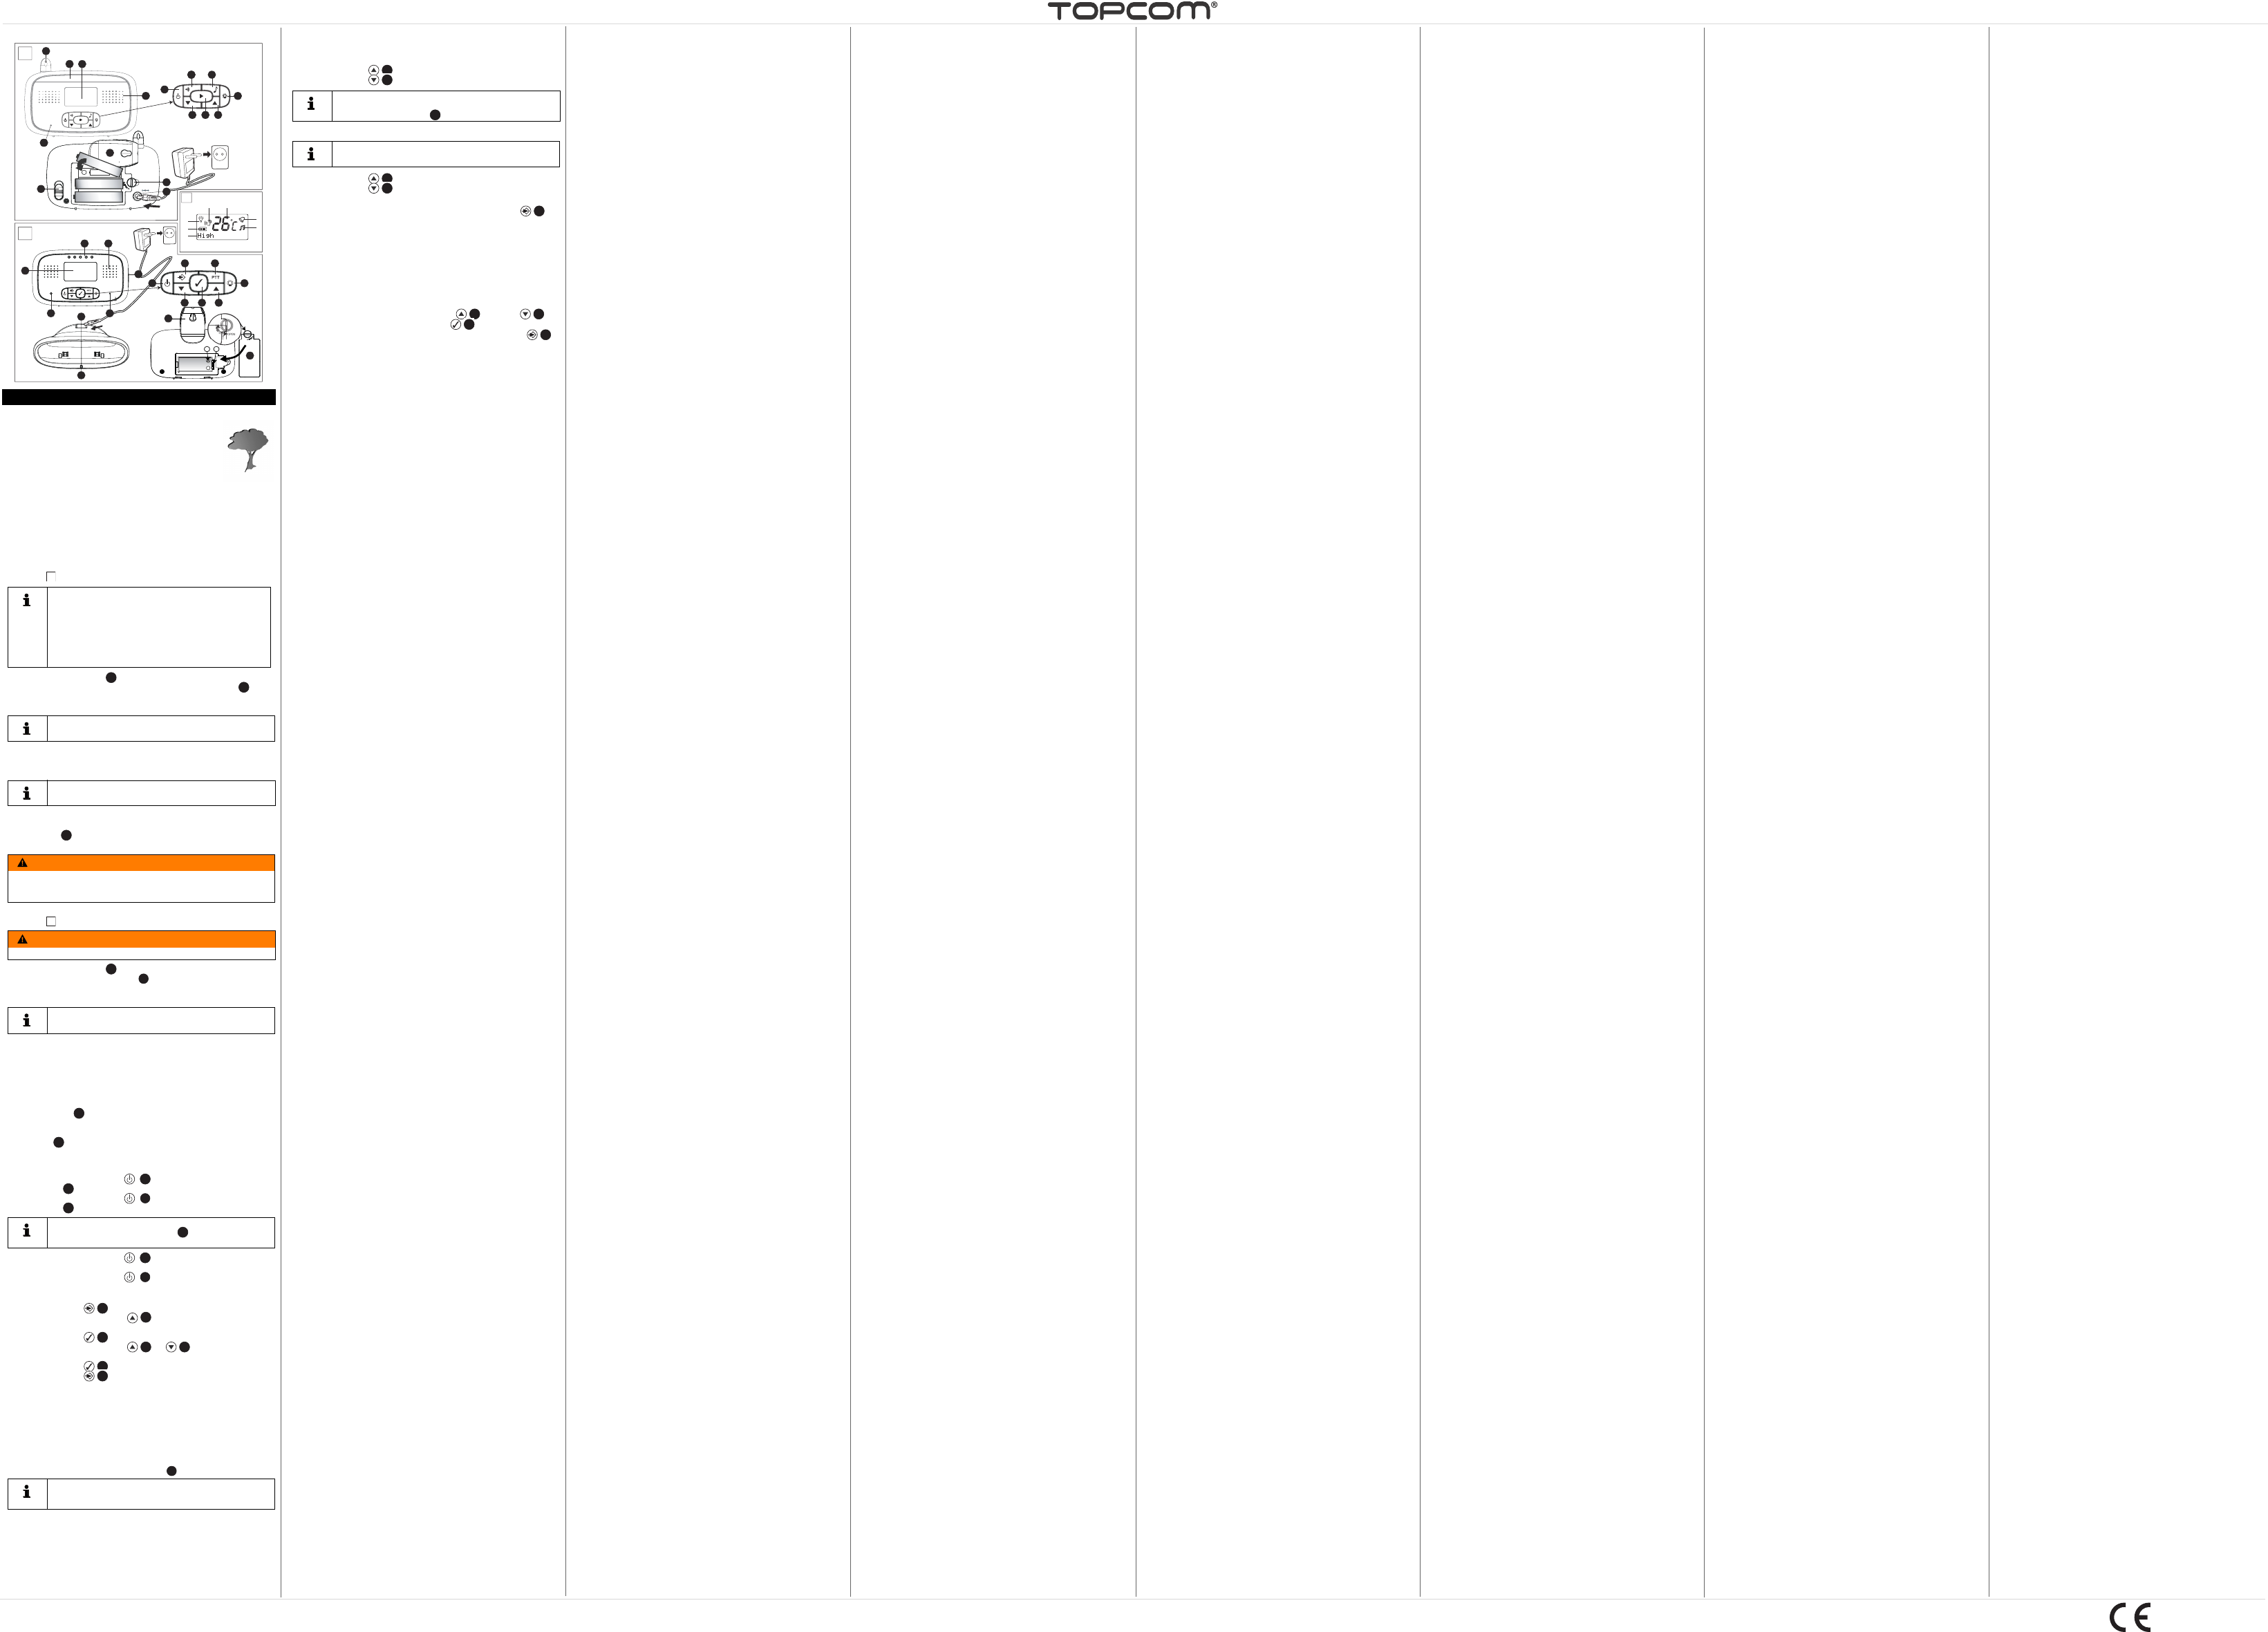
1.1Installing Batteries in the Baby Unit
See Figure on the fold-out page.
–Rotate the belt clip upward.
–Turn the screw on the cover of the battery compartment at the
back of the baby unit 90° counterclockwise and remove the
battery compartment cover.
–Fit three AA alkaline cells (LR06/Mignon) in the battery
compartment. Ensure that the polarity is correct.
–Close the battery compartment.
1.2Connecting the Baby Unit to the AC Mains
Insert the small plug of the AC mains adapter in the mains power connector
of the baby unit and plug the AC mains adapter into a mains connector
(230 V / 50 Hz).
1.3Installing Rechargeable Batteries in the Parent Unit
See Figure on the fold-out page.
–Rotate the belt clip upward.
–Turn the screw on the cover of the battery compartment at the
back of the parent unit 90° counterclockwise and remove the
battery compartment cover.
–Place the NiMH battery pack in the battery compartment.
Ensure that the tab of the battery pack fits in the corresponding
recess and that the polarity matches the figure (B).
–Carefully close the battery compartment and rotate the belt clip
back downward.
1.4Installing the Parent Unit charging cradle
–Insert the small plug of the AC mains adapter in the mains power
connector of the charging station and plug the AC mains
adapter into a mains connector (230 V / 50 Hz).
–Place the parent unit in the charging station. The red Charging
LED will go on.
2Operation and Use
2.1Switching the Baby Unit and Parent Unit On and Off
–Press the On/Off switch to switch on the parent unit. The
display is activated.
–Press the On/Off switch to switch on the baby unit. The
display is activated.
–Press the On/Off switch to switch off the parent
unit (press and hold until the display goes blank).
–Press the On/Off switch to switch off the baby unit (press
mijn topcom ks-4236 heeft een groen lichtje bij NEMO sticker. sinds enkele dagen knippert dit steeds, paar seconden aan dan uit en meteen weer aan voor paar seconden. wat betekent dat? ik kan het in de handleiding niet vinden. hoe los ik het op? het is overdag prima maar in de nacht flikkerend groen licht is irritant. kan iemand helpen?
Gesteld op 27-10-2020 om 22:04
Gebruikershandleiding.com neemt misbruik van zijn services uitermate serieus. U kunt hieronder aangeven waarom deze vraag ongepast is. Wij controleren de vraag en zonodig wordt deze verwijderd.
Product:
Spelregels forum
Om tot zinvolle vragen te komen hanteren wij de volgende spelregels:
lees eerst de handleiding door;
controleer of uw vraag al eerder door iemand anders is gesteld;
probeer uw vraag zo duidelijk mogelijk te stellen;
heeft u een probleem en al geprobeerd om dit op te lossen, vermeld dit erbij aub;
heeft u een oplossing gekregen van een bezoeker dan horen wij dat graag in dit forum;
wilt u een reactie geven op een vraag of antwoord, gebruik dan niet dit formulier maar klik op de knop 'reageer op deze vraag';
uw vraag wordt direct op de website gezet; vermijd daarom persoonlijke gegevens in te vullen;
Belangrijk! Als er een antwoord wordt gegeven op uw vraag, dan is het voor de gever van het antwoord nuttig om te weten als u er wel (of niet) mee geholpen bent! Wij vragen u dus ook te reageren op een antwoord.
Belangrijk! Antwoorden worden ook per e-mail naar abonnees gestuurd. Laat uw emailadres achter op deze site, zodat u op de hoogte blijft. U krijgt dan ook andere vragen en antwoorden te zien.
Abonneren
Abonneer u voor het ontvangen van emails voor uw Topcom Babytalker 3600 - KS 4236 bij:
nieuwe vragen en antwoorden
nieuwe handleidingen
U ontvangt een email met instructies om u voor één of beide opties in te schrijven.
Ontvang uw handleiding per email
Vul uw emailadres in en ontvang de handleiding van Topcom Babytalker 3600 - KS 4236 in de taal/talen: Engels als bijlage per email.
De handleiding is 3,17 mb groot.
U ontvangt de handleiding per email binnen enkele minuten. Als u geen email heeft ontvangen, dan heeft u waarschijnlijk een verkeerd emailadres ingevuld of is uw mailbox te vol. Daarnaast kan het zijn dat uw internetprovider een maximum heeft aan de grootte per email. Omdat hier een handleiding wordt meegestuurd, kan het voorkomen dat de email groter is dan toegestaan bij uw provider.
Andere handleiding(en) van Topcom Babytalker 3600 - KS 4236
Uw handleiding is per email verstuurd. Controleer uw email
Als u niet binnen een kwartier uw email met handleiding ontvangen heeft, kan het zijn dat u een verkeerd emailadres heeft ingevuld of dat uw emailprovider een maximum grootte per email heeft ingesteld die kleiner is dan de grootte van de handleiding.
Er is een email naar u verstuurd om uw inschrijving definitief te maken.
Controleer uw email en volg de aanwijzingen op om uw inschrijving definitief te maken
U heeft geen emailadres opgegeven
Als u de handleiding per email wilt ontvangen, vul dan een geldig emailadres in.
Uw vraag is op deze pagina toegevoegd
Wilt u een email ontvangen bij een antwoord en/of nieuwe vragen? Vul dan hier uw emailadres in.