310487
5.
Bus connection
7.
Entering the physical address
CHEOPS control KNX
Electromotor-driven, proportional actuator 7329201
4.
Assembly/disassembly
3.
Description of the device
1. Apply the bus voltage.
Note: While the automatic adjustment run is in progress, one of the
three lower LEDs flashes.
The adjustment process may last as long as 10 minutes. When the automatic adjust-
ment is complete, the top LED will still be lit. The actuator is opened, see chap. 10.
8.
Adjusting the automatic valve
9.
Querying the valve setting
1.
Usage
Only ETS can be used to assign the physical address and
group addresses, and to adjust parameters
Loading the physical address/application:
1. Press the button 1. LED 2 is lit.
2. Now ETS can be used to load first the physical
address and then the application.
The connection cable can be brought to
a desired mounting location in one of
the cable ducts.
1. Push the cable into the cable duct
that has been prepared on the rear
side of the device.
2. Note the polarity.
3. Connect the bus cable to the bus line (red + / black –)
Note: The two free connection cables can be used as binary inputs for
window contacts and/or presence indicators, for example.
The effect (constant) of the actuator is, that every position between two limiting
values, which have to be defined, can be reached. The electro-motor-driven propor-
tional (constant) actuator is suitable for connection to the European Installation Bus
KNX. The connection is made directly without any separate bus coupler. The power
supply comes from the KNX.
Integrated control with recording of actual temperature allows for independent con-
trol of individual areas. Depending on how the parameters are set, the target tem-
perature can be changed at any time with the manual buttons.
Assembly:
1. Select the adapter ring that fits from those included with delivery.
2. Tighten the adapter ring (fig 1). Finger-tight is sufficient.
3. Bring the device into the vertical assembly position, fig. 2.
4. Push the device onto the adapter ring until you can hear it snap into place.
Disassembly:
1. Open the cover of the actuator.
2. Press on the red lever to the left, see fig. 3.
3. Remove the actuator.
e.g: lower the temperature
Recording of the actual
temperature
Closing cover
Access in open state
to program button and
unlocking of actuator
e.g: increase the
temperature
For example target
temperature
2.
Safety
Installation and assembly of electrical equipment must only be performed by appro-
priately trained electricians. National requirements and safety regulations must be
observed. The regulations and instructions conforming to the manual of the ZVEI/
ZVEH for building system technology must be observed for proper laying of bus lines
and placing the KNX devices in service! Tampering with or making changes to the
machine will cause render any claims under the warrantee null and void.
Fig. 1
Fig. 2
F
ig. 3
1. Press the two keys
(red+blue) at the same time.
Note:
The valve is opened as following
depending on which LED lights up.
Valve opening in %:
81 .. 100 %
61 ... 80 %
41 ... 60 %
21 ... 40 %
1 ... 20 %
0 % = no LED
Example depends on the application
that is loaded
23 °C
22 °C
Target temp: e.g. 21 °C
20 °C
19 °C
10.
Display of current temperature control (standard display)
1. Close the cover to secure access to
interlock of the actuator and to secure
the programming button.
2. Turn the enclosed special key, rotate
the interlock by 90°.
11.
Protection against unauthorized removal of the actuator
12.
Technical data
13.
Service
Bus voltage KNX: 29 V DC
Current consumption KNX bus < 12 mA
Operating temperature: 0 °C ...+ 50 °C
Run time: < 20 s/mm
Set force: max. 120 N
Detection of valve limit stops: Automatic
Adapter rings included will fit: Danfoss RA, Heimeier, MNG, Schlösser from
3/93, Honeywell, Braukmann, Dumser (distri-
butor), Reich (distributor), Landis + Gyr,
Oventrop, Herb, Onda
Type of device: 1 according to EN 60730-1
Protection class: III
Protection type: IP 20 (EN 60529)
Pollution degree: 2
Rated impulse voltage: 330 V
6.
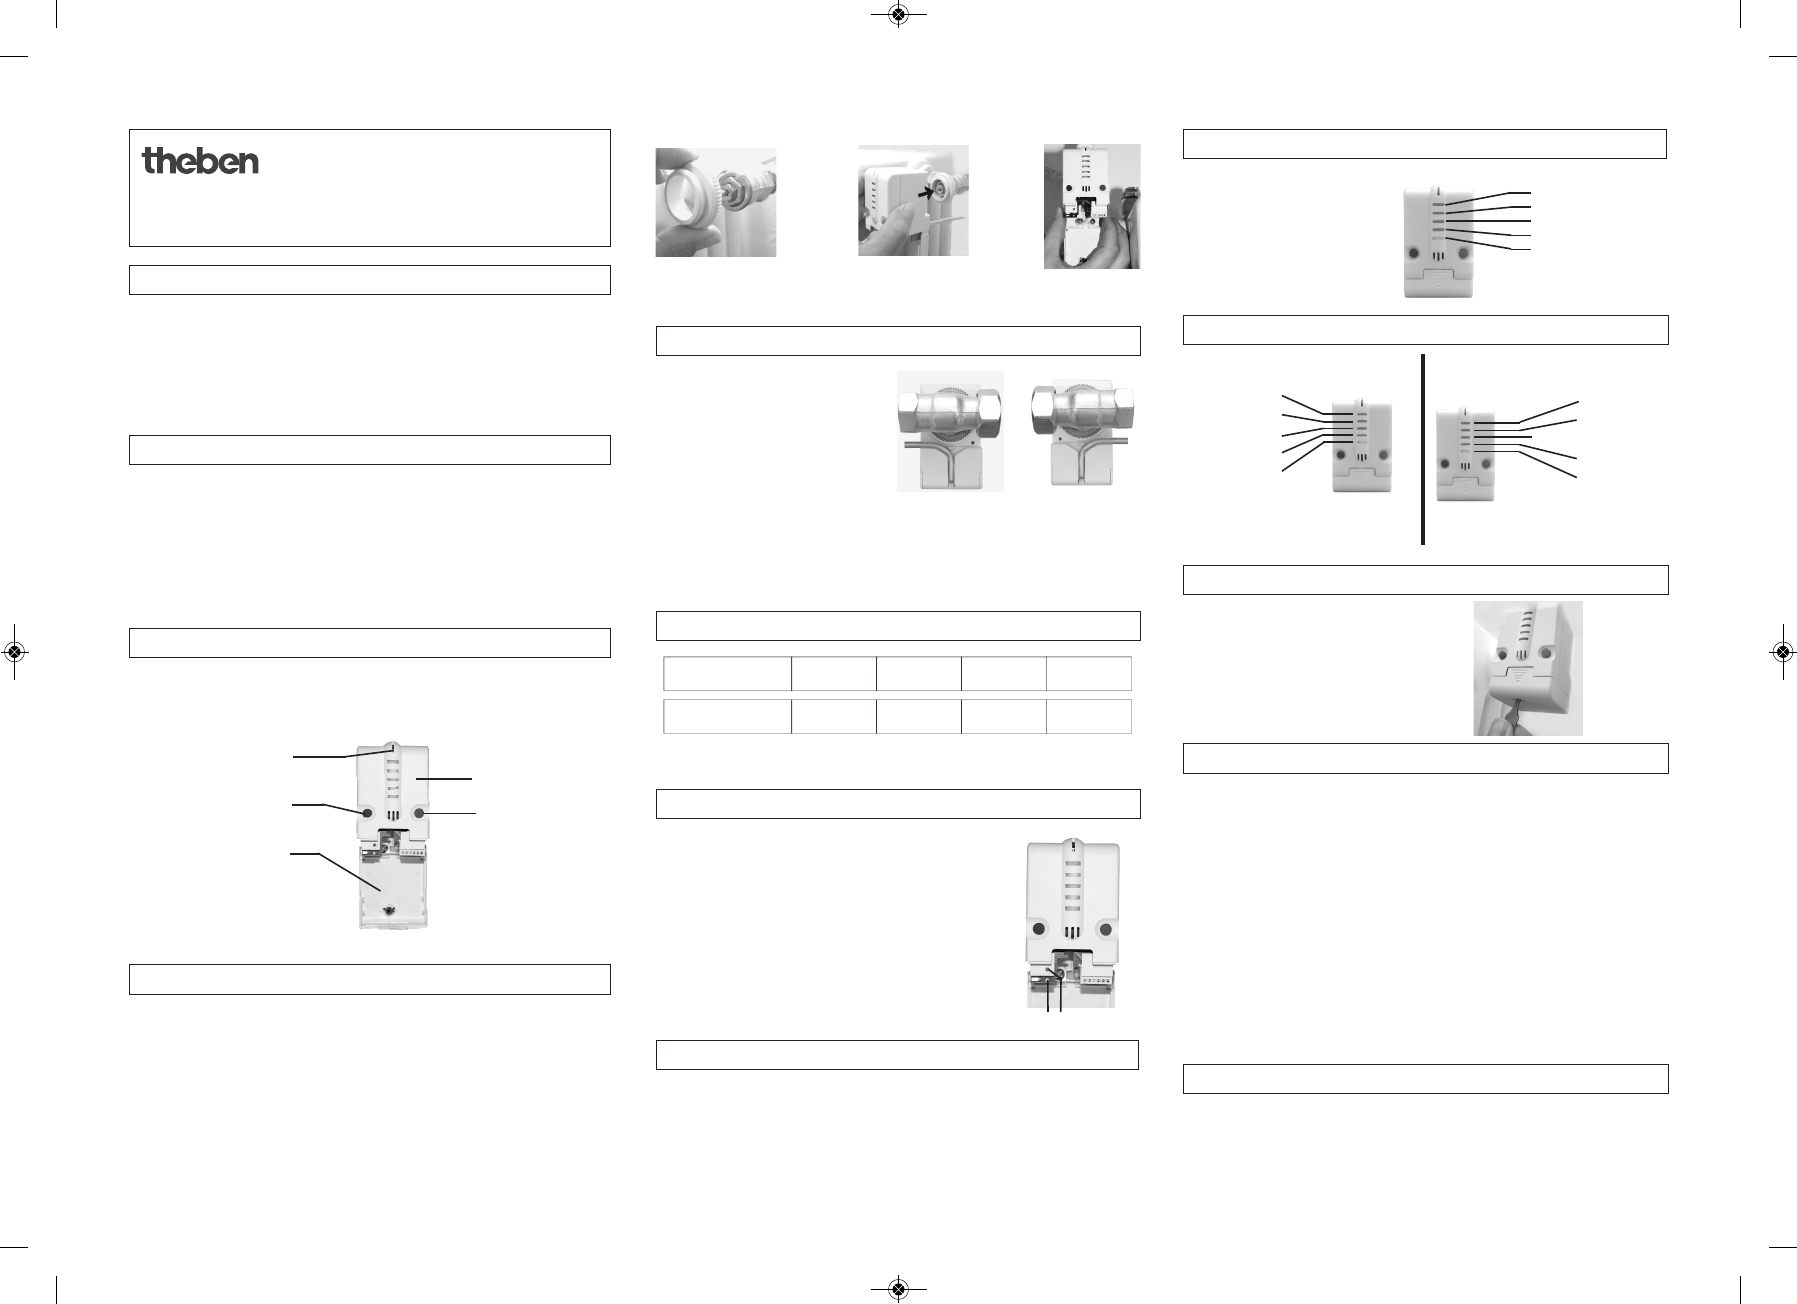
Connection to the window contact and/or presence indicator
yellow/ green: E1
Window
Window
Window
---- ----
---- ----
---- ----
Presence
Actual value*
white/ brown: E2
*For example with remote sensor, Order No. 9070191.
Example without loaded application
By pushing the red or blue button one
of the fixed temperature values can be
selected.
22 °C
20 °C
18 °C
16 °C
5 °C
When installing behind a curtain please use a remote sensor (9070191).
Theben AG
Hohenbergstr. 32
72401 Haigerloch
GERMANY
Tel. +49 7474 692-0
Fax +49 7474 692-150
Service
Tel. +49 7474 692-369
Fax +49 7474 692-207
hotline@theben.de
Addresses, telephone numbers etc. at
www.theben.de
2
1