The grid display cannot be used in MF mode and movie mode.
ADDITIONAL FUNCTION .
2
Addition of ISO 50 sensitivity
ISO 50 can provide exceptional results with the fine detail and lower noise. Please see DP1
USER’S MANUAL P.5 3 for information regarding “SETTING THE SENSITIVITY”.
Notice:
ISO 50 has a narrow dynamic range and therefore may blow out highlight detail such as
brightness or high saturation areas. Please ensure pictures are taken with the correct exposure
setting. If it will not be possible to capture sufficient results, please adjust the EV setting to the
minus side for a little more protection of the highlights.
If [Auto] is selected, it will not change to ISO 50 automatically. Regardless of the firmware
version, the ISO value will change to ISO 100 or 200 in normal shooting, or to ISO 100, 200 or
400 automatically when using flash.
ADDITIONAL FUNCTION .
3
Customizing the Digital Zoom Button function
It is possible to allocate different functions such as [ISO Setting] from [Shooting Menu] to the
buttons (the Digital Zoom Button).
16 functions which all function with the exception of [Color space] in the [
Shooting Menu]
(P.28-29 of the instruction manual), Qs (Quick Set Menu) and OFF can be allocated to the
buttons.
If you wish to use the digital zoom, please select [Digital Zoom]from the [Zoom Button
Settings] menu.
How to set:
1. Press the button.
2. To open the [Set Up] menu, press the button.
3. Use the buttons to select the [ Zoom Button Settings ] menu and press the button.
4. Use the buttons to select the desired setting and press the button.
Set Both Buttons
It is possible to allocate the same function to both
buttons.
The setting will change by pressing
buttons.
Wide Button Setting
It is possible to allocate different functions to the
button and
button. The setting will change by pressing the allocated button.
Tele Button Setting
5. Use the buttons to select the desired icon and then
press the
button to apply the setting.
The available settings are limited depending on the selected
shooting mode. (Unavailable icons will be turned grey.)
According to the selected function, the setting will be changed
as follows by pressing the
buttons.
Set Both Buttons
Wide Button Setting
Tele Button Setting
ISO Setting, Image Size,
Image Quality, White Balance
Color Settings, Drive Mode
Metering Mode
The selected icon can be changed.
(Example) Image Quality
FINE
↔
NORM
↔
BASIC
↔
RAW
FINE
→
NORM
→
BASIC
→
RAW
Auto Bracket, Contrast,
Sharpness, Saturation
The value will be displayed next to the selected icon, and can be changed.
The value will disappear 2 seconds after being set. Only the icon will be
dis
p
la
y
ed.
(
If the settin
g
values is 0, the icon will be hide as well
)
Image With Sound
OFF (Hide icon) ↔ON (
)
Digital Zoom
Press
to increase magnification
or
to decrease magnification.
Press the button to increase magnification.
When the button is pressed passed
the maximum ratio, the magnification
will return to the ori
g
inal ratio.
AF Area
AF area will change as follows.
■When Custom White Balance is selected, the previous stored setting will be used. To
capture a new custom white balance, please refer to P. 52 for information regarding “Setting a
Custom White Balance”.
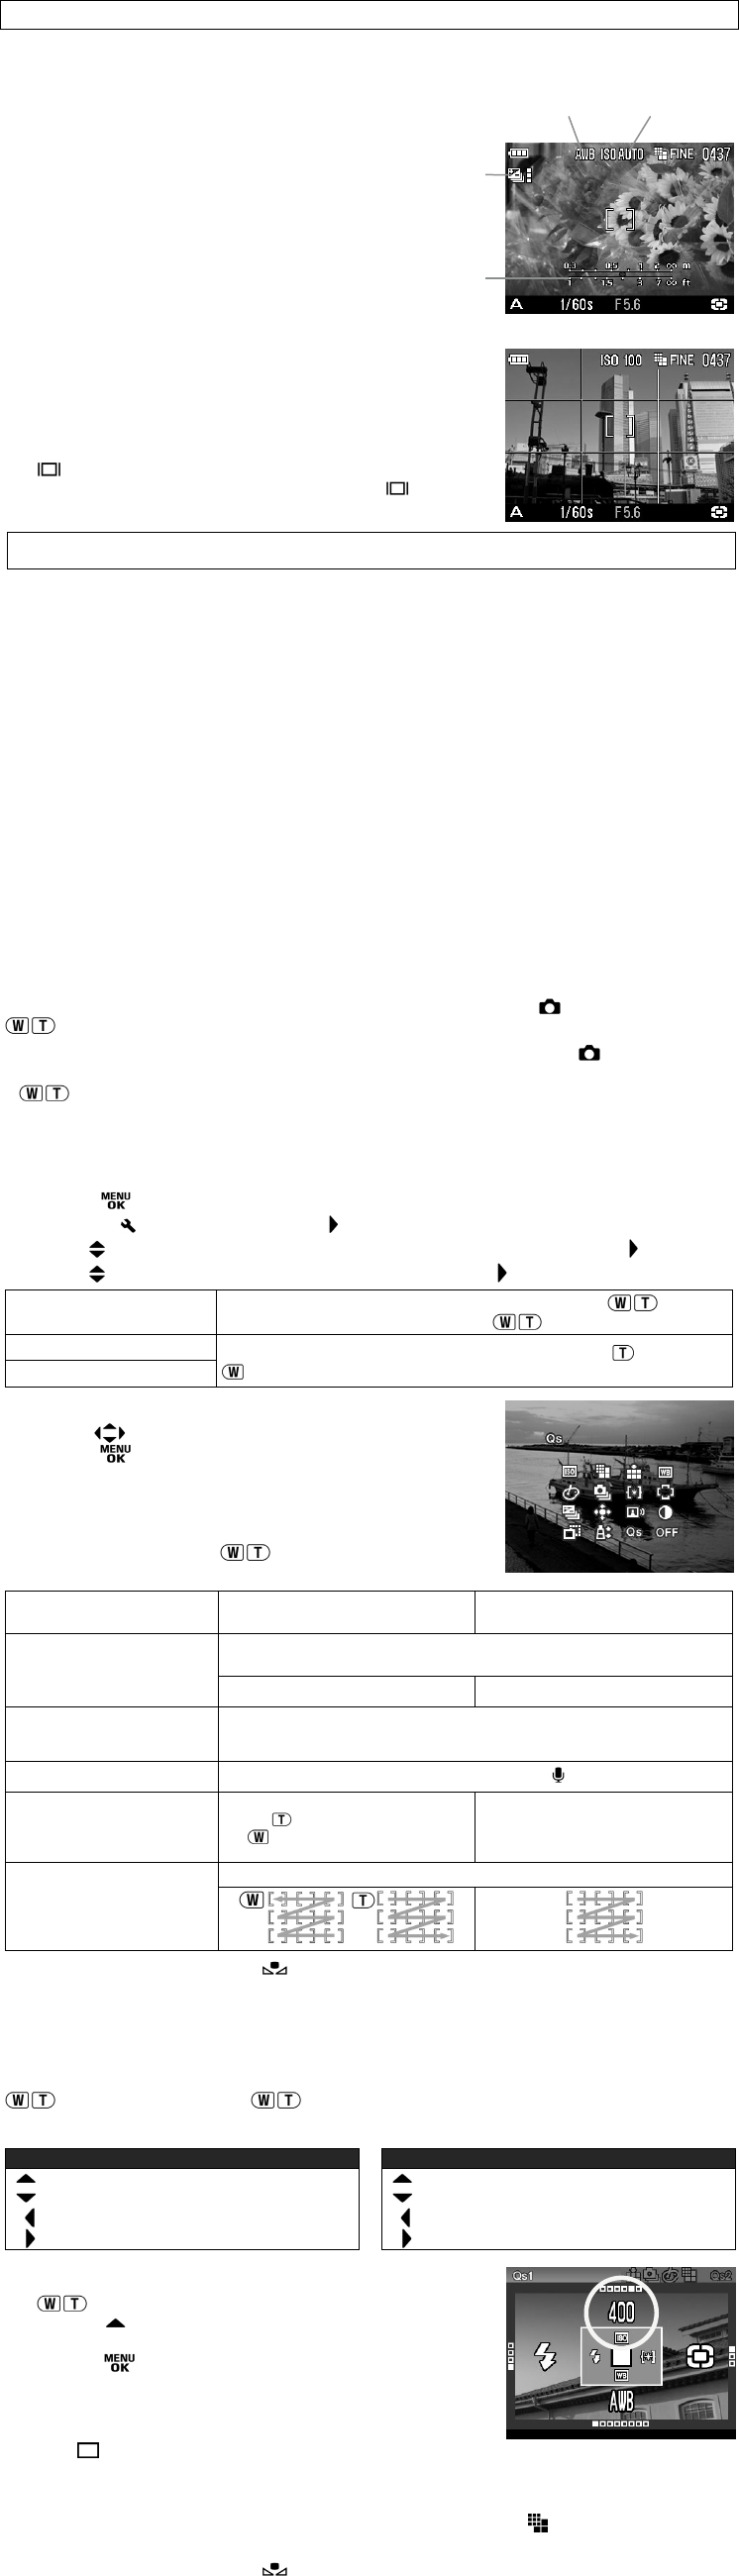
How to use the Qs (Quick Set Menu)
When the camera is in the Still Image Mode, the Quick Set Menu will be displayed by pressing the
button. (By pressing the button again, it is possible to switch to Qs1 or Qs2.)
Select the desired Menu by pressing the 4-way controller and change the setting.
Qs1 (Quick Set Menu 1) Qs2 (Quick Set Menu 2)
ISO Setting
White Balance
Flash Mode
Metering Mode
Image Size
Color Settings
Image Quality
Drive Mode
For example, if you wish to change the ISO Setting to 400, press
the
button to display Qs1, then set the value to 400 by
pressing the
button several times.
By pressing
or the shutter button “half-way”, the settings
will be applied and the camera will return to shooting mode.
Warning !!
Select , if you wish to set to the Drive Mode to [Single].
Select
NORM, if you wish to set the Color Settings to [Normal].
When the recoding mode is set to the movie mode, only White balance can be changed.
When Image Quality is slected to RAW, Image Size will be set to
(Hi) automatically. It is
not possible to select any other Image Size.
When Custom White Balance
is selected, the previous stored setting will be used. To
capture a new custom white balance, please refer to P. 52 for information regarding “Setting a
Custom White Balance”.
12
3
4
Hulp nodig? Stel uw vraag in het forum
Misbruik melden
Gebruikershandleiding.com neemt misbruik van zijn services uitermate serieus. U kunt hieronder aangeven waarom deze vraag ongepast is. Wij controleren de vraag en zonodig wordt deze verwijderd.
Product:
Spelregels forum
Om tot zinvolle vragen te komen hanteren wij de volgende spelregels:
lees eerst de handleiding door;
controleer of uw vraag al eerder door iemand anders is gesteld;
probeer uw vraag zo duidelijk mogelijk te stellen;
heeft u een probleem en al geprobeerd om dit op te lossen, vermeld dit erbij aub;
heeft u een oplossing gekregen van een bezoeker dan horen wij dat graag in dit forum;
wilt u een reactie geven op een vraag of antwoord, gebruik dan niet dit formulier maar klik op de knop 'reageer op deze vraag';
uw vraag wordt direct op de website gezet; vermijd daarom persoonlijke gegevens in te vullen;
Belangrijk! Als er een antwoord wordt gegeven op uw vraag, dan is het voor de gever van het antwoord nuttig om te weten als u er wel (of niet) mee geholpen bent! Wij vragen u dus ook te reageren op een antwoord.
Belangrijk! Antwoorden worden ook per e-mail naar abonnees gestuurd. Laat uw emailadres achter op deze site, zodat u op de hoogte blijft. U krijgt dan ook andere vragen en antwoorden te zien.
Abonneren
Abonneer u voor het ontvangen van emails voor uw Sigma DP1S bij:
nieuwe vragen en antwoorden
nieuwe handleidingen
U ontvangt een email met instructies om u voor één of beide opties in te schrijven.
Ontvang uw handleiding per email
Vul uw emailadres in en ontvang de handleiding van Sigma DP1S in de taal/talen: Engels als bijlage per email.
De handleiding is 0,71 mb groot.
U ontvangt de handleiding per email binnen enkele minuten. Als u geen email heeft ontvangen, dan heeft u waarschijnlijk een verkeerd emailadres ingevuld of is uw mailbox te vol. Daarnaast kan het zijn dat uw internetprovider een maximum heeft aan de grootte per email. Omdat hier een handleiding wordt meegestuurd, kan het voorkomen dat de email groter is dan toegestaan bij uw provider.
Uw handleiding is per email verstuurd. Controleer uw email
Als u niet binnen een kwartier uw email met handleiding ontvangen heeft, kan het zijn dat u een verkeerd emailadres heeft ingevuld of dat uw emailprovider een maximum grootte per email heeft ingesteld die kleiner is dan de grootte van de handleiding.
Er is een email naar u verstuurd om uw inschrijving definitief te maken.
Controleer uw email en volg de aanwijzingen op om uw inschrijving definitief te maken
U heeft geen emailadres opgegeven
Als u de handleiding per email wilt ontvangen, vul dan een geldig emailadres in.
Uw vraag is op deze pagina toegevoegd
Wilt u een email ontvangen bij een antwoord en/of nieuwe vragen? Vul dan hier uw emailadres in.