User
GB
DECLARA
Hereby
,
--------------------------- Manual/Dr -----------------------------
Copyright © Dr
®
The above mentioned pr
specified in the dir
the Member States r
This pr
standar
valid on May 2013:
EN55015
EN61547
EN61000
EN61347
Joseph V
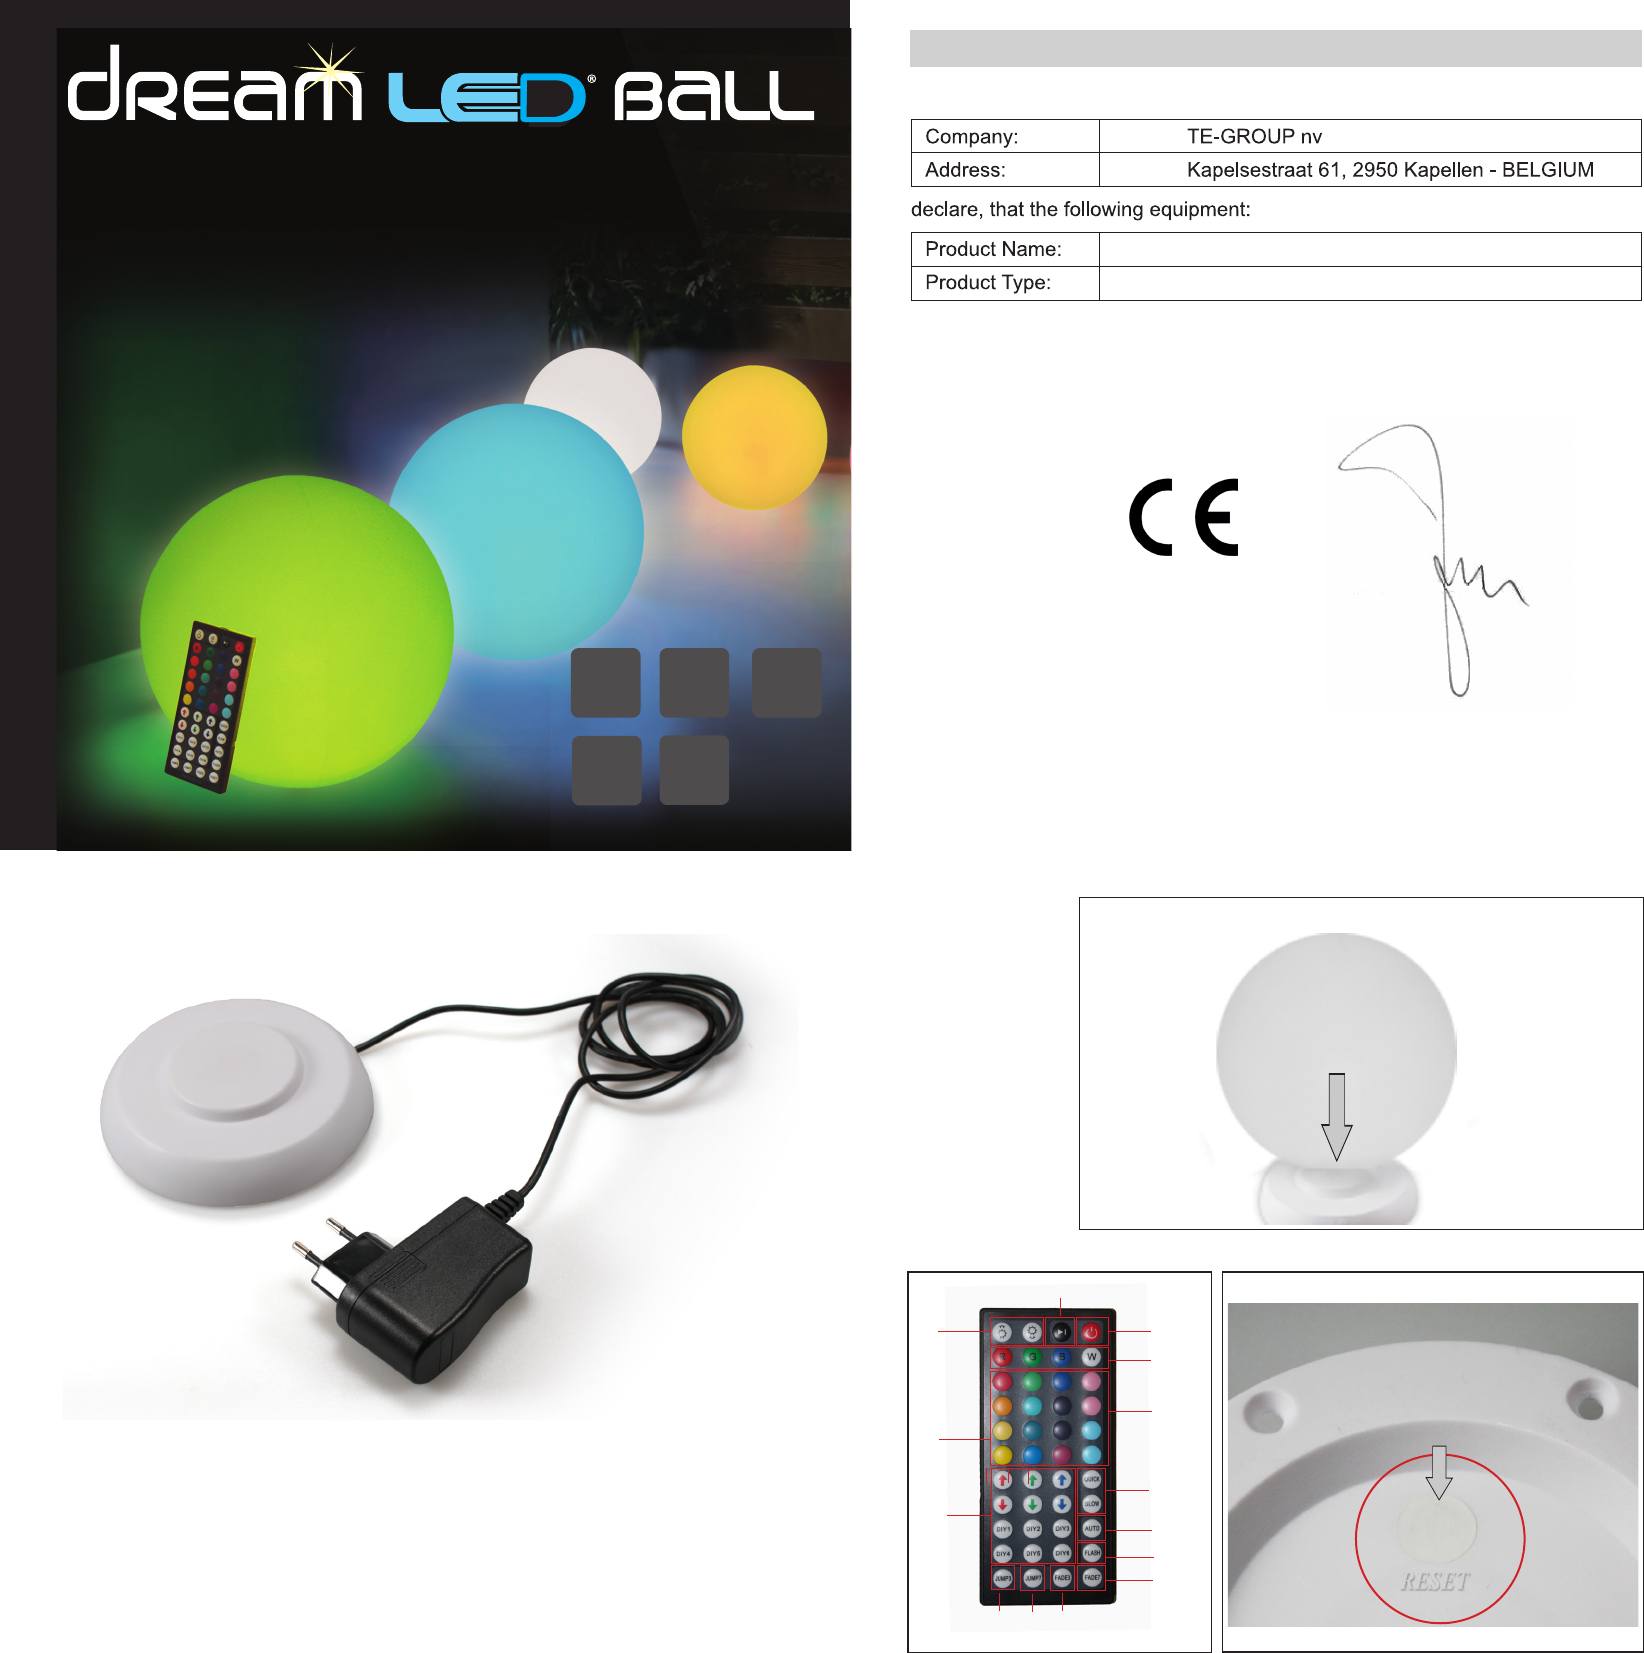
DreamLED Ball 20 cm
RGB LED Ball
ILLUSTRA
ILLUSTRA
ILLUSTRA
GB
2
1
3
4
4
5
6
8
7
9
10 11
13
P
The Dr
* LED Ball
* Induction plate for char
* RGB Infrar
* 230V DC adapter
FEA
• Can be used indoor and outdoor
• Wir
• Low carbon, ener
• Safe and r
• Long life span, with high brightnes
• High degr
• High-tenacity
• The way to extend the batt
• The r
CHARGING INSTRUCTIONS
1) Connect the adaptor with the induction char
See illustration 1
2) Place the LED light on top of the induction char
See illustration 2
3) The indicator light will turn gr
DESCRIPTION OF THE REMOTE C
See illustration 3
1. ON/OFF: T
2. Play/Pause: Play/Pause the chosen light eff
3. DIM-buttons: Brighten or dark
4. Main col
5. Pr
6. QUICK/SL: Adjust the speed of the chosen light effect
7. AUTO : All av
8. FLASH: The LED Ball will flash in white col
9. F
ADE 7: 7 col
10. F
ADE 3: 3 RGB col
11. UMP 7: 7 color
12. JUMP 3: The LED Ball changes into 3 RGB col
(#) The speed of all these light effects can be adjusted using the Quick/Sl
(*) The brightness of all these light effects can be adjus
13. DIY buttons and Arr
and 6 DIY col
a DIY button, for e
Blue col
to stor
last time. Ther
Note:
• If another button is pr
• All DIY buttons ar
button will be invalid until DIY 2 button will be pr
RESET BUTTON ON THE BO
See Illustration 4
Whenever a pr
this button to r
SAFETY INSTRUCTIONS
• Never open the LED Ball or the induction plate.
• Never touch the plug c
• Make sur
• Use only the original power suppl
• Never plac
• Never plac
• Pr
• Unplug the unit at the main power socket bef
soft, dry anti-static cl
• Do not attempt r
• If the unit is not pr
®
cannot acc
TECHNICAL DA
- Operating voltage: 110-240V A
- Power suppl
- Power c
- Ambient operating temperatur
- Humidity: 10% - 85% (none condensing)
- Storage temper
- Storage humidity: 5% - 90% (none condensing)
- PrLED Ball : IP68, Induction Plate : only fAdapter : only f
LED Ball:
LED RGB IP68
DC 7,5V, 1A, 8W
8x EPIST
Max. 60 lumen
120° light angle
Dimensions (L*W*H): ø 200 mm
Induction Plate:
DC 7,5V at 1A
Remote:
20 col
DIY buttons + 6 “mix” buttons (arr
Battery: CR 2025
Adapter: Input: 100-240V * Output: 7,5V / 1A (2A thermal fuse)
GUARANTEE
Copyright © Dr
®
. Dr
®
is a r
®
brand stands f
superior pr
®
warrants this pr
defects in material and workmanship ftwo (2) years fr
NL FR
D
PL
NL
INHOUD
De Dr
* LED Ball
* Inductieplaat voor het opladen
* Geavanceer
* 230V DC adapter
KENMERKEN & INST
• Kan binnen en buiten wor
• Draadloos opladen met inductie
• Ener
• Veilig en betr
• Lange le
• Hoge beschermingsgraad, IP68, 100 % water
• Sterk, bestand t
• V
• De afstandsbediening, adapter en inductieplaat zijn NIET wat
LAADINSTRUCTIES
1) Sluit de adapter aan op de inductieplaat en steek deze in een s
Zie afbeelding 1
2) Plaats de LED Ball op de inductieplaat om op te laden. Het contr
Zie afbeelding 2
3) Het contr
BESCHRIJVING V
Zie afbeelding 3
1. ON/OFF: De LED Ball aan-/uitschakel
2. Play/Pause: Het gekozen licht
3. DIM-toetsen: Gekozen kl
4. Hoofdkleur
5. V
6. Quick/Slow: De snelheid v
7. Auto: Alle beschikbar
8. FLASH: De LED Ball knippert in de witte kleur (#)(*)
9. Fade 7: Laat 7 kl
(#)
10. Fade 3: Laat 3 RGB kl
te knipper
11.
12.
(#)V
(*) V
13. DIY toetsen (“doe-het-zelf”) en Pijl-toetsen: Er zijn 3 groepen van “op” en “neer” pijlt
Blauw en 6 DIY (“doe-het-zelf”) toetsen om kleur
persoonlijk fav
te activer
de 6 pijltoetsen tot u uw eigen gewensDruk nogmaals op de DIY1 toets om het
geselecteer
u heeft opgeslagen. Er zijn 6 DIY toetsen, dus u kunt 6 fav
Opmerking:
• Als u op een ander
wor
• Alle DIY toetsen zijn onafhank
de DIY1 toets nietig wor
RESET-KNOP OP DE ONDERKANT
Zie Illustratie 4
W
drukt u op deze knop om het systeem te r
VEILIGHEIDSINSTRUCTIES
• Open nooit de LED Ball of inductieplaat.
• Raak nooit de stekk
• Zor
• Gebruik enkel origineel toebehor
• Zet het apparaat nooit in de nabijheid van warmtebr
• Zet het apparaat nooit op oppervlakken die ge
• Bescherm het apparaat tegen special
• Gebruik voor het r
antistatische doek. T
• Een r
• Bij ongeëigend gebruik aanvaar
®
geen enkel
TECHNISCHE GEGEVENS
- Bedrijfsspanning: 110-240V AC, 50/60 Hz
- V
- Str
- Omgevingstemper
- Luchtvochtigheid: 10% - 85% (niet condenser
- T
- Luchtvochtigheid voor opber
- V
LED B
all: IP68, Inductieplaat: enkel vAdapter : enkel voor binnenshuis
LED Ball:
LED RGB lP68
DC 7,5V, 1A, 8W
8x EPIST
Max. 60 lumen
120° uitvalshoek
Afmetingen (L*B*H): ø 200mm
Inductieplaat:
DC 7,5V @ 1A
Afstandsbediening:
20 verschill
DIY toetsen + 6 “mix” toetsen (pijltoetsen)
Batterij: CR2025
Adapter: Ingang: 100-240V * Uitgang: 7,5V / 1A (thermische zekering 2A)
GARANTIE
Copyright © DreamLED
®
.
®
is een gedeponeer
®
staat voor pr
®
dat
dit prtwee (2) jaar na de oorspronk
aankoopdatum van het pr
ILLUSTRA