(AW-500-SM model)
The AW-500-SM can operate in two modes. When using one speaker, flip the switch to the
“Stereo” position and connect the “Front” or “Main” left and right channels of your system’s
power amplifier to both inputs (See Figure 2A). When using more than one AW-500-SM,
flip the switch to the “Mono” position and connect either output of your system’s power
amplifier to either input cup (See Figure 2B).
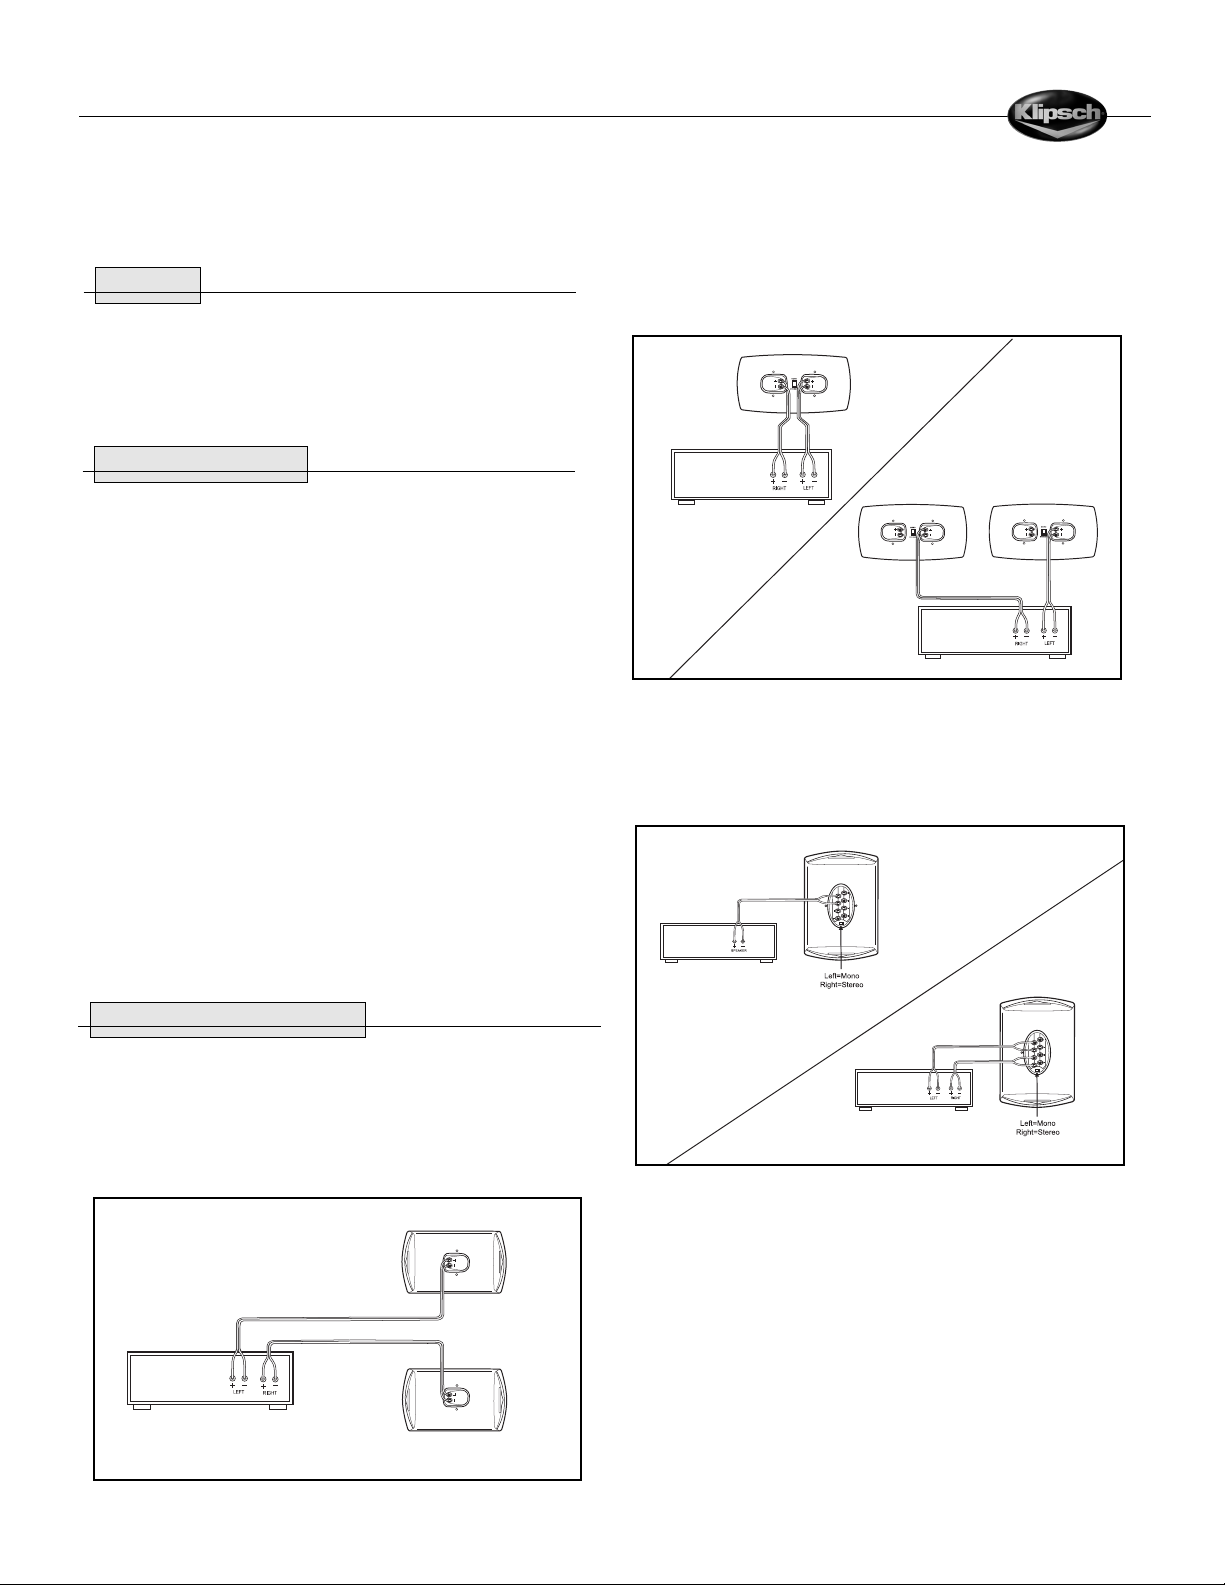
(AW-800-SW)
The AW-800-SW can operate in two modes. If the amplifier you are using is mono, flip the
switch to the left and connect the output of your system’s amplifier to either of the two
input connectors (See Figure 3A). For stereo use, flip the switch to the right and connect
the output of your system’s amplifier to both input connectors (See Figure 3B).
You may also use an optional wall or ceiling mount that will fit the provided 3/8” – 16 inserts.
Please see your authorized Klipsch dealer to see which model is right for you.
CONNECTIONS
Note: Proper connection of your speakers to your amplifier or receiver is vital to obtaining good
sound quality. Please follow these directions carefully. Sloppy connections can cause amplifier
malfunction or damage. We recommend that you use 16-gauge or heavier stranded copper wire.
Use a lower gauge (heavier) wire for longer runs to reduce the amount of amplifier power lost due
to the wire’s resistance.
BUT FIRST: TYPES OF CONNECTORS
Bare wire. Pull the two conductors apart for about an inch and strip approximately 1/4-inch of
insulation from the end of each. (A wire stripper will simplify this, but you can use an ordinary
pocket knife to cut around and through the insulation down to the wire.) Twist the strands of wire
on each individual conductor tightly together. Loosen the nuts on a pair of binding posts until the
holes through the metal posts are exposed, then insert the bare wire through the holes. Screw the
nuts down finger-tight on the wire. Make sure that no strands of wire are touching from one bind-
ing post to the other or to any strands from the other conductor. Failure to observe this precaution
at either end of the connection can result in amplifier malfunction or damage.
Pins. Many pre-made speaker cables are terminated with metal pins. Loosen the nuts on a pair of
binding posts until the holes through the metal posts are exposed, then insert the pins through the
holes. Screw the nuts down finger-tight on the pins — do not overtighten. Make sure that there is
no metal-to-metal contact between the two pins or binding posts. Failure to observe this precau-
tion at either end of the connection can result in amplifier malfunction or damage.
Spade lugs. Some speaker cables are terminated with U-shaped connectors called spade lugs. Loosen
the nuts on a pair of binding posts and slip the spade lugs around the metal posts. Screw the nuts
down finger-tight on the lugs and inspect to ensure they have remained firmly in place. Make sure that
there is no metal-to-metal contact between the two lugs or binding posts. Failure to observe this pre-
caution at either end of the connection can result in amplifier malfunction or damage.
OTHER TYPES OF SPECIALTY CONNECTORS ARE AVAILABLE TO FACILITATE HOOKING UP YOUR SPEAKERS.
PLEASE CONSULT YOUR AUTHORIZED KLIPSCH DEALER FOR SUGGESTIONS AND FURTHER DETAILS.
SPEAKERS TO AMPLIFIER: KEEPING IT STRAIGHT
(AW-400, AW-500, AW-525, AW-650 models)
One of the most important things about hooking up your speakers is keeping them in the same
polarity, or phase. If they are connected out of phase, bass and sound imaging will be degraded.
The easiest way to ensure that your speakers are wired in phase is to always connect the positive
and negative output terminals on your amplifier or receiver to the matching input terminals on your
speakers: positive (“+”, color-coded red) to positive and negative (“–”, color-coded black) to
negative. (See Figure 1.)
Figure 3
Figure 2
Figure 1
A
B
A
B