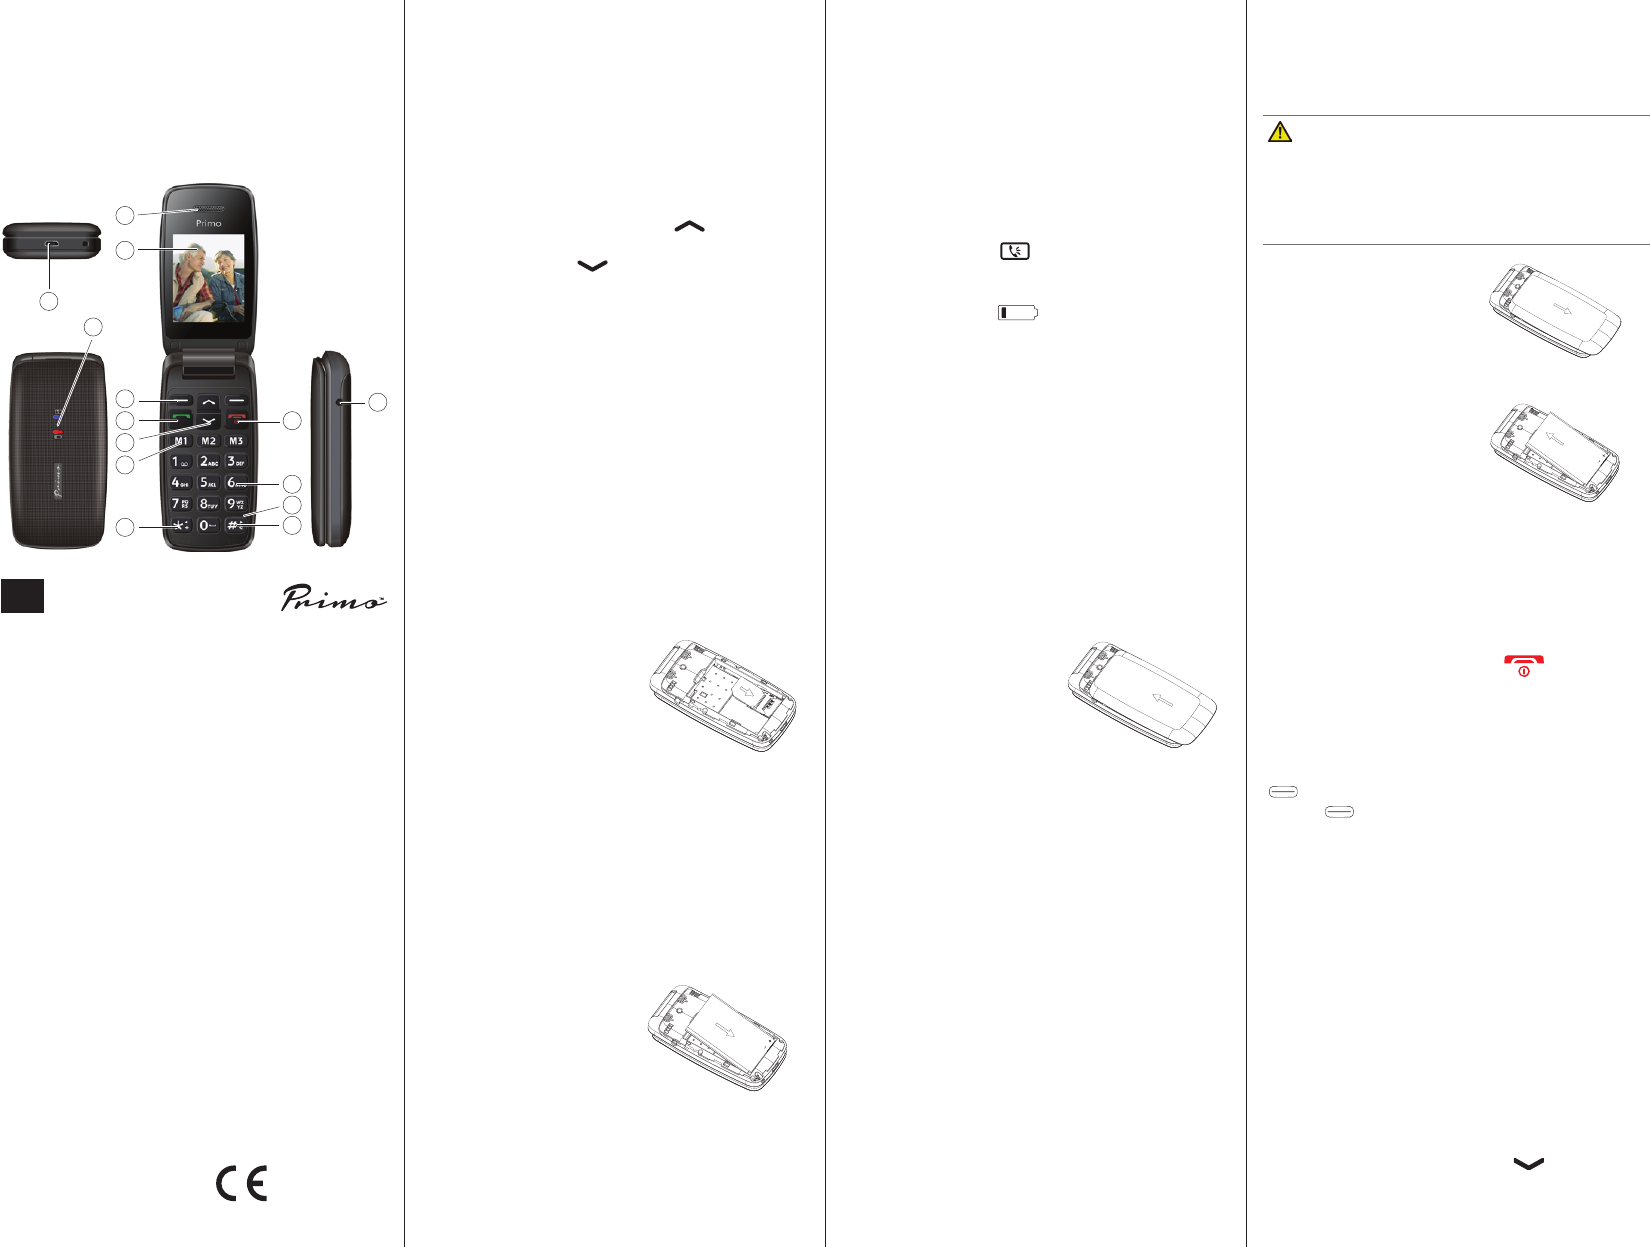

-
Hoe zet ik het geluid (muziekje) uit bij het openen en sluiten van de gsm Gesteld op 18-2-2024 om 22:26
Reageer op deze vraag Misbruik melden -
Heb je bij de primo by doro een luidspreker functie
Reageer op deze vraag Misbruik melden
Gesteld op 4-2-2024 om 15:37 -
hoe zet je een achtergrond op een doro primo 401? stuur naar robby.veekmans@gmail.com dank u. Gesteld op 13-1-2024 om 02:03
Reageer op deze vraag Misbruik melden -
kun je een achtergrond op doro primo 401 gsm zetten, zo ja hoe? dank u. Gesteld op 5-1-2024 om 03:30
Reageer op deze vraag Misbruik melden -
kun je een achtergrond op de primo dorp 401, zo ja, hoe? dank u. Gesteld op 5-1-2024 om 03:25
Reageer op deze vraag Misbruik melden -
is er een volledige handleiding te downloaden?
Reageer op deze vraag Misbruik melden
ik vind alleen de beknopte 2 pag. de snelstart handleiding. Gesteld op 30-8-2023 om 21:47 -
Kan berichten met promo doro niet versturen
Reageer op deze vraag Misbruik melden
Heb alles geprobeerd
Gesteld op 5-7-2023 om 16:38-
ik denk dat het te maken heeft met het feit, dat Doro Primo 401 niet meer werkt met 2G.
Waardeer dit antwoord (2) Misbruik melden
Geantwoord op 6-7-2023 om 06:35
-
-
Doro Primo 401 is een 2G model en kan niet functioneren met het huidige 4G netwek Geantwoord op 6-7-2023 om 06:55
Waardeer dit antwoord (2) Misbruik melden -
Mijn telefoon blijft op noodsituatie staankan niet bellen of gebeld worden Gesteld op 27-6-2023 om 14:50
Reageer op deze vraag Misbruik melden-
ik heb het zelfde probleem Geantwoord op 3-7-2023 om 13:32
Waardeer dit antwoord (17) Misbruik melden
-
-
Ik kan niet bellen met mijn primo doro./ Staat op noodsituatie/ hoe krijg ik dat eruit Geantwoord op 15-8-2023 om 14:56
Waardeer dit antwoord (7) Misbruik melden -
Toestel is werkt niet meer op het 2G netwerk Geantwoord op 16-8-2023 om 12:57
Waardeer dit antwoord (1) Misbruik melden -
hoe zet je het geluid van de klep uit
Reageer op deze vraag Misbruik melden
bij instellingen klep open/ sluiten op stil maar blijft steeds muziekje geven bij telkens open en sluiten van het toestel Gesteld op 15-5-2023 om 20:55 -
krijg alleen een zwart scherm hoe zet ik hem aan Gesteld op 8-4-2023 om 12:51
Reageer op deze vraag Misbruik melden-
Geen scherm na het indrukken van het rode telefoontje? Dan is de accu waarschijnlijk leeg, ZIT er eigenlijk wel een accu in? Geantwoord op 8-4-2023 om 16:46
Waardeer dit antwoord Misbruik melden
-
-
Hoe moet ik het netwerk selecteren van mijn telefoon
Reageer op deze vraag Misbruik melden
Gesteld op 21-2-2023 om 12:55 -
mijn gsm primo doro 401 de stlle modus is ingschakeld hoe krijg ik weer geluid Gesteld op 1-2-2023 om 15:32
Reageer op deze vraag Misbruik melden -
Vind niet waar of hoe mijn code voor opladen geld op gsm te vinden Gesteld op 10-12-2022 om 19:59
Reageer op deze vraag Misbruik melden -
Ik wil de pincode van de simkaart niet meer bij het aandoen gebruiken. Hoe doe ik dat? Gesteld op 22-10-2022 om 11:34
Reageer op deze vraag Misbruik melden -
Ik wil de pincodevsn de simkaartnietmeer invullen. Hoe doek dat? Gesteld op 22-10-2022 om 11:33
Reageer op deze vraag Misbruik melden -
Het blauwe lampje blijft branden. Op wat voor manier kan ik het uit krijgen. Gesteld op 27-9-2022 om 14:04
Reageer op deze vraag Misbruik melden -
kan ik een niet gewenst telefoonnummer blokkeren zodat die persoon mij
Reageer op deze vraag Misbruik melden
niet meer kan bellen ? Gesteld op 1-6-2022 om 10:59 -
Hoe kan ik het volume van het geluid voor berichten wijzigen?
Reageer op deze vraag Misbruik melden
Gesteld op 26-5-2022 om 08:08-
Volumeregeling
Waardeer dit antwoord (3) Misbruik melden
U kunt het volume aanpassen tijdens een gesprek met de zijknoppen +/–. Het volume wordt in het display
weergegeven.
De laatst gebruikte instellingen worden opgeslagen Geantwoord op 26-5-2022 om 16:32
-
-
Hoe regel ik het volume van de telefoon, mijn vrouw heeft moeite met verstaan het gesproken woord. Gesteld op 25-2-2022 om 14:27
Reageer op deze vraag Misbruik melden-
1. Ga naar Menu en dan naar Gebruikersprofielen
Waardeer dit antwoord (3) Misbruik melden
2. Via Opties naar Algemeen
3. Dan naar Aanpassen en OK
4. Scrol hier door de getoonde lijst.
Geantwoord op 25-2-2022 om 15:21
-
-
Inkomend gesprek aannemen door gewoon open te klappen. Hoe doe je dat? Gesteld op 19-2-2022 om 23:55
Reageer op deze vraag Misbruik melden -
Onder welke knop kan ik het geluid harder of zachter zetten? Gesteld op 25-1-2022 om 10:50
Reageer op deze vraag Misbruik melden-
1. Kies Menu en dan op OK
Waardeer dit antwoord (3) Misbruik melden
2. Kies Gebruikersprofielen
3. Kies Algemeen
4. Kies Aanpassen
5. Scroll naar Belvolume
(Huidige volume wordt getoond)
6. Kies Opties en dan op Wijzigen
Geantwoord op 25-1-2022 om 12:32
-
-
Bel toon veranderen? Hoe kan ik het bel geluid veranderen of harder zetten Gesteld op 10-11-2021 om 13:12
Reageer op deze vraag Misbruik melden -
Hoe open ik Uw forum. De door mij te stellen vragen zijn al eerder gesteld. Gesteld op 4-11-2021 om 15:47
Reageer op deze vraag Misbruik melden -
Mijn toestel geeft aan dat er een pin moet worden ingevoerd. Nooit eerder gevraagd en waar is die pin dan? Gesteld op 11-10-2021 om 12:08
Reageer op deze vraag Misbruik melden -
bij het verzenden van een sms krijg ik de melding bericht staat in postvak uit. maar blijkt niet verzonden Gesteld op 29-9-2021 om 14:56
Reageer op deze vraag Misbruik melden -
Bericht wordt in postvak uit gezet maar niet verzonden Gesteld op 29-9-2021 om 14:30
Reageer op deze vraag Misbruik melden -
Hoe moet ik de trilstand stoppen en overgaan naar rinkelen? Gesteld op 7-9-2021 om 12:11
Reageer op deze vraag Misbruik melden -
Hoe kan ik op deze telefoon de voicemail afluisteren? Gesteld op 19-8-2021 om 21:56
Reageer op deze vraag Misbruik melden -
Hoe belgeluid luider maken alles geprobeerd maar niets lukt Gesteld op 11-8-2021 om 06:46
Reageer op deze vraag Misbruik melden -
Ik wil een snelkuesnummer invoeren, hoe doe ik dat Gesteld op 26-7-2021 om 22:37
Reageer op deze vraag Misbruik melden -
is de primo 401 quick start guide geschikt voor (3G) Gesteld op 21-5-2021 om 10:53
Reageer op deze vraag Misbruik melden -
de vraag is of de primo 401 quick start guide geschikt is voor (3g)
Reageer op deze vraag Misbruik melden
Gesteld op 21-5-2021 om 10:49 -
de vraag is of deze primo 401 quick start guide telefoon ook is geschikt voor 3 G Gesteld op 21-5-2021 om 10:42
Reageer op deze vraag Misbruik melden -
Is deze primo 401 quick start guide 2 g of ook 3 g
Reageer op deze vraag Misbruik melden
Gesteld op 19-5-2021 om 21:07-
kan ik zien het verbruiken Geantwoord op 20-5-2021 om 09:53
Waardeer dit antwoord Misbruik melden
-
-
Is deze primo 401 doro geschikt voor 4 g in verband met de ondersteuning t mobile Gesteld op 29-4-2021 om 10:41
Reageer op deze vraag Misbruik melden -
hoe zet ik de luidspeaker aan van de primo 401 doro? Gesteld op 19-4-2021 om 08:59
Reageer op deze vraag Misbruik melden -
Hoe kan men M 1. 2. en 3 de nummers opslagen om met een toetsaanslag het nummer te kiezen?
Reageer op deze vraag Misbruik melden
Gesteld op 11-4-2021 om 14:32 -
Hoe kan ik primo Dora luider zetten? Niet terug te vinden in de handleiding en het antwoord op gelijkaardige vragen is niet zichtbaar. Alvast bedankt Gesteld op 28-3-2021 om 15:36
Reageer op deze vraag Misbruik melden -
Scherm van mijn doro is niet meer leesbaar
Reageer op deze vraag Misbruik melden
Lcd staat op max Gesteld op 20-2-2021 om 15:16 -
gsm was totaal leeg , lig al meerdere dagen op te laden ( alleen overdag ) toon aan dat de batterij is volgeladen is maar bij de oplader uitschakelen toont de batterij terug leeg aan , ik kan de gsm niet meer opstarten ook al is hij aan het opladen en toont hij volle batterij aan , met andere woorden de gsm doet niks meer , kan u mij helpen Gesteld op 9-1-2021 om 18:48
Reageer op deze vraag Misbruik melden -
Ik heb geen idee hoe ik het volume van de telefoon kan regelen. In de handleiding staat er niets over vermeld.
Reageer op deze vraag Misbruik melden
Is het volume wel te regelen? Gesteld op 12-11-2020 om 21:43-
Via gebruikersprofiel, algemeen, aanpassen. Geantwoord op 2-7-2021 om 15:50
Waardeer dit antwoord (3) Misbruik melden
-
-
Hoe zet ik het geluid harder met sterretje en hekje kun je een andere beltoon voor contact selecteren volgens de beschrijving maar het geluid wordt niet harder Gesteld op 1-10-2020 om 19:34
Reageer op deze vraag Misbruik melden-
Via menu_gebruikersprofiel_algemeen en aanpassen...na iedere wijziging even opties en opslaan is het mij gelukt Geantwoord op 15-10-2020 om 21:50
Waardeer dit antwoord (12) Misbruik melden
-
-
hij belt veel te zacht u kunt hem bijna niet horen , hij moet wat luider staan, maar dat staat niet in het boekje? Gesteld op 27-9-2020 om 18:57
Reageer op deze vraag Misbruik melden -
blauw lampje voor inkomende oproepen blijft flikkeren .In "inkomende oproepen"geen spoor van een oproep. Gesteld op 2-9-2020 om 19:54
Reageer op deze vraag Misbruik melden -
Telefoon begint onverwacht te trillen terwijl deze niet in gebruik is Gesteld op 2-9-2020 om 15:04
Reageer op deze vraag Misbruik melden -
Ik wil graag af en toe de telefoon op speaker zetten maar kan niet vinden wat ik moetdoen. Gesteld op 24-8-2020 om 11:43
Reageer op deze vraag Misbruik melden -
Hoe krijg ik telefoon nummers op de M voorgeprogrammeerde nummers ? Gesteld op 21-8-2020 om 17:02
Reageer op deze vraag Misbruik melden -
hoe stel ik de sneltoetsen M1, M2, M3, in met voorgeprogrameerde nummers Gesteld op 21-8-2020 om 16:58
Reageer op deze vraag Misbruik melden -
hoe krijg ik al men telefoonnummers terug op doro primo Gesteld op 21-8-2020 om 11:38
Reageer op deze vraag Misbruik melden -
Hoe zet ik de doro primo terug in fabrieksinstellingen? Gesteld op 29-6-2020 om 17:28
Reageer op deze vraag Misbruik melden -
Als ik mijn mobile bel, Doro primo, krijg ik geen kiestoon maar meteen de voice mail. Zo wel mobile als de vaste lij
Reageer op deze vraag Misbruik melden
Gesteld op 10-6-2020 om 16:33 -
Hoe kan ik een nummer wissen wat opgeslagen is onder sneltoetsen m1 van mijn primo 401 ? Gesteld op 20-4-2020 om 19:49
Reageer op deze vraag Misbruik melden -
hoe kan ik vanuit internet zelf geld bijvoegen zonder naar de PROXIMUS WINKEL te gaan die uiteraard gesloten is door corona Gesteld op 6-4-2020 om 13:46
Reageer op deze vraag Misbruik melden -
Hoe zet ik telefoon nummer in M1 in een primo 401? Gesteld op 21-3-2020 om 17:30
Reageer op deze vraag Misbruik melden -
kan ik de ringtoon zo instellen dat hij na vier keer overgaan vanzelf stopt? Gesteld op 5-3-2020 om 00:04
Reageer op deze vraag Misbruik melden -
hoe kan ik de oprepinstelling veranderen om de telefoon langer te laten rinkelen bij een oproep Gesteld op 27-2-2020 om 11:52
Reageer op deze vraag Misbruik melden -
Hoe zet je geluid harder van de primo 401 in de handleiding kan ik niks vinden Gesteld op 20-11-2019 om 08:58
Reageer op deze vraag Misbruik melden-
het belt veel te zacht , hoe kan ik dat luider zetten ? staat niet in het boekje! Geantwoord op 27-9-2020 om 18:46
Waardeer dit antwoord (23) Misbruik melden
-
-
hij belt veel te zacht , hoe kan ik hem luider zetten ,dat staat niet in het boekje ? Geantwoord op 27-9-2020 om 18:55
Waardeer dit antwoord (14) Misbruik melden -
wat betekent het blauwe langzaam knipperende lichtje op de telefoon deksel Gesteld op 31-8-2019 om 19:00
Reageer op deze vraag Misbruik melden-
Het blauwe lichtje betekend dat iemand je probeerde te bellen ...... Geantwoord op 2-9-2019 om 13:04
Waardeer dit antwoord (7) Misbruik melden
-
-
Hoe voorkom ik dat de wekker herhaaldelijk afloopt - ook al zegt het één keer? Gesteld op 18-7-2019 om 19:16
Reageer op deze vraag Misbruik melden-
De "een keer" slaat niet op het aantal alarmherhalingen, maar op hoe vaak je de wekker om die tijd wil laten aflopen (1 dag, 2 dagen achter elkaar, etc). Geantwoord op 5-8-2019 om 01:17
Waardeer dit antwoord (1) Misbruik melden
-
-
hoe stel ik mijn telefoon geluid in kan het nergens vinden Gesteld op 29-5-2019 om 14:12
Reageer op deze vraag Misbruik melden-
Menu>gebruikersprofielen>algemeen>aanpassen>belsignaal. Niet vergeten om daarna "algemeen" te activeren. Weet niet of deze uitleg duidelijk is, maar ik hoop dat het je toch helpt. Geantwoord op 31-10-2019 om 20:34
Waardeer dit antwoord (6) Misbruik melden
-
-
beste hoe kan ik een telefoon nummer opslaan op de snel toetsen M1 M 2 M3 ik vind niets terug in de bij geleverde hand leiding Gesteld op 20-5-2019 om 17:23
Reageer op deze vraag Misbruik melden-
Kijk even bij vraag van 13 mei 2018. Daar staat het antwoord en dat werkt. Geantwoord op 15-6-2019 om 13:51
Waardeer dit antwoord (7) Misbruik melden
-
-
bij het openen en sluiten van het toestel hoor ik een geluid , hoe kan ik dit uitschakelen mss Gesteld op 27-2-2019 om 20:23
Reageer op deze vraag Misbruik melden-
Bij gebruikersprofiel "algemeen" selecteren en daarin de gewenste instellingen aanpassen , er staat zo ook "bij dichtklappen" en "bij openklappen". Geantwoord op 31-10-2019 om 20:36
Waardeer dit antwoord (11) Misbruik melden
-
-
Het verzenden van een SMS-bericht lukt niet Ik krijg de mededeling:"Niet verzonden, blijft in postvak uit". Wat te doen?
Reageer op deze vraag Misbruik melden
Wat is het telefoonnummer van "SMSC-adres"? +31626000? Gesteld op 24-2-2019 om 12:22-
beste ik had het zelfde voor je moet daarvoor een nieuwe simkaart aan vragen en dan is het probleem opgelost voor mij was het wel 13 euro (base) Geantwoord op 20-5-2019 om 19:01
Waardeer dit antwoord (12) Misbruik melden
-
-
Hoe kun je telefoonnummer opslaan onder sneltoetsen M1 Gesteld op 15-1-2019 om 18:21
Reageer op deze vraag Misbruik melden-
Ik heb ook alles al geprobeerd en het lukt me ook niet? Wie weet het wel????? Geantwoord op 16-2-2019 om 19:27
Waardeer dit antwoord (16) Misbruik melden
-
-
hoe stel ik een prive nr in of kan ik hem terug verwijderen.
Reageer op deze vraag Misbruik melden
Als ik van een primo gsm bel naar een ander toestel krijgt de ontvanger geen nr te zien alleen prive nummer.wat kan ik doen om dat te verwijderen. Gesteld op 10-1-2019 om 13:43-
Als het voor de eerste keer is dan is het 0000 Geantwoord op 15-1-2019 om 18:09
Waardeer dit antwoord (2) Misbruik melden
-
-
Hoe kan ik de telefoon instellen, dat als er gebeld wordt dan met klepje opnemen. Gesteld op 22-8-2018 om 17:48
Reageer op deze vraag Misbruik melden-
Ik heb dezelfde vraag. Geantwoord op 22-8-2018 om 17:54
Waardeer dit antwoord (16) Misbruik melden
-
-
Hoe stel ik telefoonnummers in onder de toetsen M1 M2 en M3? Gesteld op 28-7-2018 om 18:02
Reageer op deze vraag Misbruik melden-
Ik heb de zelfde vraag, vreemd dat dit niet duidelijk in de handleiding staat Geantwoord op 12-10-2018 om 21:00
Waardeer dit antwoord (2) Misbruik melden
-
-
Ik heb het antwoord:
Waardeer dit antwoord (12) Misbruik melden
Gelieve eerst het contact, dat u op een sneltoets wilt opslaan, in het telefoonboek in te geven. Open daarna het telefoonboek, kies het gewenste contact en druk op "Opties", ga nu 11 keer naar beneden tot "Naar sneltoets kopiëren" OK en "Opslaan". Wilt u een sneltoets wijzigen doe dan exact hetzelfde, het nieuw gekozen contact verwijdert dan automatisch het eerder ingestelde contact. Geantwoord op 15-10-2018 om 20:39 -
"R" verschijnt op de display. Hoe kan ik dat verwijderen? inkomende gesprekken kunnen wel van België naar Frankrijk. Vanuit Frankrijk bellen naar een Frans nummer gaat dat niet. Heeft dit te maken met de "R" die op de display komt. Gesteld op 17-7-2018 om 15:51
Reageer op deze vraag Misbruik melden-
de R kan van Roaming zijn ( op een ander dan het thuis netwerk bellen). Kijk of netwerk op automatisch staat of op handmatig. Geantwoord op 28-7-2018 om 17:59
Waardeer dit antwoord Misbruik melden
-
-
Ik krijg de telefoon niet meer aan, wat moet ik doen Gesteld op 14-7-2018 om 18:27
Reageer op deze vraag Misbruik melden-
ik hep mijn tilefoon gewist hoe kan ik hem weer aan krijgen Geantwoord op 16-8-2018 om 18:14
Waardeer dit antwoord (1) Misbruik melden
-
-
Hoe krijg ik telefoonnummers onder de sneltoetsen M1, M2 en M3 van mijn nieuwe primo 401? Gesteld op 13-5-2018 om 18:26
Reageer op deze vraag Misbruik melden-
GEVONDEN:
Waardeer dit antwoord (36) Misbruik melden
Als telefoon op beginscherm staat (tijd -datum) klik op de pijl omhoog.
dan in menu naar optie 4: sneltoetsen
dan op OK drukken
nummers van de M1 - M2 - M3 toetsen invoeren of uit de telefoonlijst koppelen.
opslaan en klaar is het. Geantwoord op 28-7-2018 om 18:22
-
-
Wat als er reeds telefoonnummers staan onder M1 M2 M3 en ik wil er andere in zetten? jeannebuedts@hotmail.com Geantwoord op 24-10-2020 om 11:22
Waardeer dit antwoord (24) Misbruik melden -
hoe moet ik het geluid van mijn primo 401 harder krijgen Gesteld op 24-4-2018 om 12:28
Reageer op deze vraag Misbruik melden-
Ik heb hetzelfde probleem!! Heeft U een oplossing? Geantwoord op 16-5-2018 om 16:40
Waardeer dit antwoord (17) Misbruik melden
-
-
Ik heb het zelfde probleem en zoek/wil graag een oplossing Geantwoord op 18-6-2018 om 08:39
Waardeer dit antwoord (3) Misbruik melden -
Wat moet ik doen om het volume van de beltoon aan te passen. Het lukt mij niet om het volume van de beltoon via het menu en instellingen te veranderen. Gesteld op 28-3-2018 om 16:13
Reageer op deze vraag Misbruik melden-
Ik heb hetzelfde probleem. Heeft U een oplossing? Geantwoord op 16-5-2018 om 16:43
Waardeer dit antwoord (5) Misbruik melden
-
-
graag antwoordt op 06-30063002 Geantwoord op 18-6-2018 om 20:20
Waardeer dit antwoord (7) Misbruik melden -
heb hetzelfde probleem, graag oplossing hiervoor Geantwoord op 3-1-2020 om 11:04
Waardeer dit antwoord Misbruik melden -
Hoe kan ik een telefoonnummer in M1, M2 of M3 verwijderen? Gesteld op 31-1-2018 om 17:18
Reageer op deze vraag Misbruik melden-
Kunt U mij zeggen hoe ik de M1, M2 of M3 instel? ik kan nergens aanwijzingen hiervoor vinden. Geantwoord op 13-2-2018 om 12:17
Waardeer dit antwoord (22) Misbruik melden
-
-
Ja , ik heb dezelfde vraag .. Geantwoord op 27-2-2018 om 20:14
Waardeer dit antwoord (9) Misbruik melden -
Primo Doro 401: sinds een paar dagen een knippersignaal met uitroepteken op de display. Enig idee wat dat betekent? Kan er niks over vinden in de handleiding... Gesteld op 14-1-2018 om 12:22
Reageer op deze vraag Misbruik melden-
Je mailbox zit vol (je zal het al wel hebben gevonden, maar voor andere mensen met het probleem...) Geantwoord op 13-12-2018 om 18:51
Waardeer dit antwoord Misbruik melden
-
-
dat alles vol zit ik ga het proberen iets leeg te maken Geantwoord op 29-10-2019 om 09:28
Waardeer dit antwoord Misbruik melden -
kan ik de beltoon volume wijzigen van mijn Primo 401 Gesteld op 29-12-2017 om 12:13
Reageer op deze vraag Misbruik melden-
Heeft U de oplossing?? Ik heb hetzelfde probleem!!!!!!! Geantwoord op 16-5-2018 om 16:42
Waardeer dit antwoord (7) Misbruik melden
-
-
Heb ook hetzelfde probleem!
Waardeer dit antwoord (3) Misbruik melden
Geluid is erg zacht! Geantwoord op 16-5-2018 om 18:03 -
beste,
Reageer op deze vraag Misbruik melden
hoe werkt de instelling van de knoppen m1 m2 en m3.
groetjes
karl Gesteld op 24-8-2017 om 12:38-
knopen m1m2m3 instellen Geantwoord op 7-9-2017 om 16:35
Waardeer dit antwoord (25) Misbruik melden
-
-
De handleiding vermeldt niet hoe de sneltoetsen moeten ingesteld worden. Wie kan helpeN Gesteld op 29-7-2017 om 07:56
Reageer op deze vraag Misbruik melden-
Ga naar telefoonboek, kies het nr dat ge wilt naar de sneltoetsen zetten, klik erop en dan ziet ge kopieeren daar op klikken en kiezen welke ge wilt instellen, M1, M2 of M3 Geantwoord op 30-9-2018 om 16:39
Waardeer dit antwoord Misbruik melden
-
-
ben in bezit van Primo 401
Reageer op deze vraag Misbruik melden
vraag me af hoe ik inde agenda een mededeling kan plaatsen?
vr gr. gerard Gesteld op 18-4-2017 om 18:31-
graag volledige handleiding s.v.p. Geantwoord op 22-4-2017 om 12:14
Waardeer dit antwoord (33) Misbruik melden
-
-
waarom knippert in ruststand het blauwe lampje voortdurend ? Gesteld op 5-4-2017 om 03:56
Reageer op deze vraag Misbruik melden-
Ik weet ook niet of dat lampje altijd moet blijven knipperen. Geantwoord op 5-9-2018 om 11:48
Waardeer dit antwoord (6) Misbruik melden
-
-
Hoe kan het volume van het belsignaal aangepast worden? Kan ef een ander muziekje ingesteld worden? Gesteld op 3-3-2017 om 18:58
Reageer op deze vraag Misbruik melden-
Hoe moet ik het belvolume van het oproep signaal harder zette , tot nu toe kan ik het niet vinden in de gebruiks handleiding
Waardeer dit antwoord (17) Misbruik melden
Jan Geantwoord op 18-9-2017 om 15:02
-
-
Ben in het bezit van een GSM PRIMO TM 401.
Reageer op deze vraag Misbruik melden
Heb de gsm kunnen gebruiksklaar maken.
Hoe moet ik de toetsen M1 M2 M3 klaarmaken voor gebruik?
In de gebruiksaanwijzing kan ik dat niet teug vinden. Gesteld op 15-2-2016 om 16:52-
1. druk op menu
Waardeer dit antwoord (20) Misbruik melden
2. ga naar telefoonboek en druk op ok
3. ga naar de persoon/het nummer dat je wilt opslaan
4. druk op opties
5. scrol naar 8 en druk op ok
6. kies de sneltoets die je wilt gebruiken en druk op opslaan
7. kies ja en klaar is kees
Geantwoord op 21-3-2016 om 10:29
-
-
Om te beantwoorden zonder de groene toets te drukken. Alleen met klep en beeindigen zonder rode toets dor de klep dicht te doen. Waar vind ik de programmering hiervan. Gesteld op 28-12-2015 om 17:53
Reageer op deze vraag Misbruik melden-
hoe ga ik van een punt naar een uitroep teken Geantwoord op 8-1-2016 om 20:47
Waardeer dit antwoord (1) Misbruik melden
-
-
hoe kan ik beltoon harder of zachter zetten. Hetzelfde geld voor gesprekstoon. Gesteld op 24-12-2015 om 11:21
Reageer op deze vraag Misbruik melden-
hoop dat u al antwoord van iemand heeft gekregen ben ook zoek om de bel toon harde te krijgen Geantwoord op 12-12-2016 om 20:43
Waardeer dit antwoord (13) Misbruik melden
-
-
ga naar menu en dan gebruikersprofielen. Druk op opties en dan op aanpassen. scrol dan naar beltoonvolume en kies opties - wijzigen. Dan kun je met het pijltje ophoog het geluid luider zetten. Druk op ok - opties - opslaan. Vergeet vooral niet op te slaan. Geantwoord op 18-8-2021 om 10:51
Waardeer dit antwoord (1) Misbruik melden -
Kan ik (en hoe? dan) een andere beltoon van de Doro Primo 401 instellen? Gesteld op 27-11-2015 om 16:30
Reageer op deze vraag Misbruik melden-
Eureka, de beltoon is te veranderen op de Menu> Gebruikersprofielen.
Waardeer dit antwoord (70) Misbruik melden
Gegevens plaatsen in de M1,M2 en M3 sneltoetsen heb ik nog niet gevonden.
De groeten
eddy Geantwoord op 19-12-2015 om 12:28
-
-
hoe ga ik van links naar rechts?
Waardeer dit antwoord (10) Misbruik melden
hoe werkt de camera? Geantwoord op 8-1-2016 om 20:45