651R/751Razur
35
ENGLISH
With this configuration you can now control Zone 2 from the main room by
using the main or Zone 2 handsets as supplied (see later section).
If it is desired to remotely control Zone 2 and the sources in it from Zone 2
itself an additional (not supplied) IR repeater system should be used, choose
one with an Emitter (modulated) type output suitable to connect to the Zone
2 IR emitter In (contact your dealer for details).
In this configuration an Infra-Red repeater system receives commands in
Zone 2 and relays them back to the 651R/751R via the Zone 2 IR Emitter In.
Now you can control Zone 2 from within that Zone using either the Zone 2 or
main handsets. In addition if IR Emitters outputs are connected from the
Zone 2 IR Emitter Outputs on the 651R/751R to the source components
(usually placed over the source units IR sensors) then commands from
remotes in Zone 2 can be relayed back to the source components.
The sources own handsets plus the Zone 2 or main handsets can be used in
Zone 2 or a learning type remote can be used to combine all the functions
together.
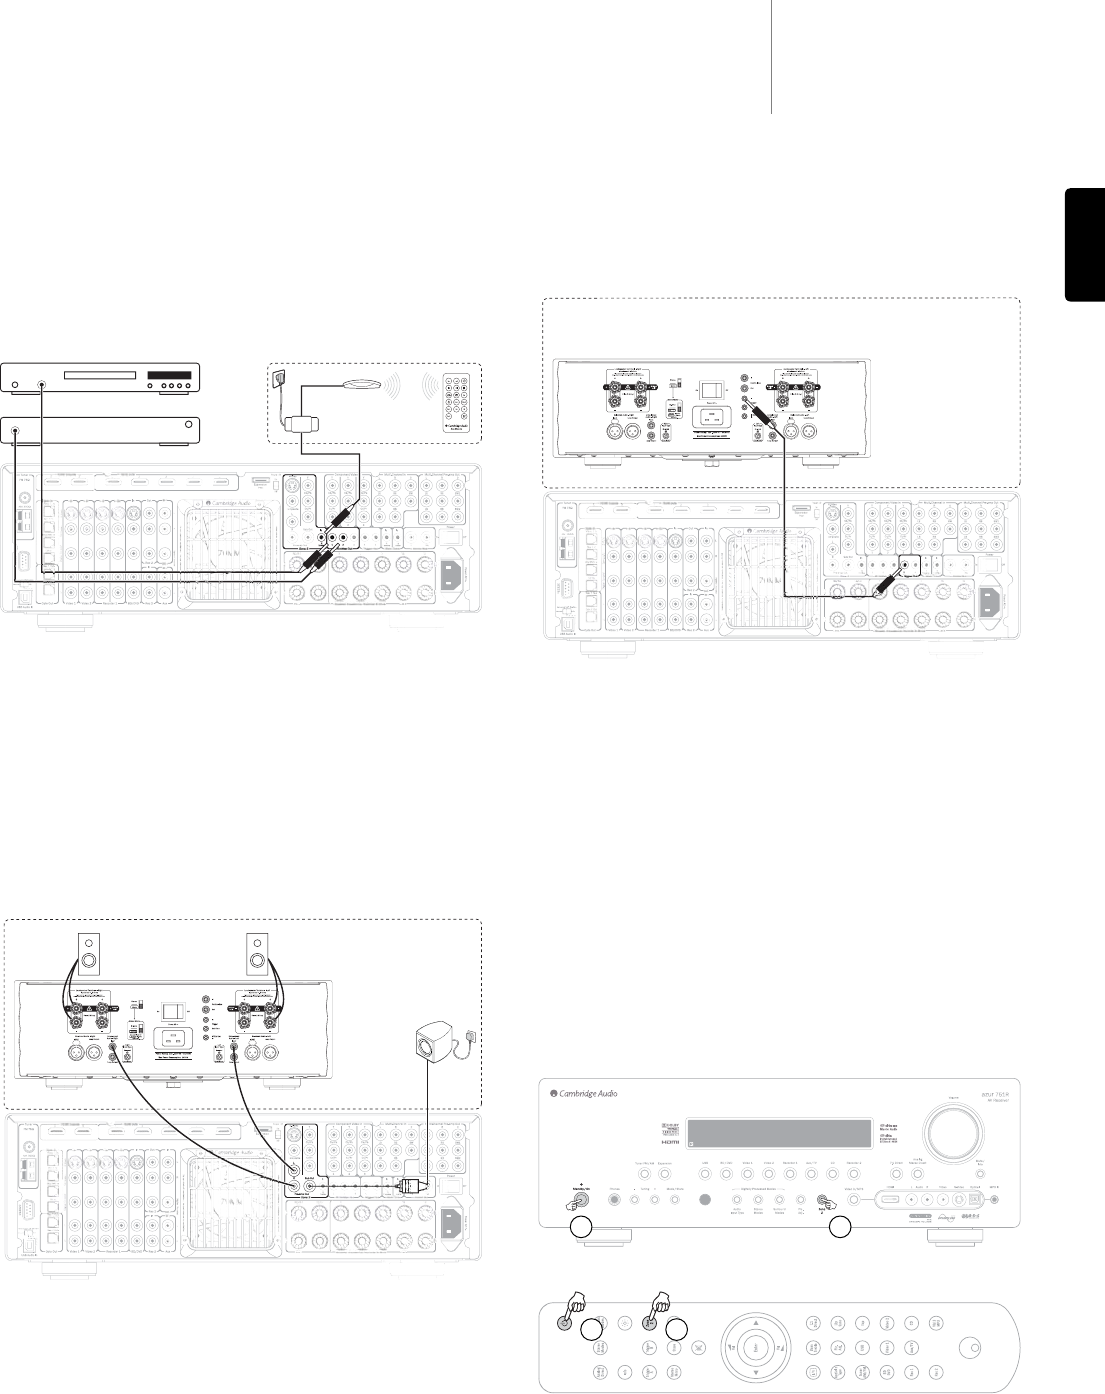
Using Zone 2 with an external stereo power amp.
The 651R/751R Zone 2 outputs include a permanently available preamp
output. This can be used to connect a separate power amp in Zone 2 if for
instance the SBL/SBR amplifier channels are being used in the main zone.
Optionally a Subwoofer can also be used in Zone 2 as shown, simply connect
a suitably long RCA/Phono – RCA/Phono lead from the Zone 2 Sub out to the
subwoofer in Zone 2.
The Zone 2 preamp output is unaffected by the assignment of the SBL/R
channels and is always available.
If a power amp is used for Zone 2 the SBL/SBR amplifier channels can then
be used for 7.1 (Set decode mode to 7.1) or Height channels (set decode
mode to 5.1+H) or to bi-amp the front channels (Set decode mode to 5.1 and
Set SBL/R assign to Bi-amp) or simply leave them unconnected (Set decode
mode to 5.1 and Set SBL/R assign to None).
If the remote Zone 2 power amp features a trigger input to turn it on and off
it is possible to use one of the 651R/751R trigger outputs for this. Connect
a suitably long 3.5mm mono jack 3.5mm mono jack lead from the Trigger A
or Trigger B output as shown.
To set the Trigger output to follow Zone 2 select Advanced Setup in the OSD
then Trigger A (or B).
Now select Follow Standby and select Zone 2. The trigger output will now be
active (high) when Zone 2 is On and inactive (low) when Zone 2 is Off.
Note: The Trigger menu also allows for Manual Select (i.e. the trigger toggles
each time the Trigger A (or B) button is pressed on the main remote handset.
If you want to disable this function and have the trigger only follow the Zone
2 on/off status ensure that Manual Select is set to No. See the Trigger menu
section for full details.
Controlling Zone 2 from the main room
Controlling Zone 2 Components
From the main room you can use the main remote handset or the buttons
on the front of the unit itself and operation is the same in either case.
First press the Zone 2 button on the front panel or remote then another
button for a function you wish to affect Zone 2 within 5 seconds.
If a command is not received within 5 seconds the unit will return to normal
operation.
To turn on Zone 2 press the Zone 2 button followed by the Standby/On
button within 5 seconds.
Or.
When Zone 2 is pressed the display will initially show Zone 2 : Off once
Standby/Off is pressed the display will change to show Zone 2 : BD/DVD or
whatever was the last source used in Zone 2.
To turn off Zone 2 simple press Zone 2 followed by the Standby/Off button
again.
Zone 2
CD Player
Satellite Receiver
Remote
IR Receiver
IR
Repeater
Zone 2
Optional
subwoofer
Zone 2
12
12